
Using Standard Leader
You may be hearing a lot of talk about how important a standard leader is…but what is a standard leader?
Standard leader is a 1.5 minute video that is placed before your first image and sound for use throughout the post production workflow. In this tech doc, we’ll go over the basics of what is in the standard leader, how to choose the right one for your project, and how to add it to your project in Adobe Premiere Pro, Final Cut Pro X, and Avid Media Composer.
Use the button below to download the ProRes HQ leaders that are typically available on FVCentral’s Support folder.
Standard Leader Basics
Standard head leader is used through the steps of picture edit, sound edit, sound mix, color correction, layback etc. and serves as a standard for color, sound level, and sync during projection. The following standards should be followed when using the leader:
- 00:58:30:00 – 1 minute of color bars and tone
- 00:59:52:00 – countdown begins
- 00:59:58:00 – sync pop, also called 2 pop
- 01:00:00:00 – your movie begins, no picture or sound should start before this

Pre-existing countdown leader to all the specifications and frame rates can be downloaded from the server and used on your projects. They can be found at FVCentral > Support > Leader [ProRes HQ]. Use the following table to choose the leader settings that best match your project settings.
| Frame Size | Pixel Aspect Ratio | Editing Timebase | Leader you will use (File Name) |
| High Definition Video | 1.78 (16:9) | 23.976 (23.98) | 1080p23.976 Head |
| 24 | 1080p24 Head | ||
| 25 | 1080p25 Head | ||
| 29.97 | 1080p29.97 Head | ||
| Standard Definition Video | 1.33 (4:3) | 23.976 (23.98) | 525 486p23.976 1.33 Head |
| 25 | 625 486p25 1.33 Head | ||
| 29.97 | 525 486p29.97 1.33 Head | ||
| 1.78 (16:9 Anamorphic) | 23.976 (23.98) | 525 486p23.976 1.78 Head | |
| 25 | 625 486p25 1.78 Head | ||
| 29.97 | 525 486p29.97 1.78 Head |
It is highly recommended to begin new projects with standard leader already in the timeline, but leader can be placed into existing projects.
Using Tail Pop
Tail pops are used at the end of your project to detect if there has been any sync drift in your film. The tail pop is a 4 second long video that has a pop at 2 seconds. It should be placed after the last frame of your project.
Pre-existing tail pops to all HD specifications and frame rates can be downloaded from the server and used on your projects. They can be found in the same location as the standard head leaders: FVCentral > Support > Leader [ProRes HQ]. Be sure to choose the leader settings that best match your project settings.
Using Standard Leader in Adobe Premiere Pro
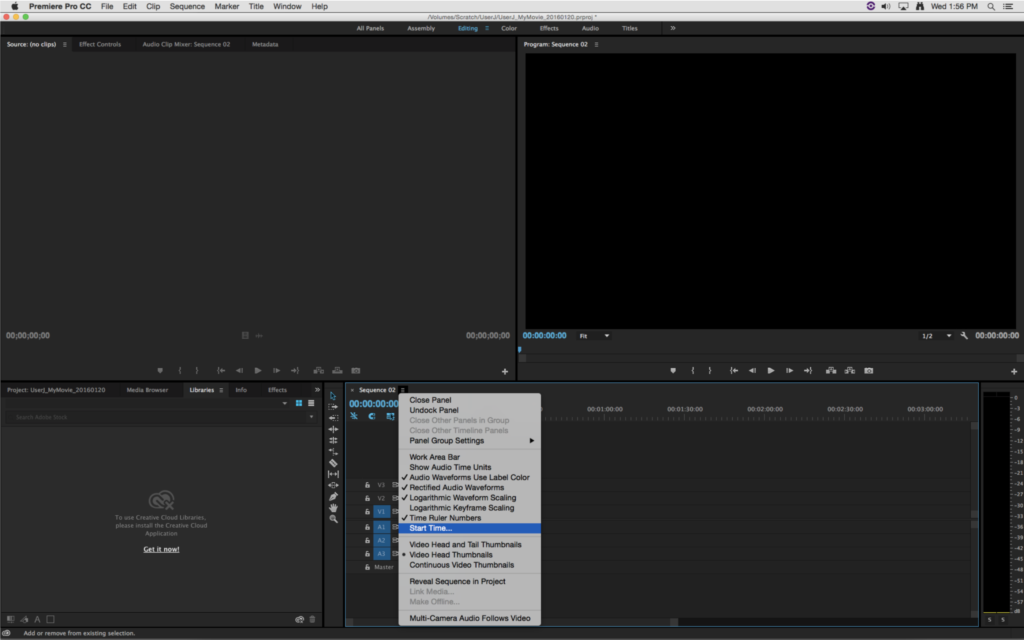
- If you are adding leader to an existing sequence, open your project and select your sequence. If you are starting from scratch, make a new project and create a new sequence. To set your starting timecode, click on the menu icon on the right of your sequence tab and select Start Time…
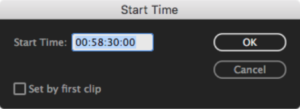
- Change the starting time code to 00:58:30:00 and click Ok.
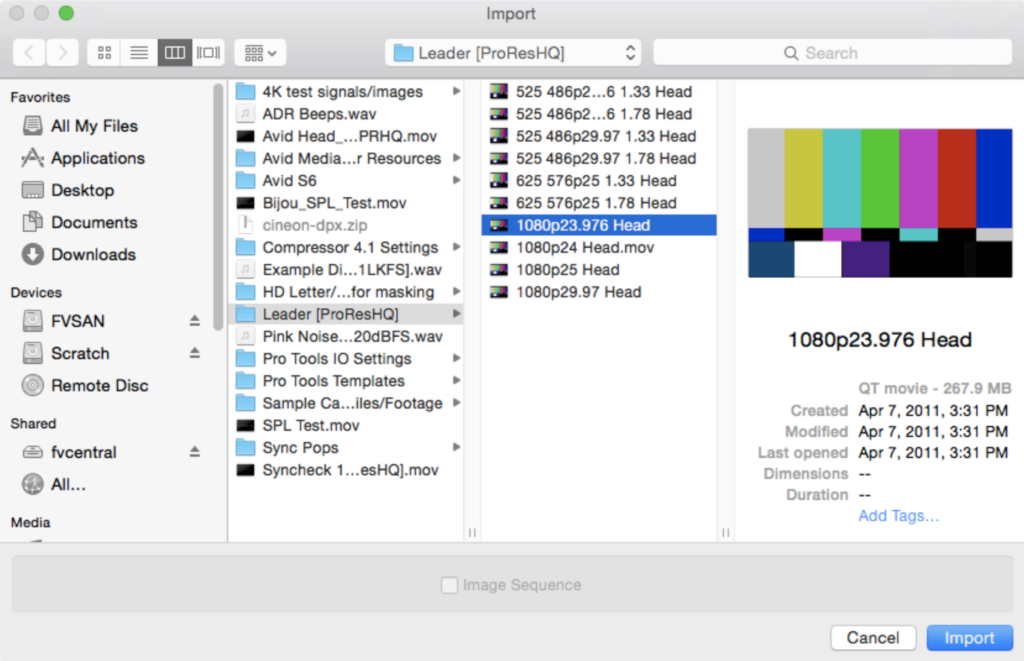
- Import your leader into your library by going to File > Import and selecting your leader. Then click Import.
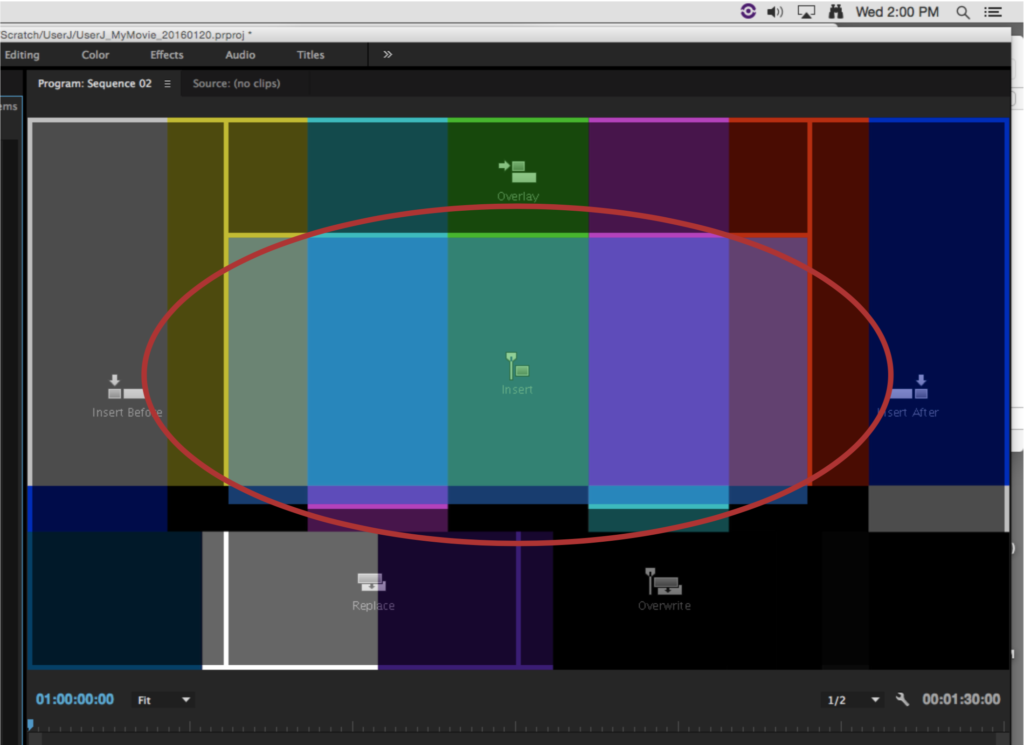
- If you are adding leader to an existing sequence, place your cursor at the beginning of your sequence. Drag the leader from your Project window to your Program window. Without releasing the mouse button, drag your cursor over the Insert option in the center of the Program window. Now let go. Your leader should now be inserted in your project, moving all your media to begin after the leader.
- If you are adding leader to a new sequence, simply place your leader at the beginning of your timeline.
- To check that is has been placed correctly, check that the 2 pop image and sync pop occur at 00:59:58:00.
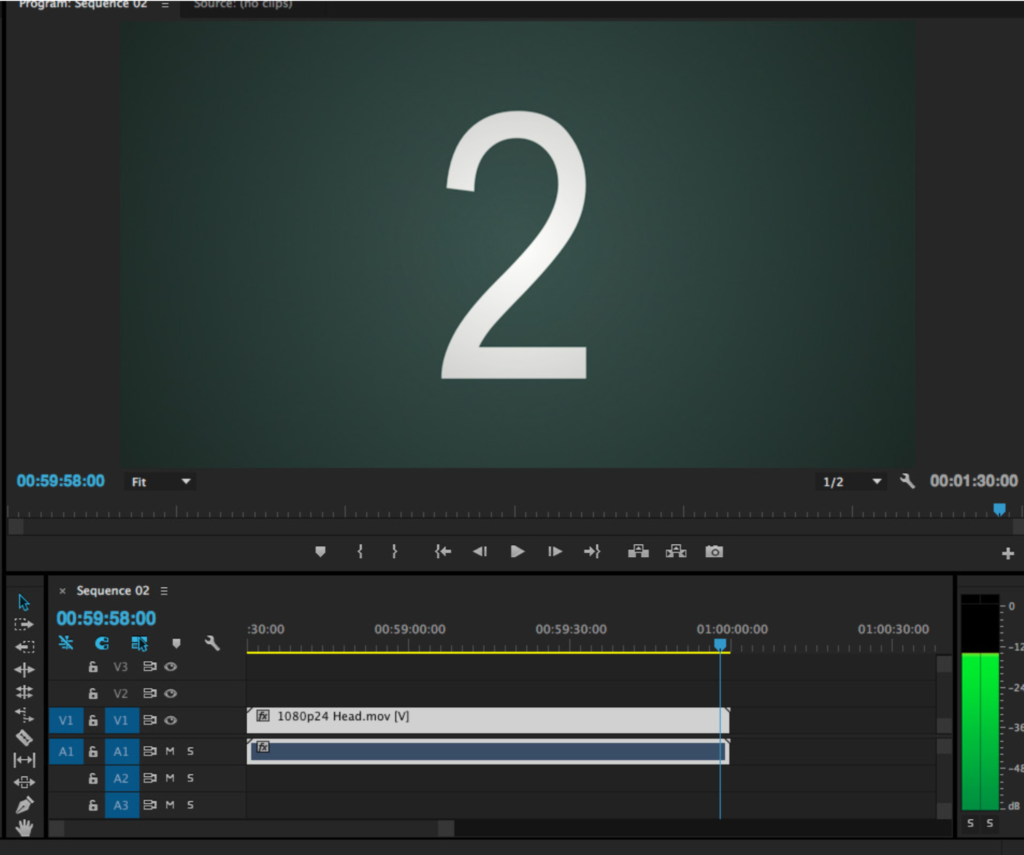
01:00:00:00 is considered the first frame of picture or sound, and anything after that point will be seen as part of your movie. You may need to move your media to start at 01:00:00:00 if it did not start at the very beginning of your sequence.
Using Standard Leader in Final Cut Pro X
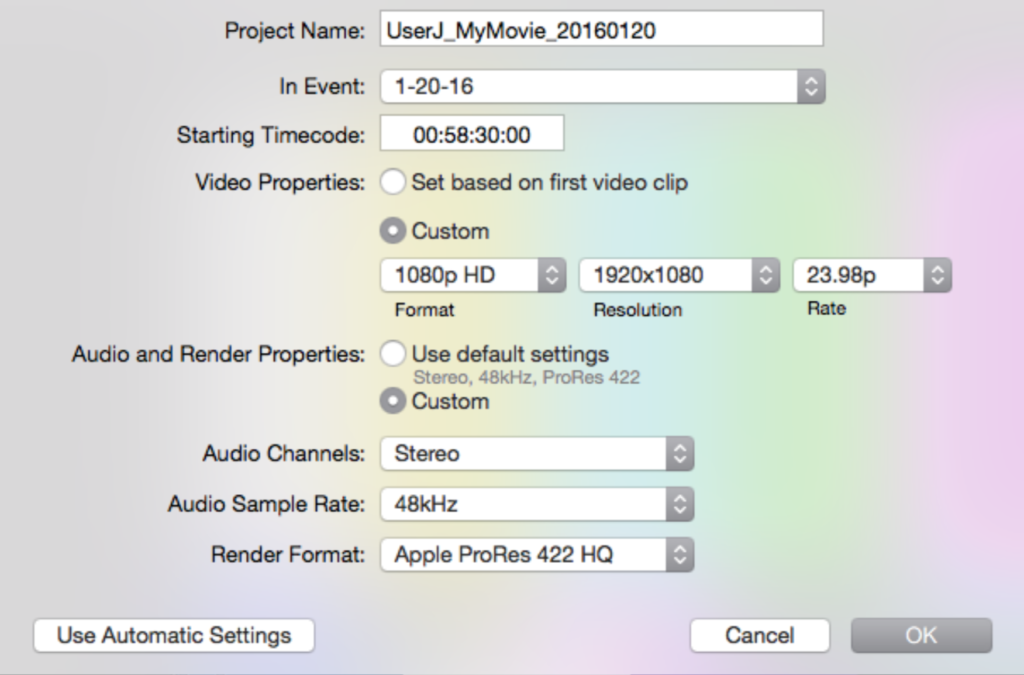
- If you are adding leader to an existing project, select your project and in the Inspector window, click Modify Settings to open the Settings window. If you are starting from scratch, make a new project and the Settings window will open. In this window, change the Starting Timecode to 00:58:30:00. Click Ok.
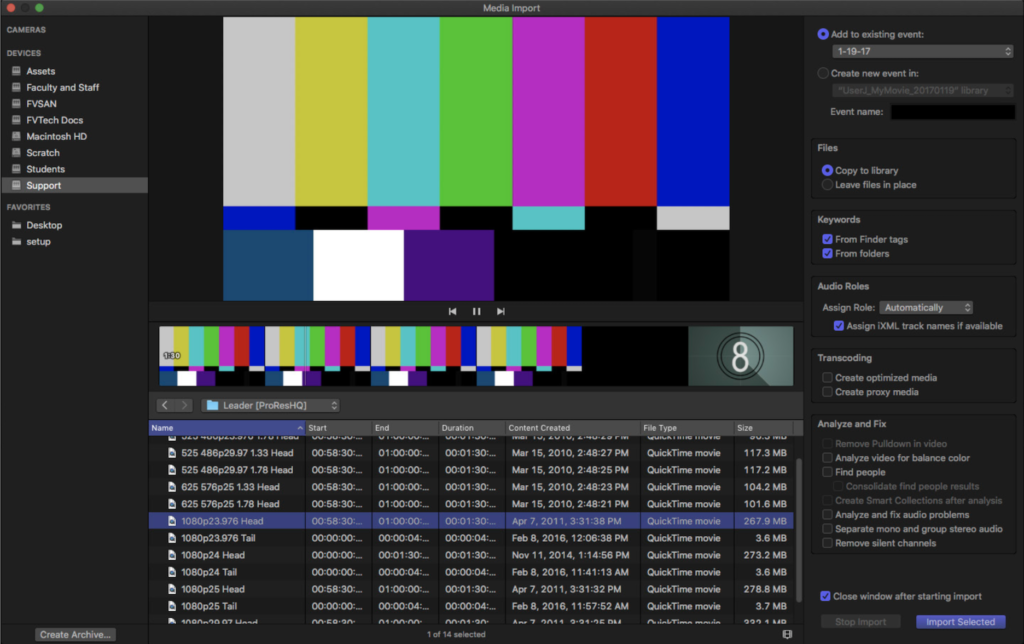
- Import your leader into your library by going to File > Import > Media and selecting your leader. Then click Import Selected.
- If you are adding leader to an existing sequence, place your cursor at the beginning of your sequence. Drag the leader from your browser down to the timeline and make sure it moves all your media to begin after the leader.
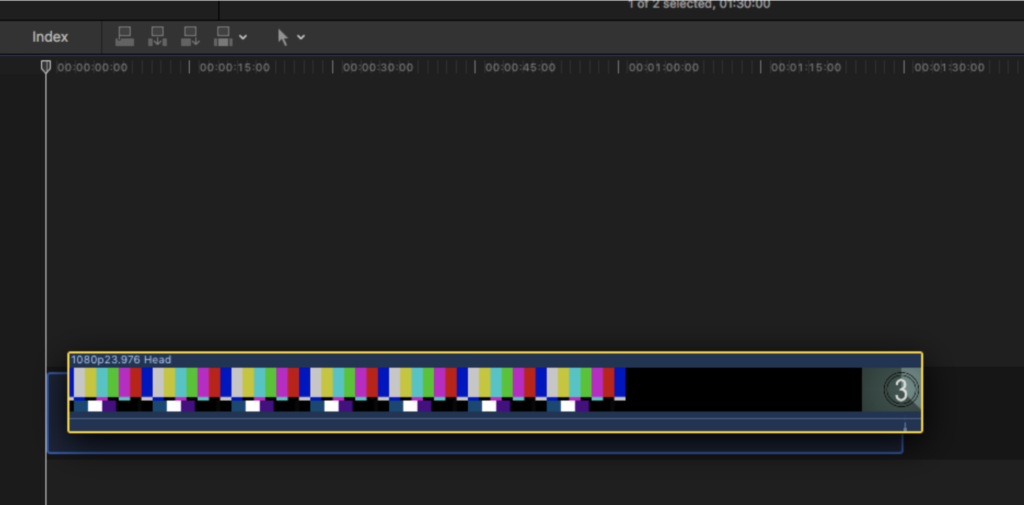
- If you are adding leader to a new sequence, simply place your leader at the beginning of your timeline.
- To check that is has been placed correctly, check that the 2 pop image and sync pop sound occur at 00:59:58:00.
01:00:00:00 is considered the first frame of picture or sound, and anything after that point will be seen as part of your movie. You may need to move your media to start at 01:00:00:00 if it did not start at the very beginning of your sequence.
Using Standard Leader in Avid Media Composer
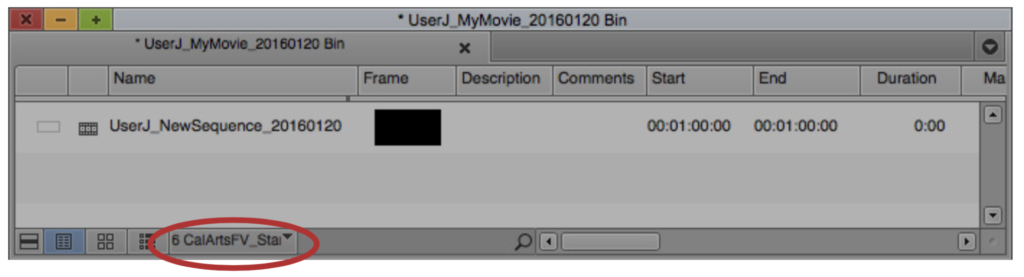
- If you are adding leader to an existing project, make sure the view you are using is the CalArtsFV_Standard in the bottom left hand corner of your bin.
- Select your sequence and in the bin, scroll to the right of the Start column. Double click on the timecode and change it to 00:58:30:00. A window will pop up asking if you want to change the start time, click Ok.
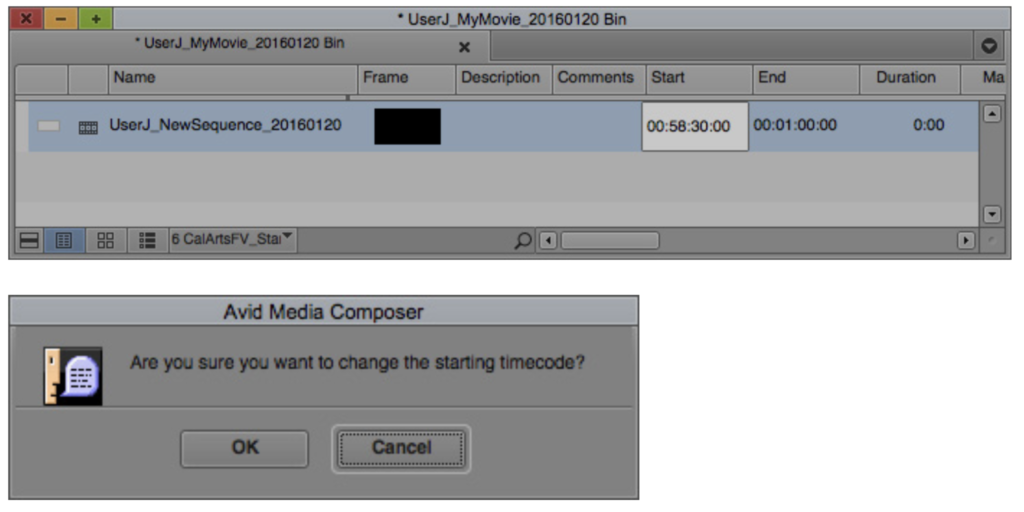
- If you are starting from scratch, make a new sequence in your bing, select it and follow the same steps as above to change the timecode.
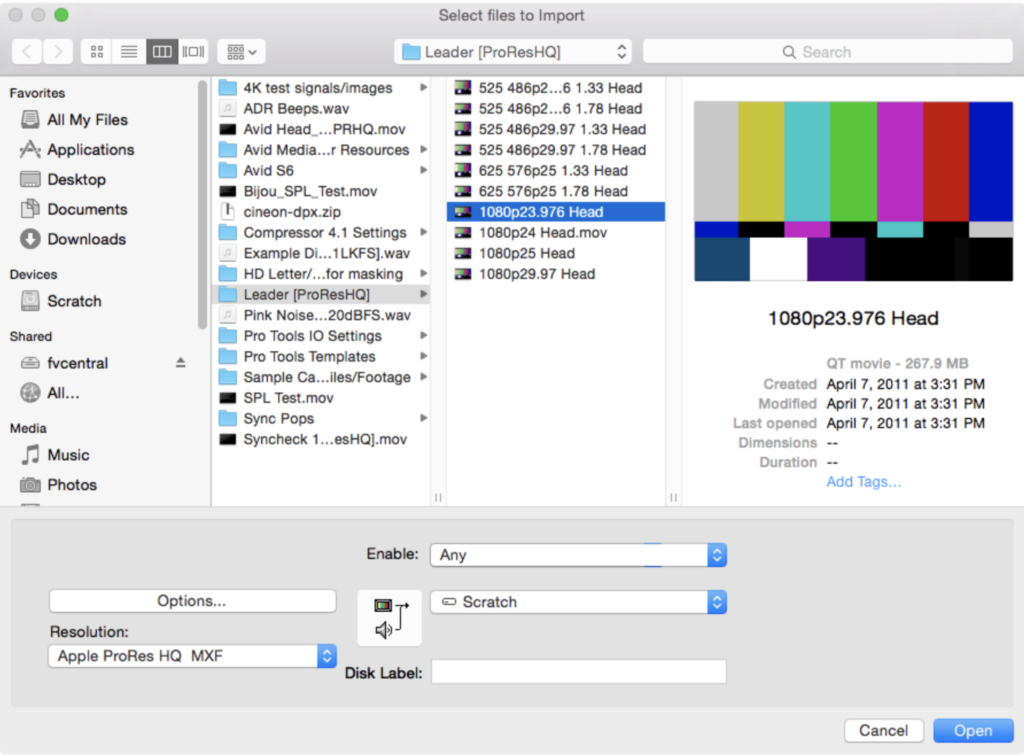
- Import your leader into your project by going to File > Import and selecting your leader, making sure it is the correct resolution. Then click Open.
- If you are adding leader to an existing sequence, place your cursor at the beginning of your sequence. Double click on the leader to open it in Source window. Click on the yellow splice-in button and add the leader beginning of the sequence.
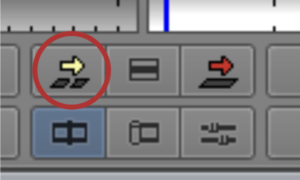
- If you are adding leader to a new sequence, simply place your leader at the beginning of your timeline by dragging it in or using the yellow splice-in button.
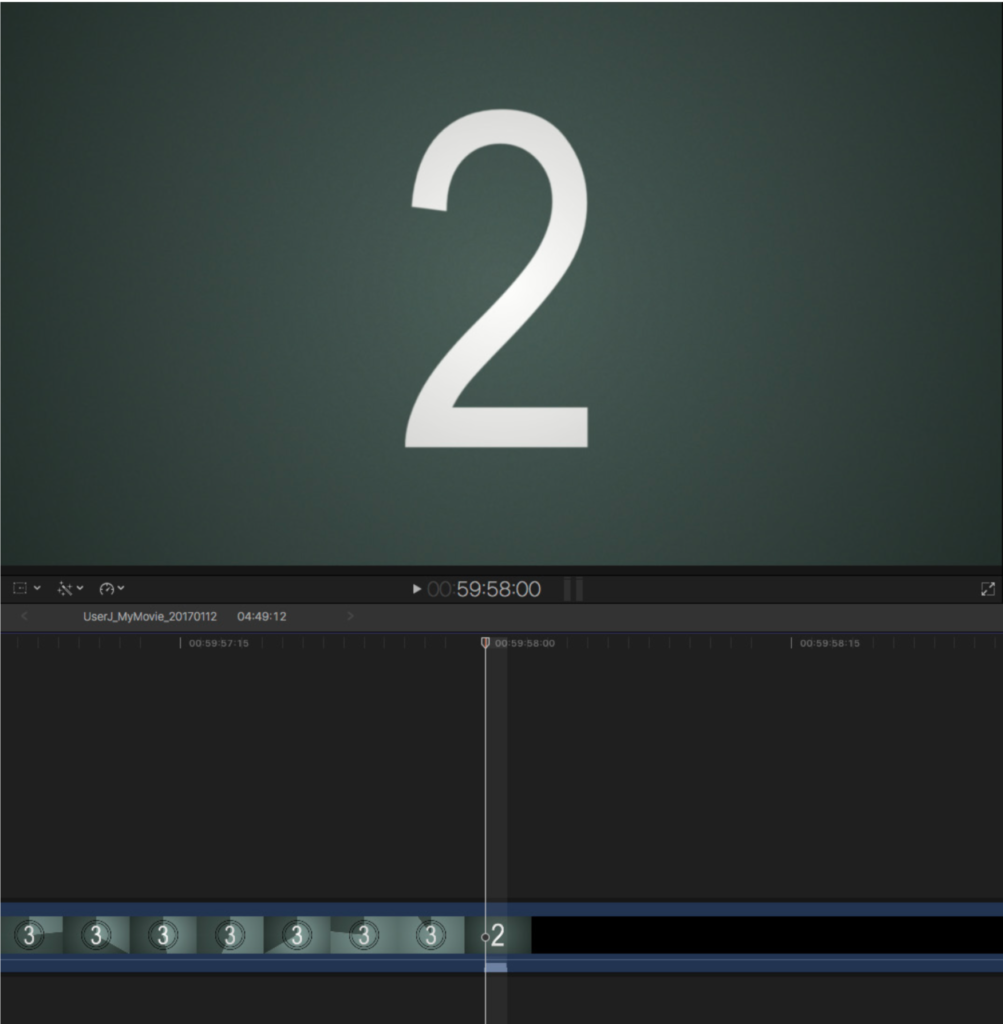
- To check that it has been placed correctly, check that the 2 pop image and sync pop sound occur at 00:59:58:00.
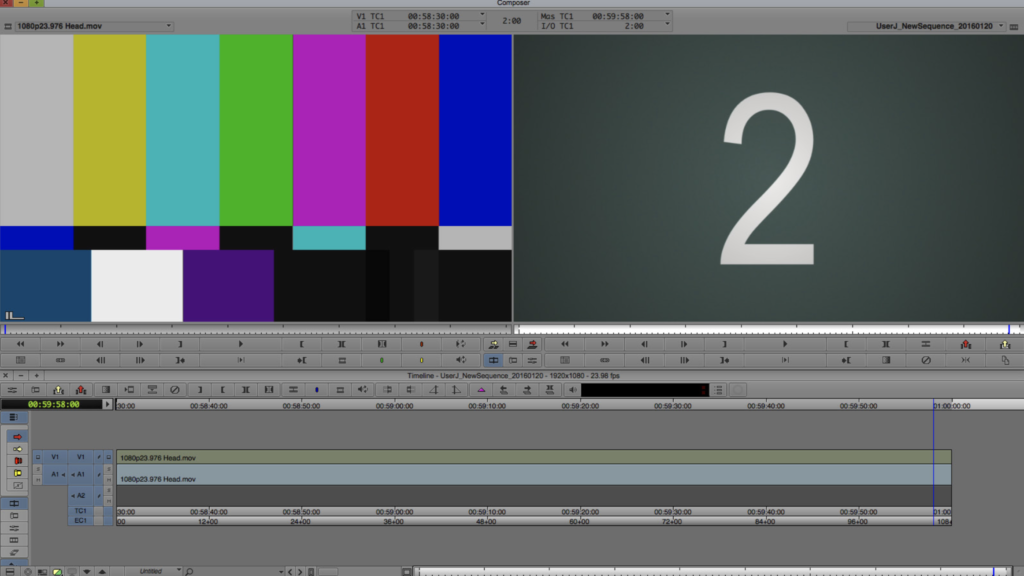
01:00:00:00 is considered the first frame of picture or sound, and anything after that point will be seen as part of your movie. You may need to move your media to start at 01:00:00:00 if it did not start at the very beginning of your sequence.