
Creating an Email Filter in Gmail
The following instructions will show you how to filter emails you receive from a specific email address into a folder and remove them from your inbox so you can easily see all of them in one place. We highly recommend this for faculty who are part of Formstack workflows.
You will need to:
- Log into your CalArts email in Gmail’s web interface
- Know what email address you’d like to create the filter for. This article will use “noreply@formstack.com” as an example.
Setting up the Filter
- Log into your CalArts email account at Gmail.com
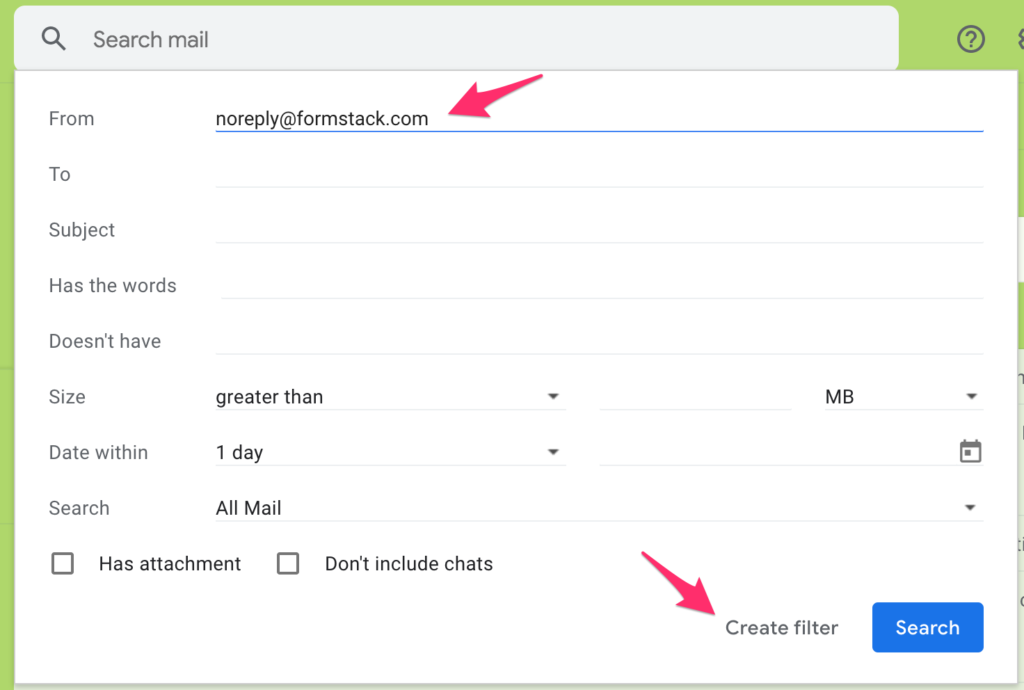
- In the Search Bar, click the Down arrow.

- In the From field, enter the email address you’d like to filter and click Create Filter.
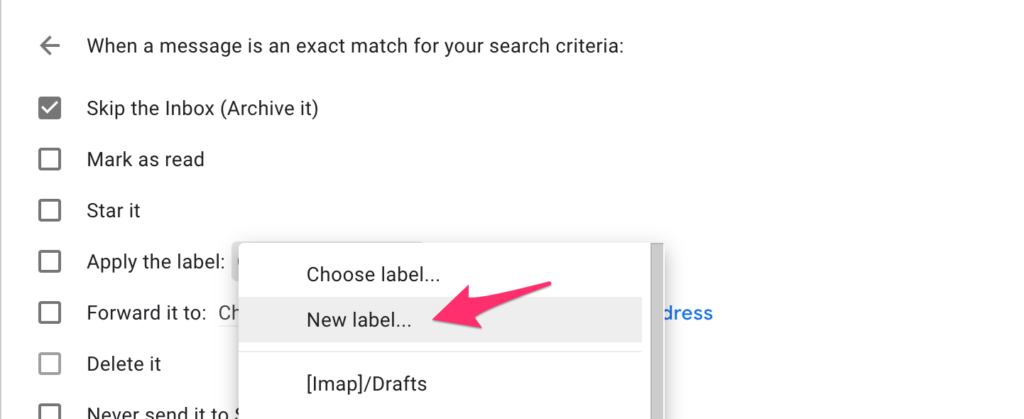
- You will then see options for your Filter. To name the filter, click on the dropdown menu next to Apply the label: and click New Label
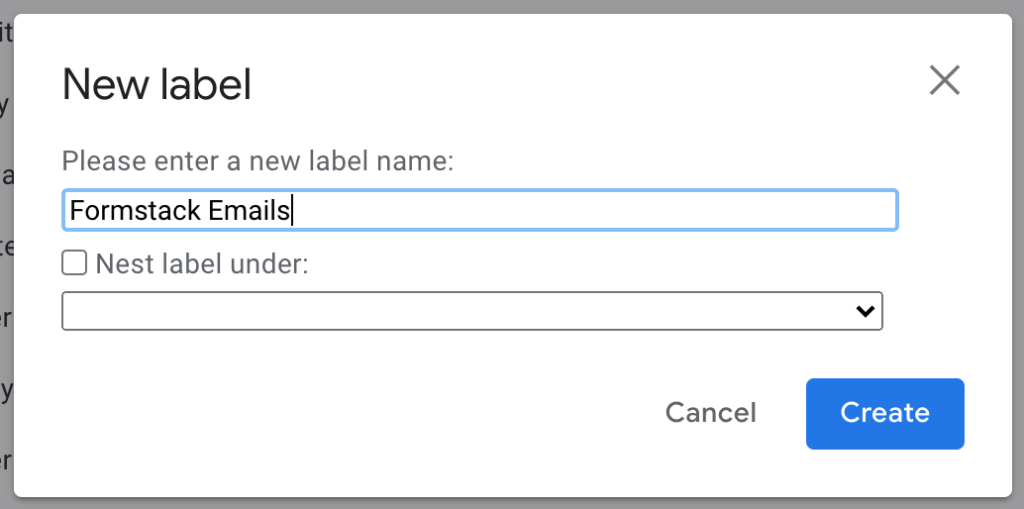
- Name your filter and click Create.
- We recommend checking three criteria for the filter:
- Skip the Inbox (Archive It)
- Apply the label
- Also apply filter to matching conversations
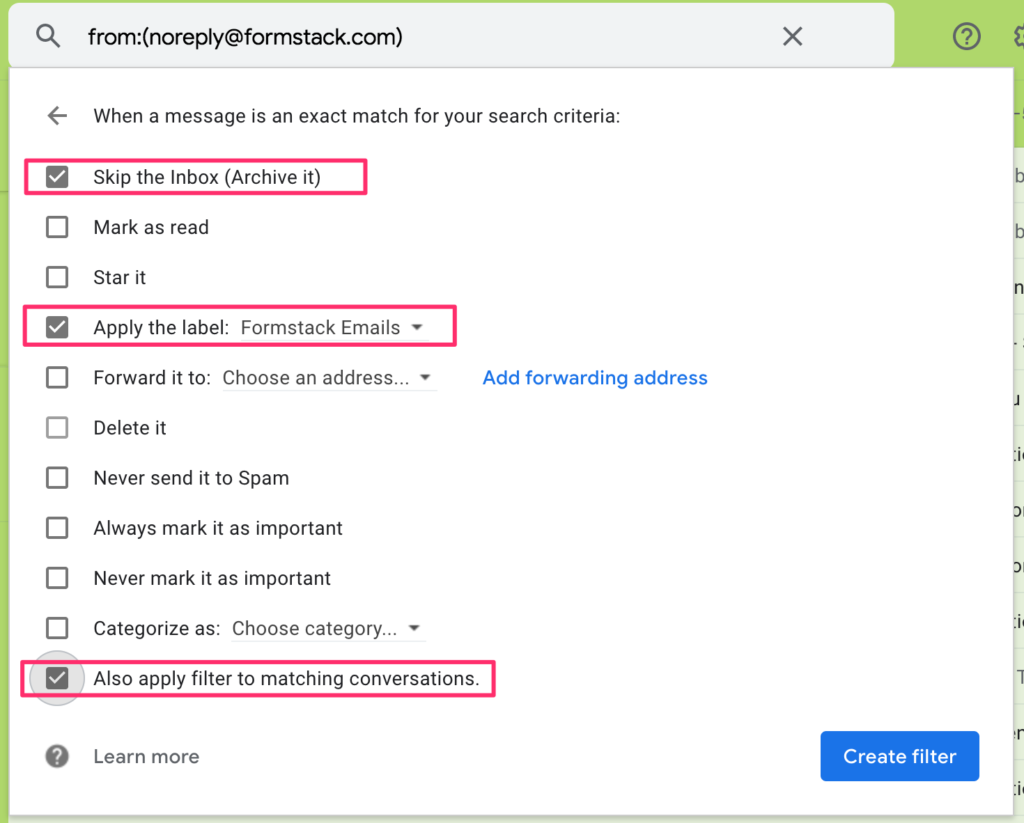
- Click Create Filter and you’ll see on the left side of the window, you’ll see your new filter.
