
Preparing Media for BrightSign Players
BrightSign LS422 players can continuously loop one file, multiple files, or sync multiple files using multiple media players with SD cards.
This tech doc will go over the media requirements for BrightSign players, how to encode your media to meet these requirements, format SD cards for the players, and synchronize media for multiple screens. You can encode your files and copy them to SD cards for non-sync media on any of the FV lab computers. For media that has to be sync, BrightAuthor must be used. It is only available in the Video Studio.
Media Requirements
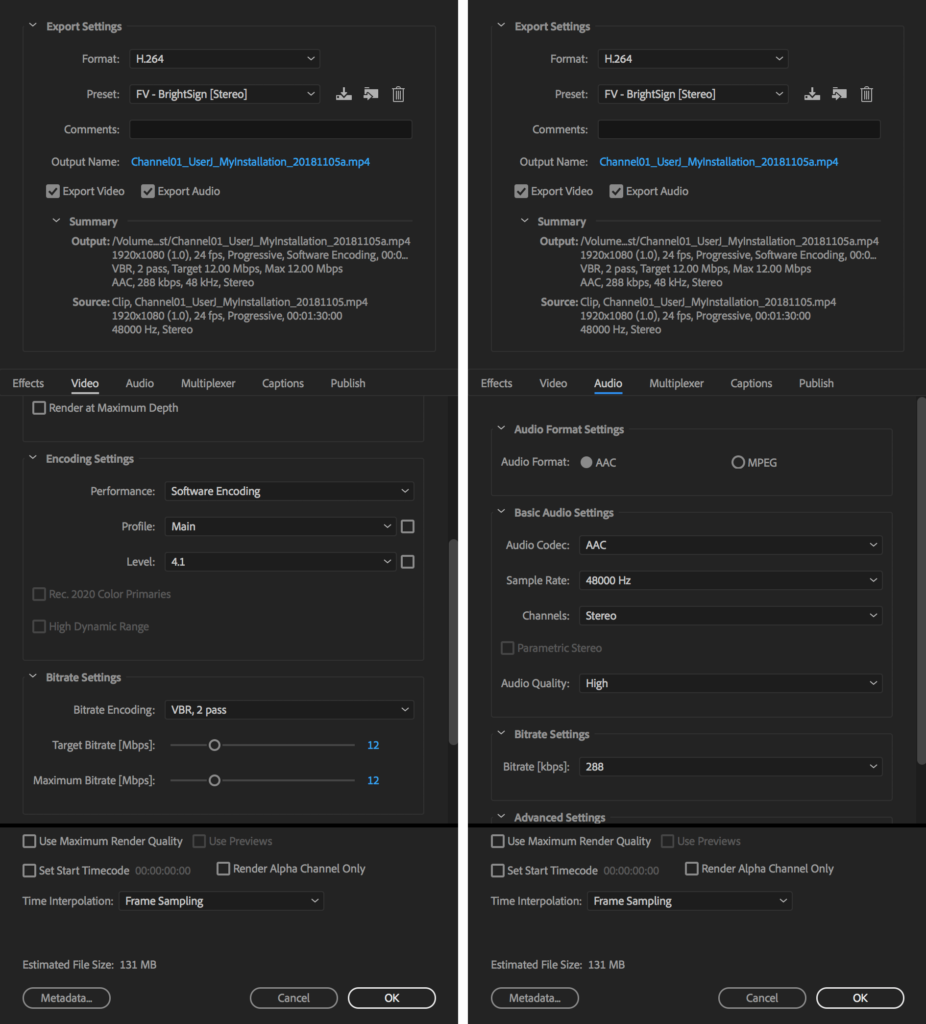
BrightSign LS422 players can only play 1920 x 1080 H.264 videos that are encoded to be Main Profile, Level 4.1, VBR 2 pass, 12 Mbps with AAC audio that is 48kHz, 288kbps. The technical staff has created the FV – BrightSign [Stereo] preset to fit these guidelines.
For multiple media syncing, all videos must have the same length, frame rate, aspect ratio/resolution.
Any audio for synched media can only be carried on the first video. Make sure that your soundtracks are all on the first video and when you install, you can send channel 01 audio to one speaker and channel 02 audio to the other.
Encoding Finished Media Using Adobe Media Encoder
If you have already exported your master files, they will need to be encoded for compatibility with the BrightSign players.
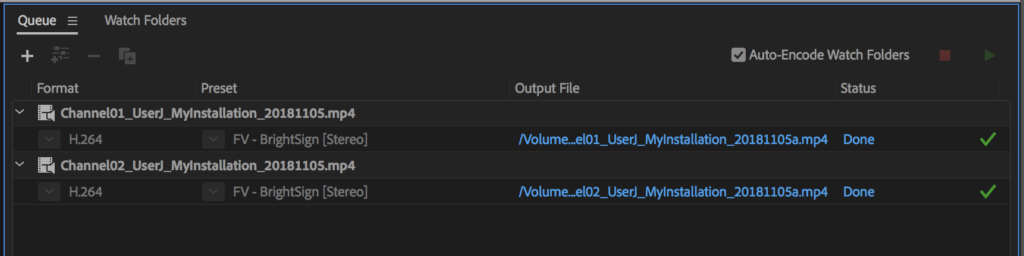
- Launch Adobe Media Encoder. In the Media Browser panel, find your file and add it to the queue by dragging it to the queue panel.
- In the Preset Browser panel, find the FV – BrightSign [Stereo] preset and drag it on top of your file in the queue. You can click on the blue text FV – BrightSign [Stereo] in the queue to check that the preset will encode your file as: H.264 .mp4, 1920 x 1080, Main Profile, Level 4.1, VBR 2 pass, 12Mbps and AAC audio that is 48kHz, 288kbps.
- Click on the blue file path under Output File and set the name and destination for your encoded file.
- Repeat this for any other files that need encoding.
- Click the Start Queue button. When all the encoding is done, there will be green check marks next to each export.
- Quit Adobe Media Encoder.
Encoding Media Using Premiere Pro
If you are working in Premiere, you can encode your files when you export.
- Set In (shortcut: i) and Out (shortcut: o) points for the entire duration of your program, making sure that the outpoint is set to the last frame of video, and not a frame of black.
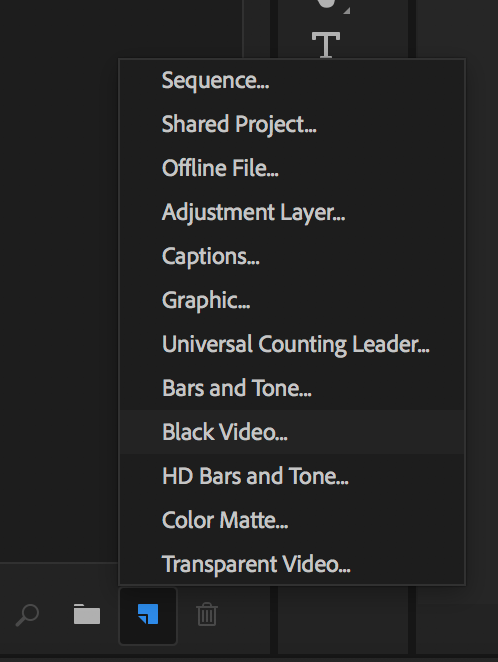
If you want to have black at the end of your program, add Black Video and set the end point at the end of the video. To add Black Video, go to the bottom corner of your Bin and click New Item > Black Video.
- Select your sequence and go to Sequence > Render In and Out.
- Go to File > Export > Media. Under Format, select H.264 and under Preset, select FV – BrightSign [Stereo]. Check that the video is H.264, 1920 x 1080, Main Profile, Level 4.1, VBR 2 pass, 12 Mbps, and AAC audio that is 48kHz, 288kbps.
- Click on the blue file path under Output Name and set the name and destination for your encoded file. Click Export.
- Repeat for any additional videos. Quit Premiere Pro when finished.
Formatting the SD Cards
BrightSign requires SDHC cards that are less than 1TB in size, and MS-DOS formatted.
Insert SD card into card reader. Launch Disk Utility (In Finder: Applications > Utilities > Disk Utility). Select your SD card and click Erase. Under Format, select MS-DOS (FAT). Click Erase.
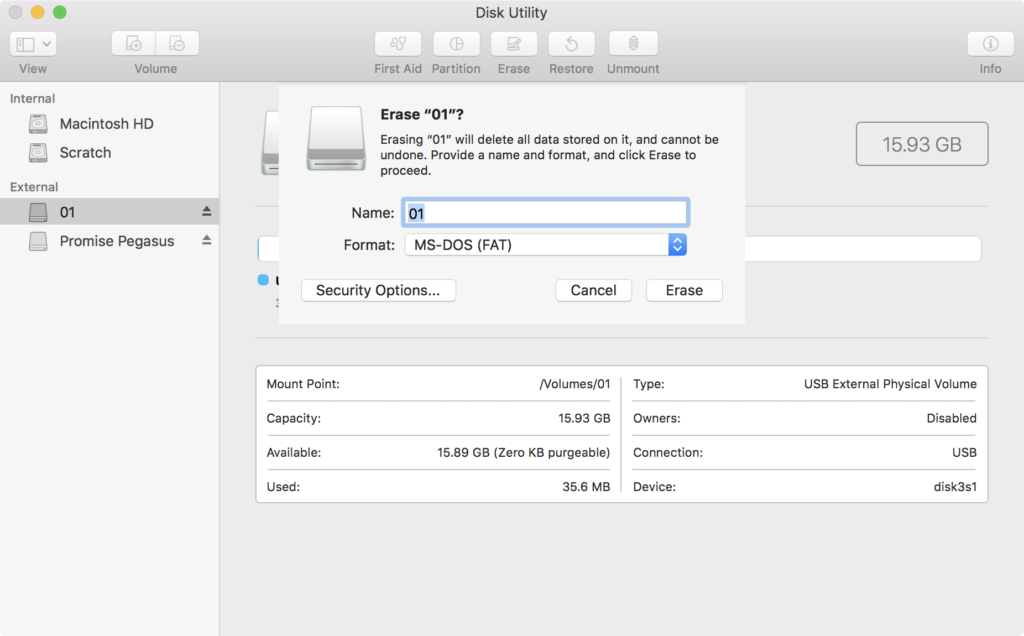
Formatting this drive will erase all data currently on the drive. Back up any critical data that may be on it.
Adding Media to SD Cards for Single Channel Playback
If you are working with single channel playback, you can drop your media file directly onto the root of the formatted SD card. BrightSign players will automatically continuously loop the file.
If you have multiple files that you’d like to play back one after the other, BrightSign players will playback the files in alphabetical order. Name your files accordingly to have them playback in the order you would like.
Using BrightAuthor to Sync Media for Multiple Screens
- Log in to iMac-01 in the Video Studio. Go to Applications and launch BrightAuthor (Window 10).pvm.
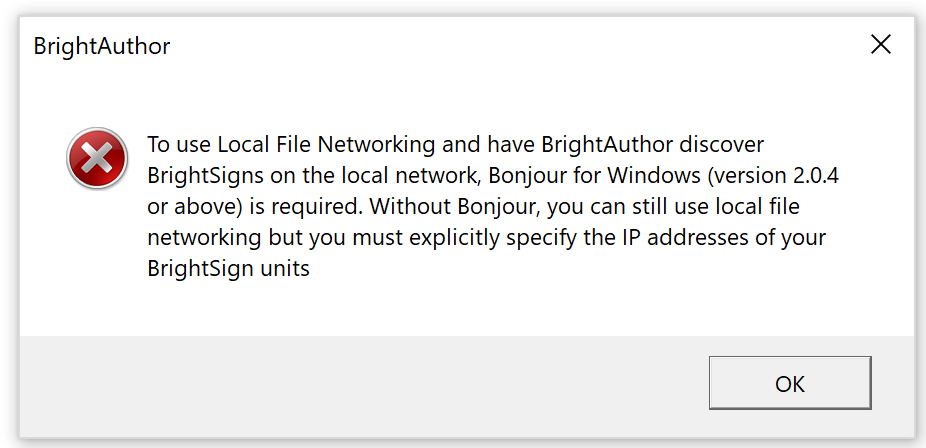
- In the virtual PC, launch the BrightAuthor software on the desktop. When the Local File Networking dialog box pops up, click Ok.
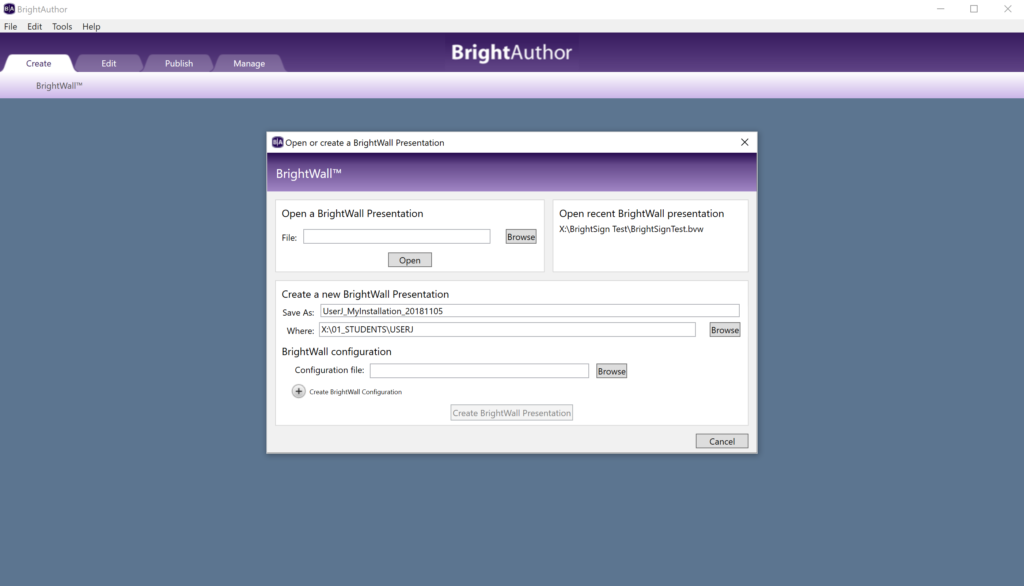
- Click on the Create tab. Under Save As, enter a title following the CalArts Naming Convention of LastNameFirstInitial_MyMovieTitle_YYYYMMDD. Do not use any spaces or special symbols beyond underscores. Next to Where, click Browse and set a save location. If you have your own drive, you can save it there, if not, you can create a new folder in Promise Drive > 01_Students. Click Ok.
If you save your project on the Promise Drive remember that it is like a scratch drive. Not Private, Not Secure, and may be erased at any time.
If you get a New Project window, close it and click on the Create Tab to get the Brightwall Configuration window seen in the screenshot above.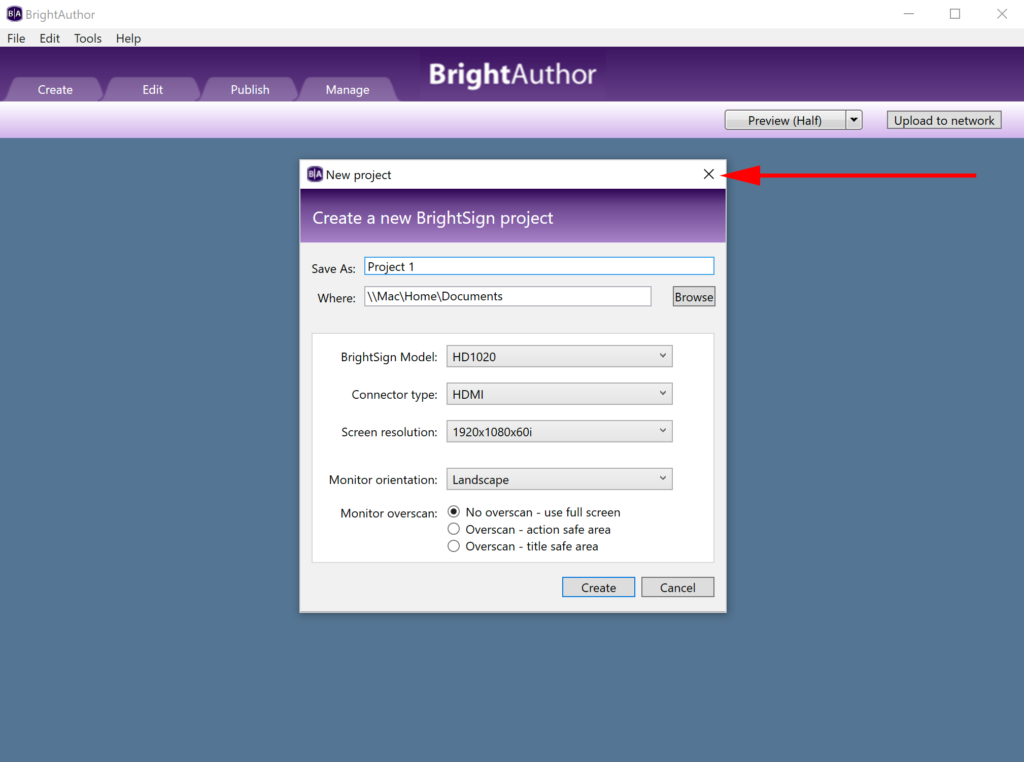
- Under configuration file, click + Create BrightWall Configuration button. Under BrightSign Model, select LS422. Under Connector Type, select HDMI. Under Screen Properties, select 1920x1080x60p. Under Monitor orientation, select either Landscape or Portrait depending on your installation. For Monitor overscan, select No overscan – use full screen. Enter the number of rows (horizontal number of screens) and columns (vertical number of screens) needed. Leave Domain set to 0 and Bezel Width and Height percentages at 0%. Click Save As, set save location to the project folder and click Save.
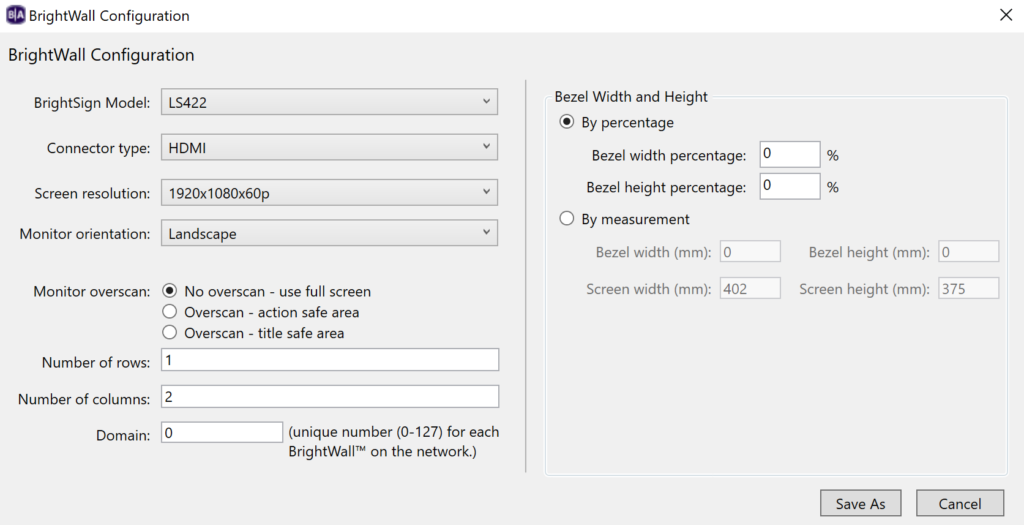
Use the numbers at the top of the Mac keyboard, the number pad does not work.
Common row and column combinations: 2 channel video (1 row, 2 columns), 4 channel grid (2 rows, 2 columns), 2 rows of 3 channels side by side (2 rows, 3 columns).
- Click Create BrightWall Presentation.

- The Brightwall Properties window will open. In the Main tab, select Regular and under View mode select Fill Screen and Centered. In the Audio tab, for projects with audio, under Audio Output, check Analog Stereo and HDMI and select Stereo. Under Audio Mixing, select Stereo. For projects without audio, uncheck Analog Stereo. Click Ok.

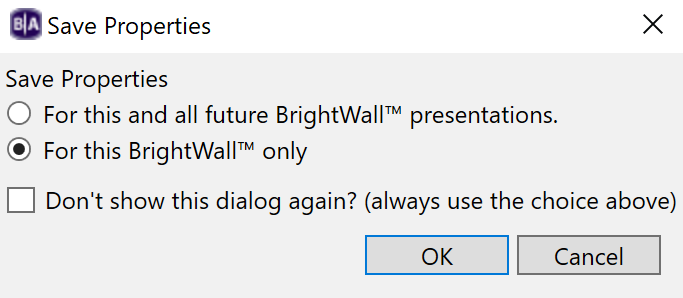
- In the Save Properties window, select For this BrightWall only. Click Ok.
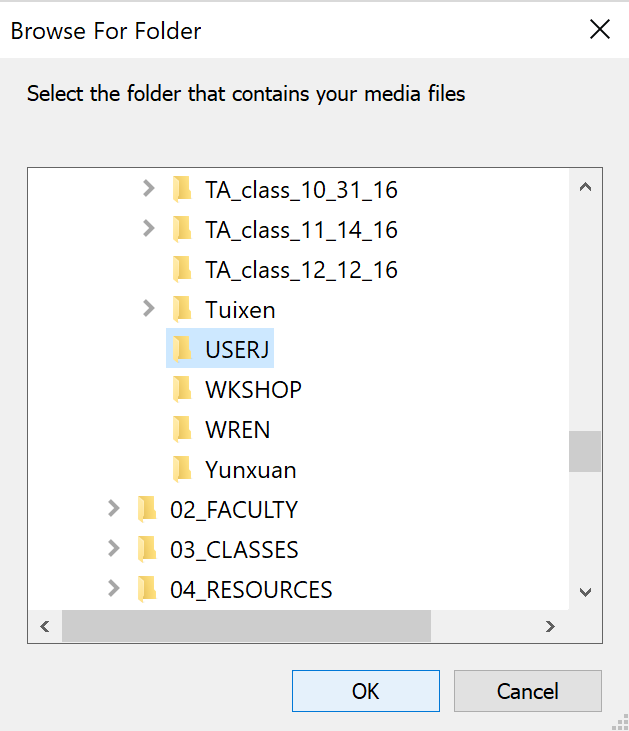
- Under Media Library, click the folder icon and navigate to the folder with your media. Click Ok.
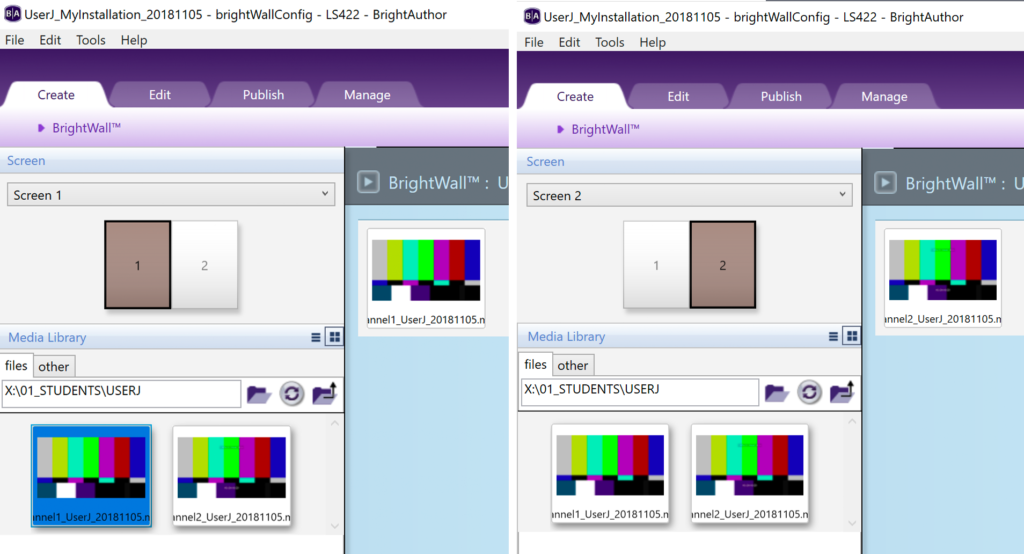
- Under the Screen panel, select 1 and drag your media for that screen number onto the panel on the right. Repeat for any additional screens.
- Click on the Publish tab and select BrightWall Presentation. A Save dialog box will open, click Yes.

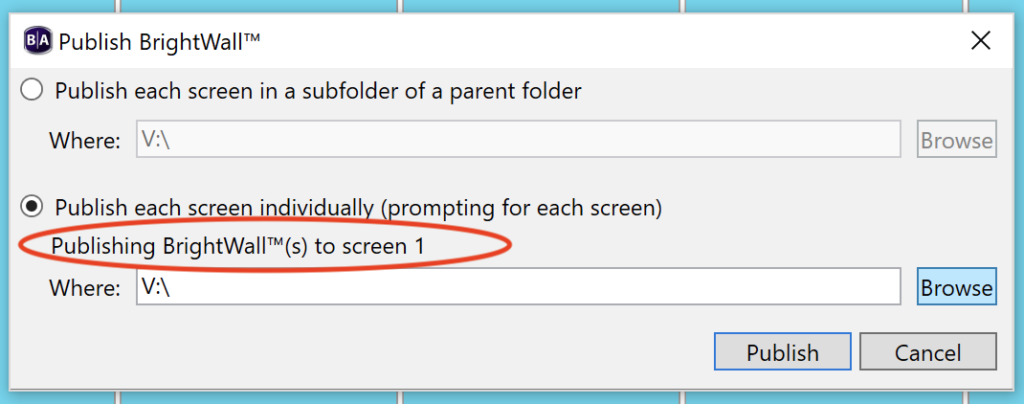
- Click Publish. This will bring up the Publish BrightWall window. Select Publish Each Screen Individually (prompting for each screen). Insert the 1st SD card into the card reader. Click Browse and navigate to it. Click Publish.
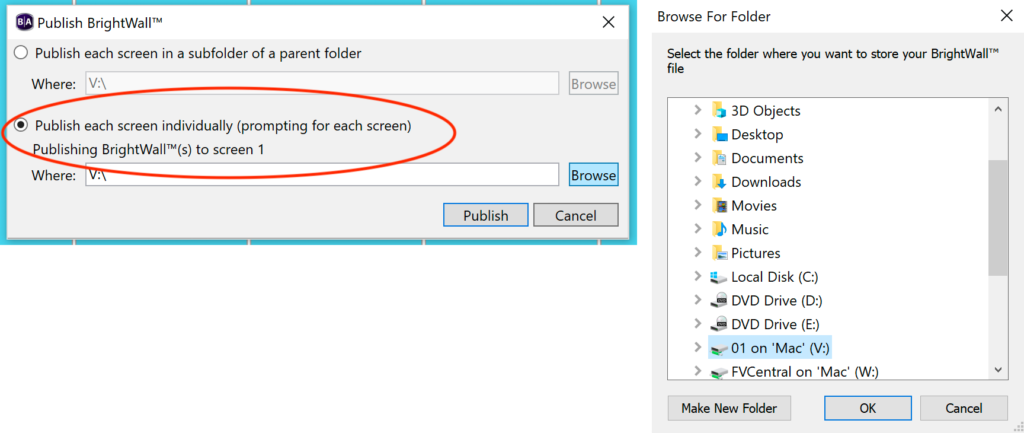
When you insert the SD card, you may be asked where to connect the USB device. Select Mac. 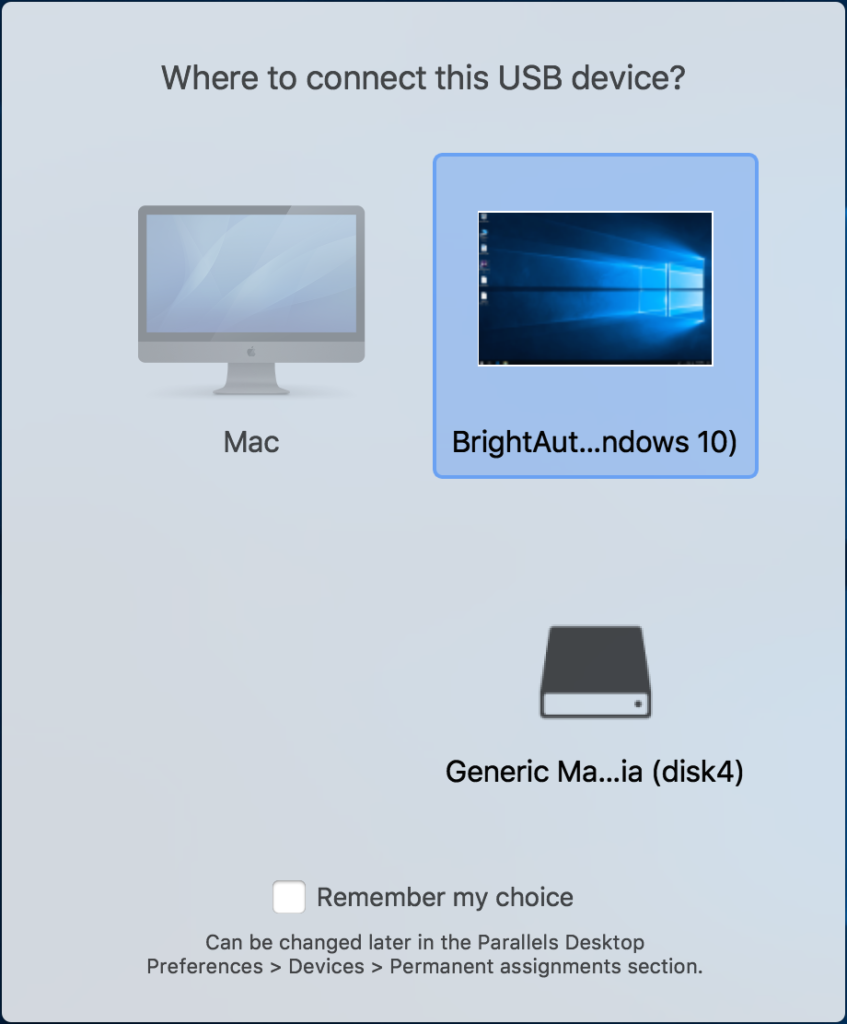
If you get the following warning message, click Yes. 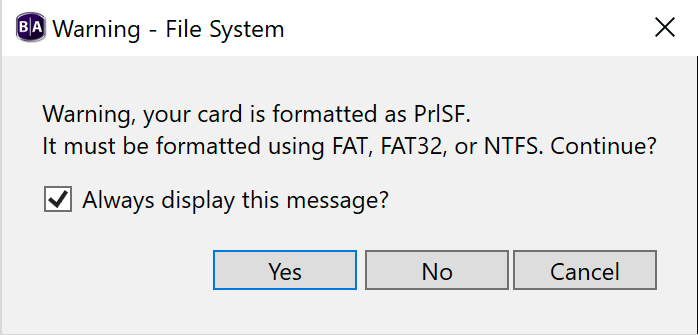
- Eject the 1st SD card and repeat for additional screens. Make sure the Publishing BrightWall to screen number corresponds to the SD number you are using (e.g. – screen 02 is going to your 2nd SD card).
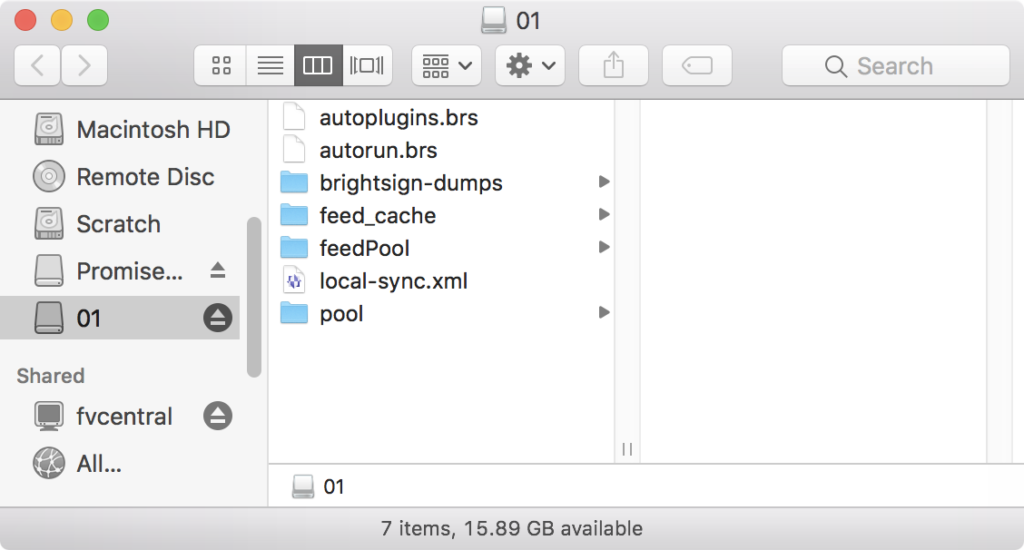
- Quit out of the BrightAuthor (Windows 10).pvm. If you open your SD cards, the folder structure will look like this. Do not alter the file naming or folder structure.
- You are now ready to install. Make sure to keep track of the SD card numbering.
Installation
- Connect the BrightSign player to the monitor or projector. Some HDMI cables are active and can only be used in one direction. Check to see if the cable you are using has Source and Display labels on the connectors. If they do, plug the Source connector into the BrightSign player and the Display connector into the monitor/projector.
- If you are using multiple BrightSign players in sync, they need to be connected vis Ethernet cable. If there are more than three, an Ethernet hub has to be used. See a Technical Specialist to check one out.
- Plug in any necessary audio cables. Power on the monitors/projectors and make sure the source inputs are correct.
- Power up the BrightSign players in sequence by plugging in their power source.
- When you are shutting down, turn off the monitor/projector first and then the BrightSign player(s) second.