
Layback in DaVinci Resolve
The layback is the final step in the post-production process wherein the final sound mix is married with the final color-corrected picture. At CalArts, sound is mixed for 5.1 theatrical surround sound playback, LtRt stereo playback with Dolby Compatibility, and Internet Only stereo for streaming playback. DaVinci Resolve will allow us to create multiple outputs from a single timeline containing all mix files regardless of their format. This process will involve several steps.
- You will create a folder for all the necessary deliverables.
- You will create a Resolve project containing two timelines, one with leader and one without.
- For 4K UHD or DCI 2K/4K projects, you will thirdly create an HD timeline without leader.
- You will be creating 3 or 4 different Outputs depending on the finishing format:
ProRes Quicktime .mov (OriginalResolution with 5.1 mix)
ProRes Quicktime .mov (HD if original is 4K UHD or DCI 2K/4K with 5.1 mix)
H.264 .mp4 (HD with Internet mix)
ArchivalMaster (OriginalResolutionwith 5.1+LtRt+Internet audio)
- If the student requests DVD & Blu-ray assets, please see the Appendix for learning how to make an .m2v file for DVD, an H.264 file for Blu-ray, and an .ac3 audio file.
Table of Contents:
- Preparing for the Layback
- Connecting to the Film/Video Database
- Restoring from a Template Archive
- Audio Channel Configuration
- The Layback
- Trimming Head Leader
- Final Output
- Tidying-Up
- Appendix
- Reopening Projects
- Creating Blu-ray & DVD Assets
Preparing for the Layback
- Go to FV Central > Operations > Laybacks > In Progress and create a folder using standard naming convention.
Standard Naming Convention (LastFM_MyMovieTitle_YYYYMMDD_Layback)
Start with the capitalized full last name, then the capital first initial, followed by the capital middle initial. For example, if your name is Steven Paul Jobs: JobsSP.
Add an underscore, followed by an abbreviated project name without spaces. Capitalize each word of the project name or title. For example, if your project name is My Movie: JobsSP_MyMovie
Add another underscore, followed by the year, month, and day without spaces. For example, if the date is April 1, 1976: JobsSP_MyMovie_19760401
Supplemental information can be added after the date, such as version, audio, frame rate, or codec information. For example, if your file is version 2, with LtRt audio, at 24fps, and ProRes HQ codec: JobsSP_MyMovie_19760401_v02_LtRt_24p_PRHQ. See the ISDCF website for more info.
Connecting to the Shared Database
- Launch DaVinci Resolve
- Click on the Show/Hide Database icon in the top left corner of the DaVinci project manager window. Click on the Network tab.

3. In a Finder window, locate the filmvideo.resolvedbkey file on FVCentral by going to Operations>Laybacks>Templates:.

4. Drag this file into the Project Libraries panel in the DaVinci Resolve Project Manager.

Restoring from a Template Archive
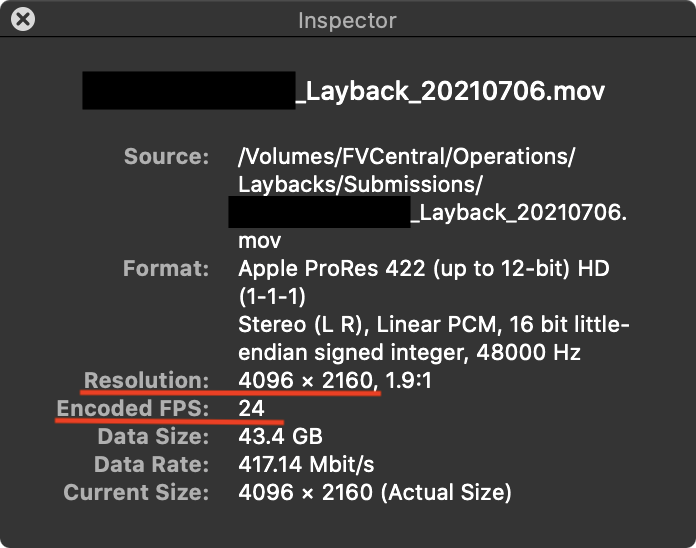
- In order to choose the right template, you need to check the resolution and frame rate of the submitted video file first. Go to FV Central>Operations>Laybacks>Submissions and find the video file. Open it with QuickTime then press Command + I to open the video inspector window. Take note of the resolution and frame rate.
You will need to use 4K templates for the following resolutions:
4K DCI:4096 x 2160
4K UHD: 3840 x 2160
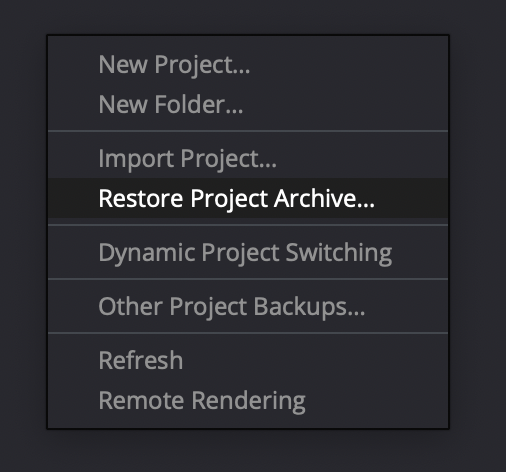
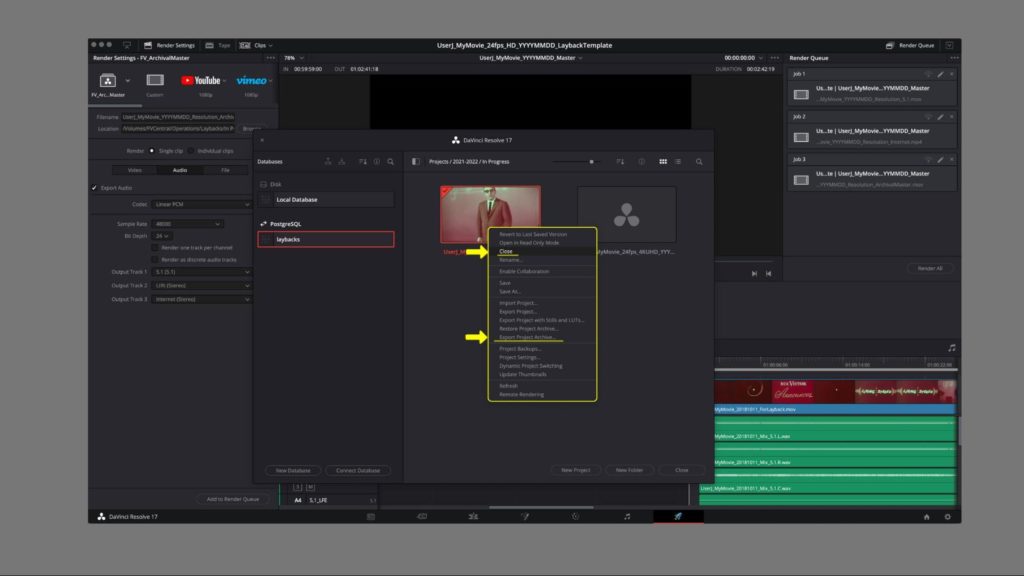
2. In the Resolve Database, navigate to the 01 In Progress folder, double-clicking to open. Right click anywhere and choose Restore Project Archive.
| Do not place the project in the local database. We can not access it from other computers, and it may be deleted by any user. |
3. Navigate to FV Central>Operations>Layback>Templates and choose the template that has the same frame rate and resolution (HD, 4K UDH, or 4K DCI) as the project you are working on.
If there is not a template that matches the submitted film’s specifications, first double check with the filmmaker that it’s intentional, then open a template with similar specifications and change the resolution or framerate in the timeline settings (Click on the Settings wheel on the bottom right hand corner to change the Timeline resolution).

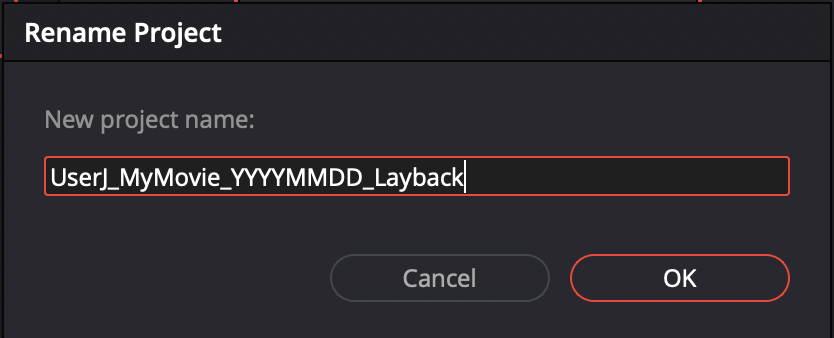
4. Once the project is in the Resolve Project Manager, right click and rename the project using CalArts Standard naming convention, leaving “Layback” appended after the date.
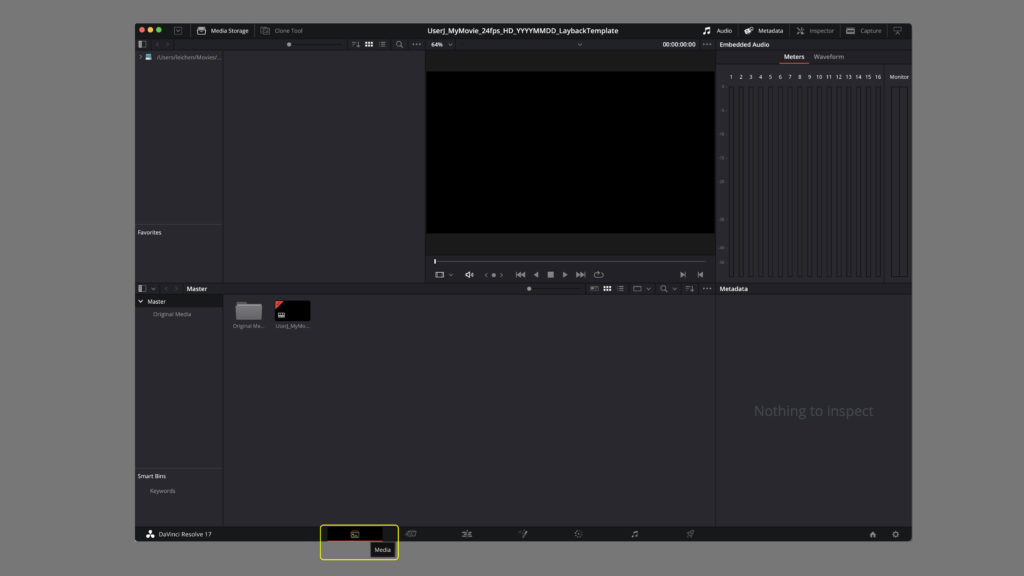
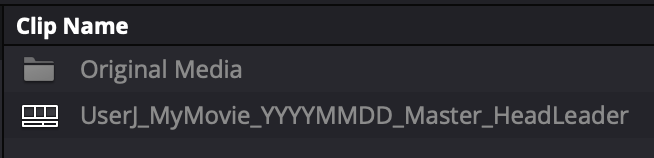
5. Open the project. Navigate to the Media tab. In the Media Pool, you will have an Original Media folder and a template timeline. If the project resolution is DCI 4K, you’ll also have an HD template timeline.
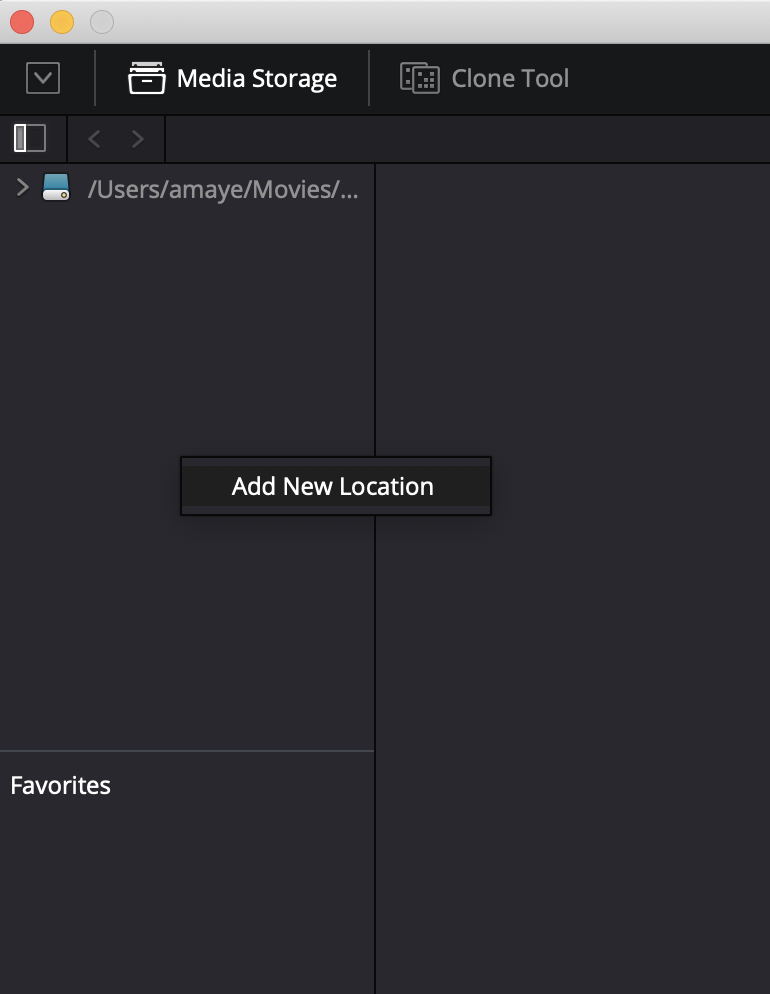
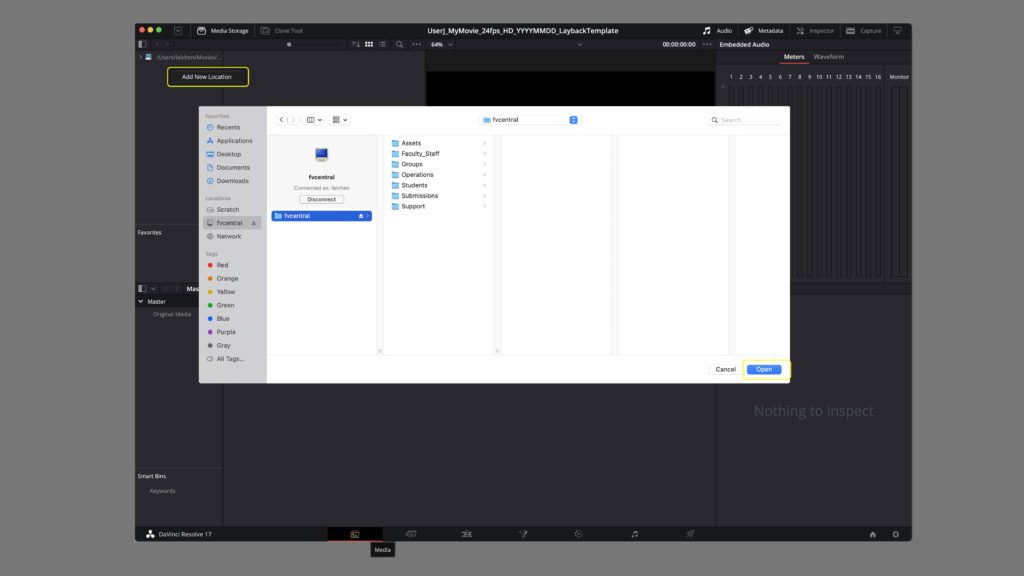
6. Switch to the Media tab, right click in the Media Storage panel in the top left and click Add New Location. In the Finder window that opens, navigate to the top level FVCentral folder and click Open. This allows DaVinci Resolve to access media located on FVCentral.
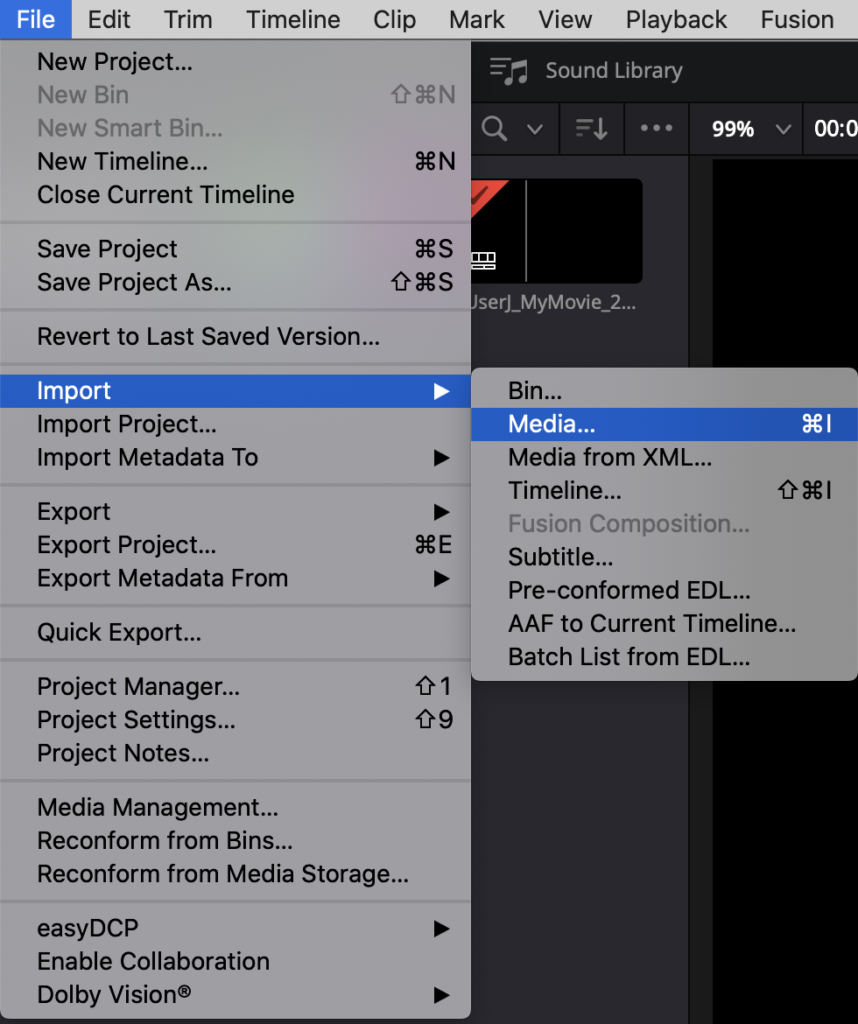
7. Navigate to the top bar menu and select File> Import > Media. Find the student’s final video file in FVCentral > Operations > Laybacks > SourceMedia. Or you can navigate to the same folder in the Media tab and drag the file into the Media Pool directly.
The student’s video file may also be in FVCentral > Submissions > Laybacks, if they submitted after hours.

Do not use the video file in the Pro Tools session unless explicitly told to. Confirm that the file is named correctly according to the standard naming convention; rename it if needed.
8. Navigate to File> Import > Media … again to import the audio files into your project. Find the client’s mix folder at FVCentral > Operations >Mixes > Completed [Paid] or Completed [Unpaid]. Or you can navigate to the same folder in the Media tab and drag the file into the Media Pool directly.

Remember that the Mix files are not bounced, they are located inside the Audio Files folder within the Pro Tools folder structure. They are named according to CalArts naming conventions:
UserJ_MyMovie_20181119_Mix_5,1_L
UserJ_MyMovie_20181119_Mix_5,1_R
UserJ_MyMovie_20181119_Mix_5,1_C
UserJ_MyMovie_20181119_Mix_5,1_LF
UserJ_MyMovie_20181119_Mix_5,1_Ls
UserJ_MyMovie_20181119_Mix_5,1_Rs
UserJ_MyMovie_20181119_Mix_LtRt_L
UserJ_MyMovie_20181119_Mix_LtRt_R
UserJ_MyMovie_20181119_Mix_InternetOnly_L
UserJ_MyMovie_20181119_Mix_InternetOnly_R
9. Now all mix files and the final image file with the leader will be in your Media Pool.
- Note that DaVinci Resolve recognizes that each individual mono mix file represents a particular channel for a given mix: the six mono files representing the 5.1 mix will show up in the media pool combined together as a single 5.1 audio clip, containing all 6 channels. This is the case for the LtRt and Internet mixes as well.
- Toggle to List View to easily see the metadata for each file. You can check the frame rate of your media here again.


10. Put the imported media into the Source Media bin.
11. Click on the name of your timeline to rename it as “UserJ_MyMovie_fps_Resolution_YYYYMMDD_Master_HeadLeader”

12. Press Command+S to save the project.
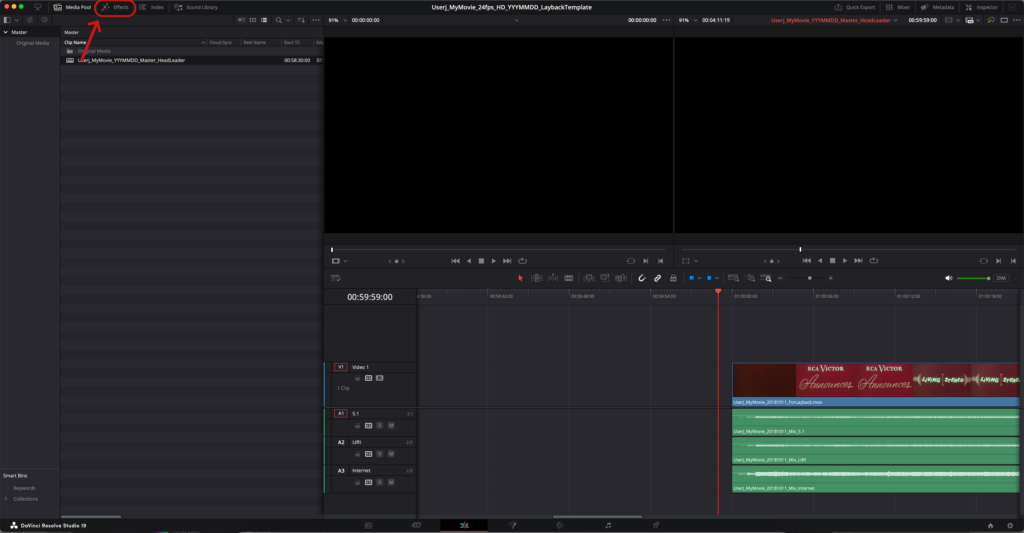
The Layback
- Navigate to the Edit Page. Double click on the Timeline that you just renamed to open it.

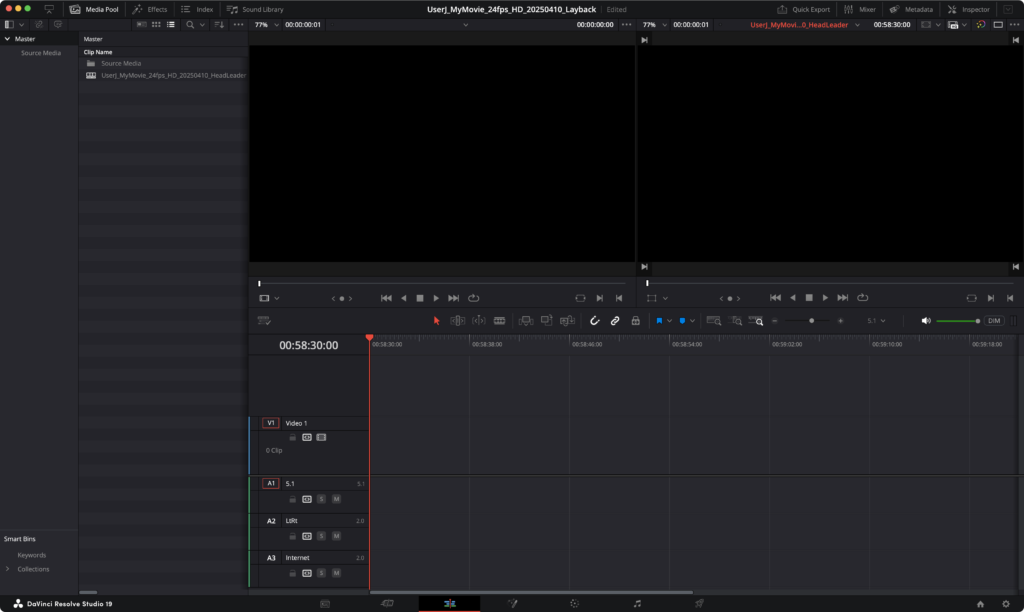
2. From the Source Media bin in the Media Pool sidebar, drag and drop the video file you just imported onto the video track at the start of the timeline, at timecode 00:58:30:00.
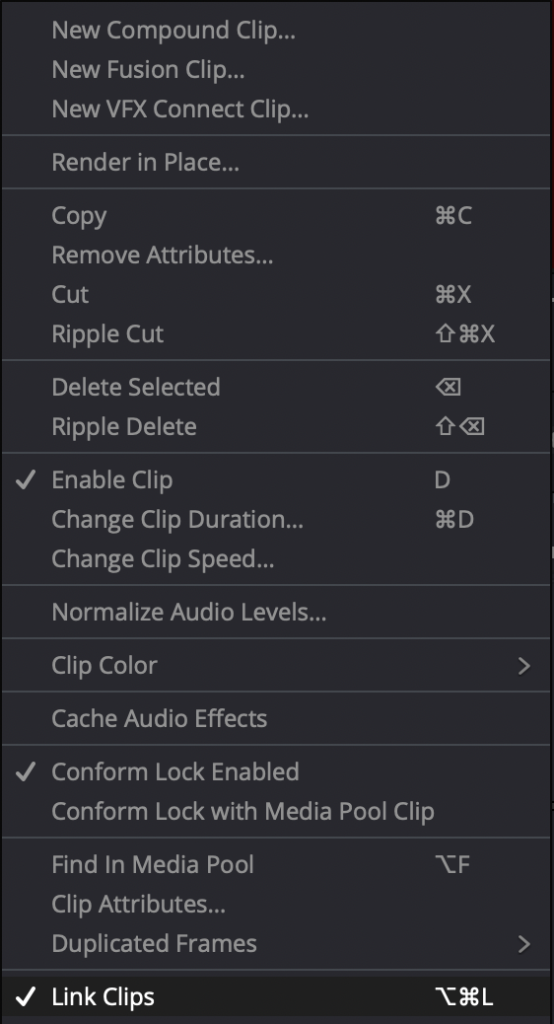
- If the Video contains audio, right click on it in the timeline and uncheck Link Clips. This will allow you to delete the audio without disturbing the image.
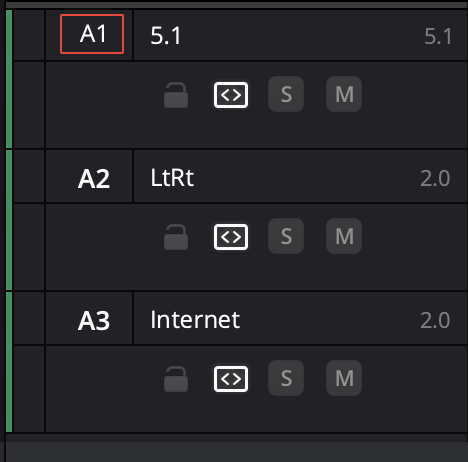
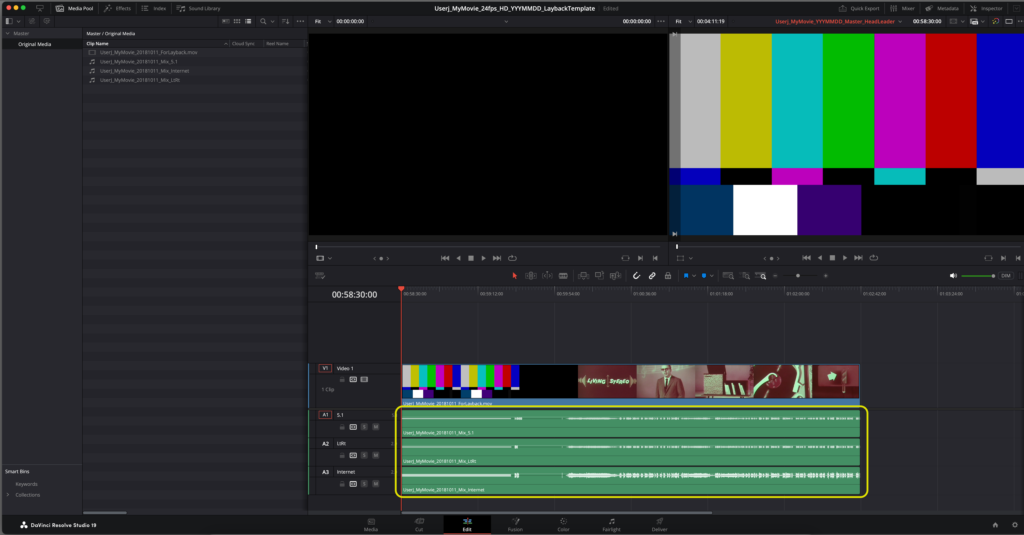
3. In the template timeline, track A1 is for the 5.1 mix. Tracks A2 and A3 are for the LtRt and InternetOnly mixes. Drag the audio clips representing each mix into the corresponding tracks. Be sure that all clips align at the start of the timeline, at timecode 00:58:30:00.
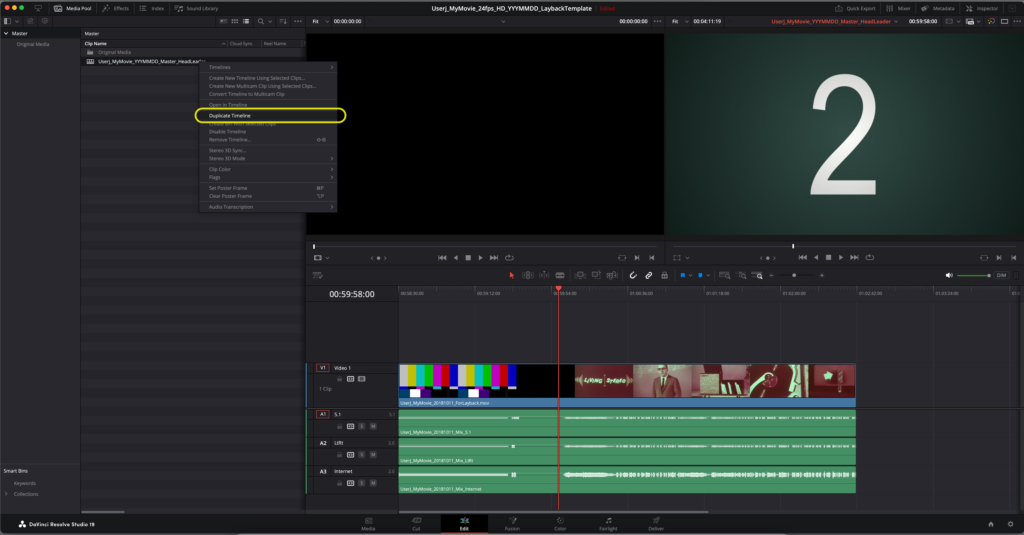
4. Type 00:59:58:00 into the timecode box in the top right of the window. Check that the frame containing the 2 occurs at 00:59:58:00, and that the 2pop aligns exactly with the beginning and end of the frame. If there is a tail pop, check that it is in sync across all channels.


5. Now is a good time to save.
Trimming Head Leader
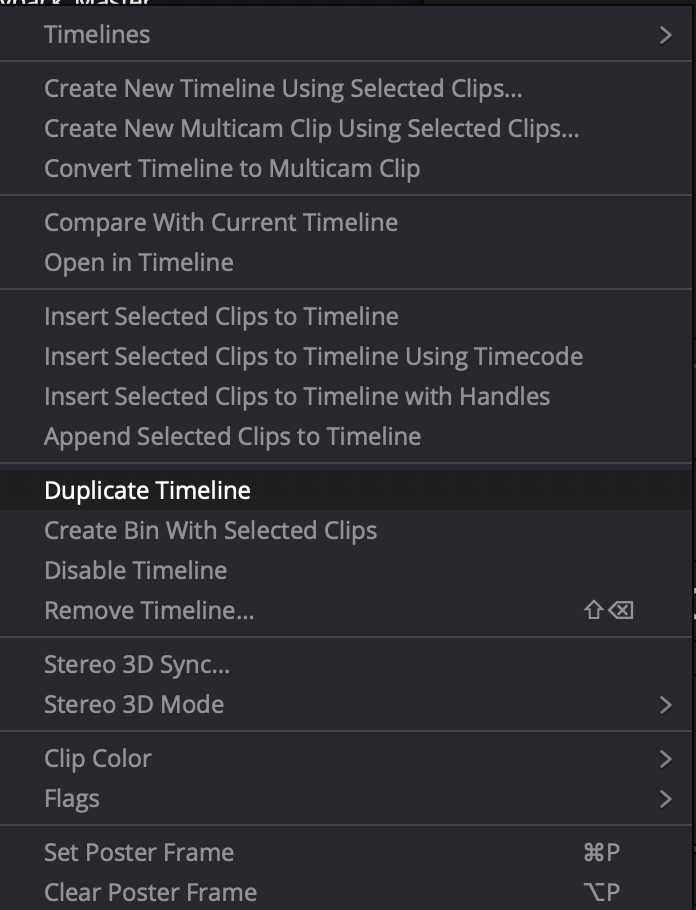
- Now we can get ready for the final output without the sync tools. In the clip list, right click on our timeline > Duplicate to create a new timeline. Rename it UserJ_MyMovie_YYYYMMDD_Master. Double click on the timeline to open it in the edit window.


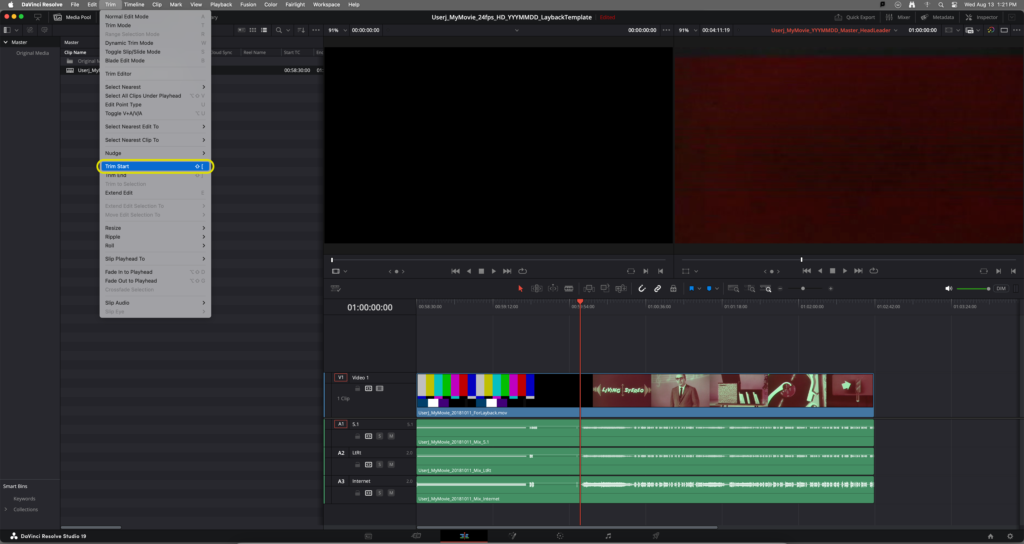
2. Trim off the head leader of the project. Enter 01:00:00:00 in the timecode, select all video and audio clips, and use the blade tool to cut (or shortcut: shift + [ will trim to playhead).
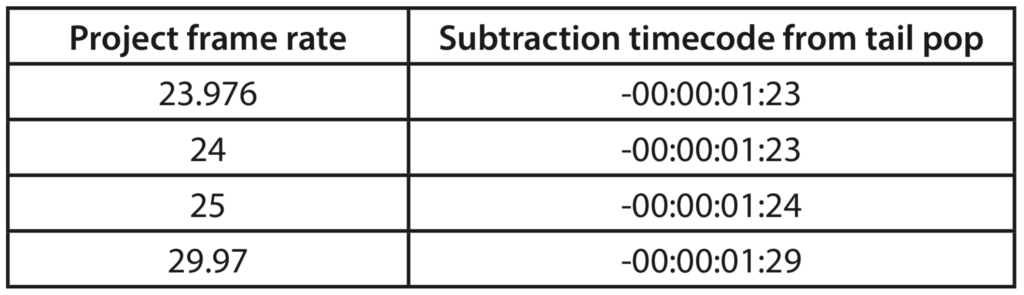
3. If there is tail pop, it must be removed. The tail pop placement varies per project and removing it will require some timecode math. A tail pop occurs exactly 2 seconds after the last image and the place to cut will depend on the frame rate. To remove the tail pop, find the 2 and use the following table to determine how much to subtract from the timecode:
Your timeline should then look like this:

4. Set your In and Out points on the timeline. The shortcut is I for In Point and O for Out Point.
a. If there is already at least 1 second of black at the beginning and end after removing the 2pop and tailpop, set the In Point to 1:00:00:00 and the Out Point to the last frame.
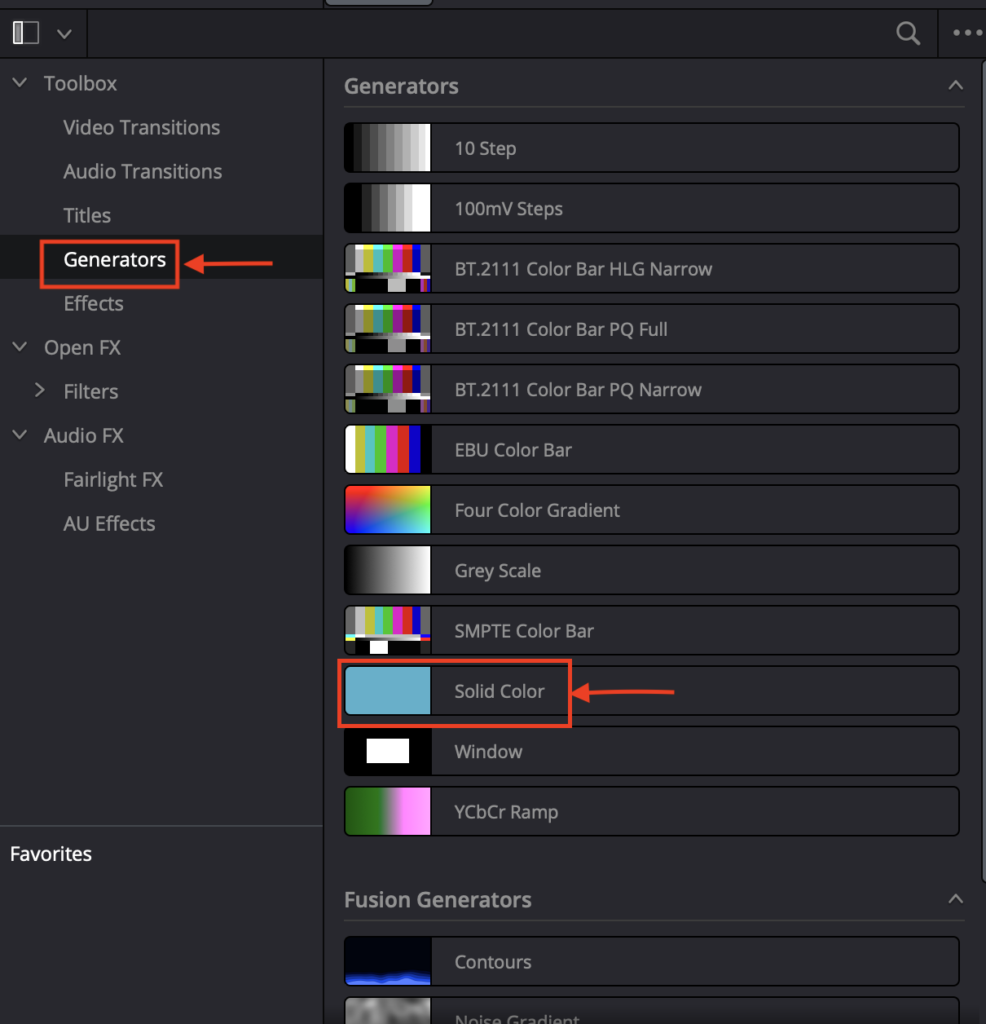
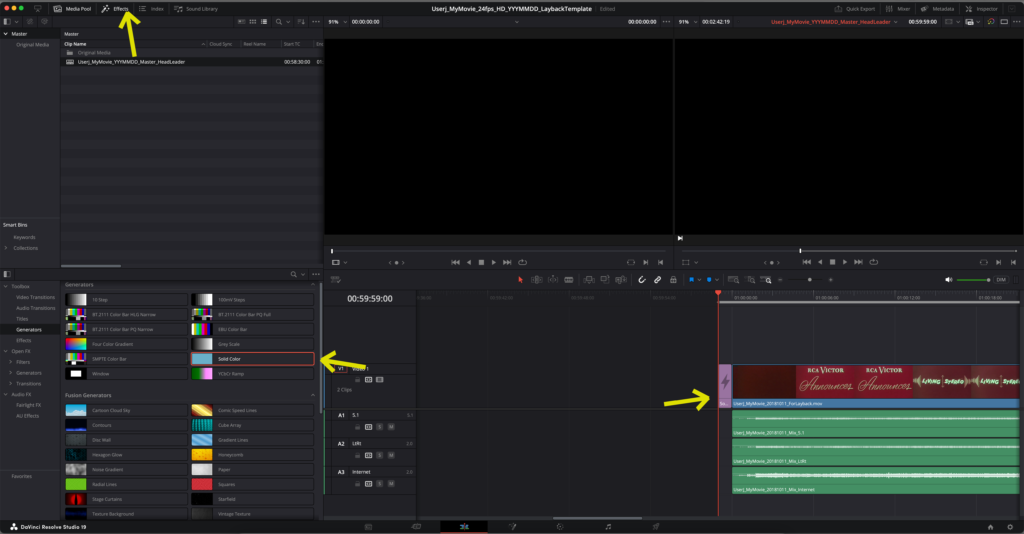
b. If there is not at least 1 second of black after 01:00:00:00 before the first frame, set the In Point to 00:59:59:00, go to Effects Library > Generators, drag Solid Color to the beginning of the video and trim it down to 1 second (or ⌘D to set duration). Copy the 1 second of black to the last frame of the film, and set the Out Point to the end of the black.
c. You should have 1 second of black screen from 00:59:59:00 to 01:00:00:00, and 1 second of black from the last frame of the film to the out point.
Without frames of black at the beginning and end, projectionists will have to project a still frame of the film while beginning and ending projection.
Final Output:
We will be creating 3 different Outputs:
Surround (OriginalResolution/5.1)
Internet (HD/Stereo)
ArchivalMaster (OriginalResolution/5.1+LtRt+Internet)
- 5,1 Output
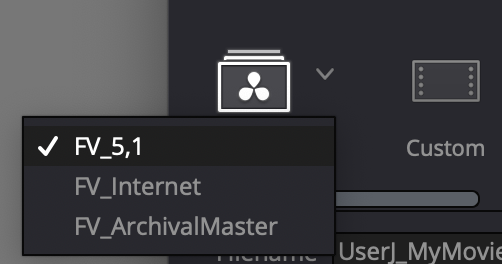
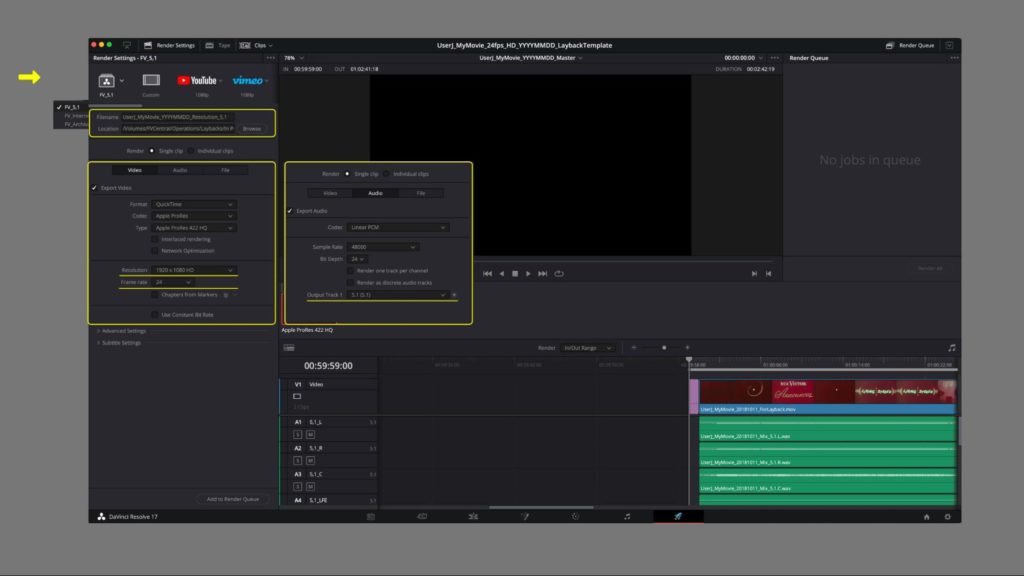
- Go to the Deliver Tab. In the top left (you may need to scroll the bar to the left) Select FV_5,1 Render Preset.
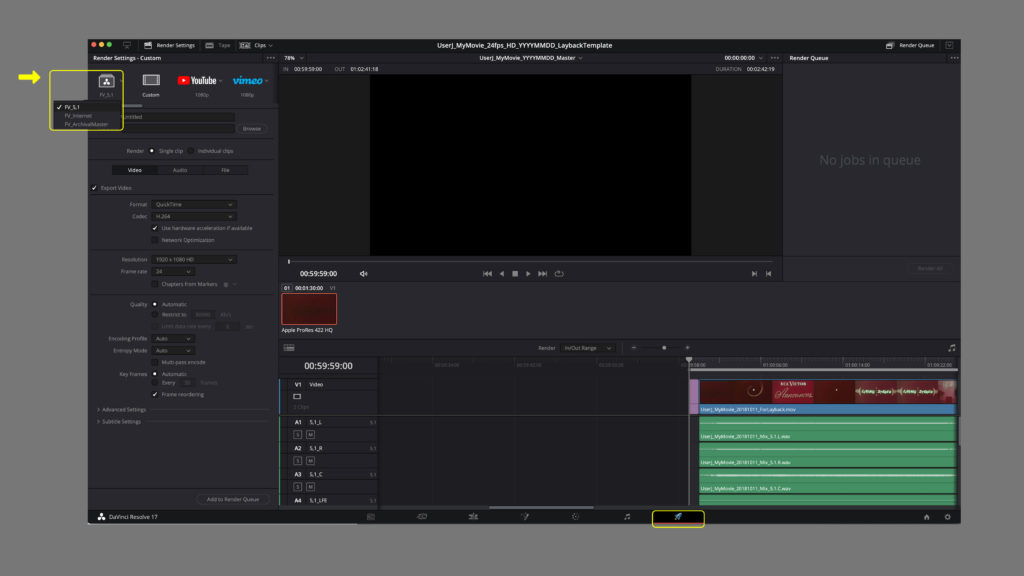
- Customize the file name: UserJ_MyMovie_YYYYMMDD__Resolution_5,1 and set Location to the folder you created at FVCentral Operations>Laybacks> InProgress>UserJ_MyMovie_YYYYMMDD_Layback
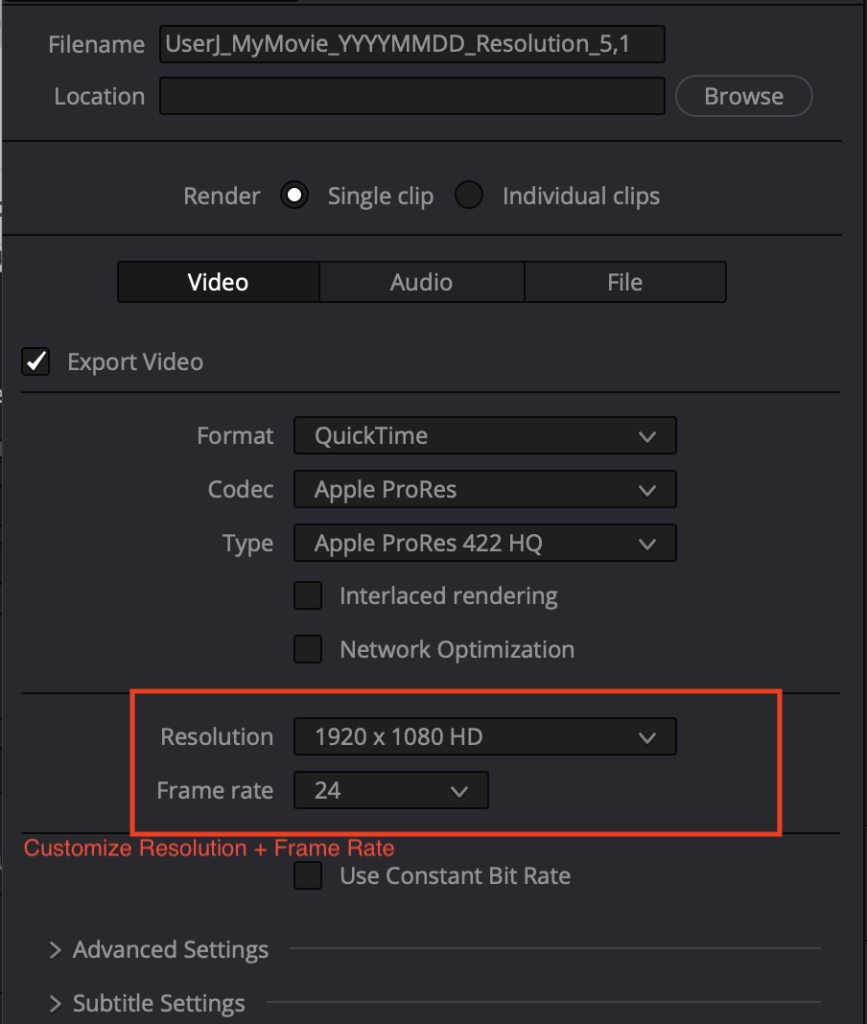
- If they are not already correct, set Resolution to Original Media’s resolution and set Frame Rate to project’s frame rate.
- Make sure the video and audio settings match below.

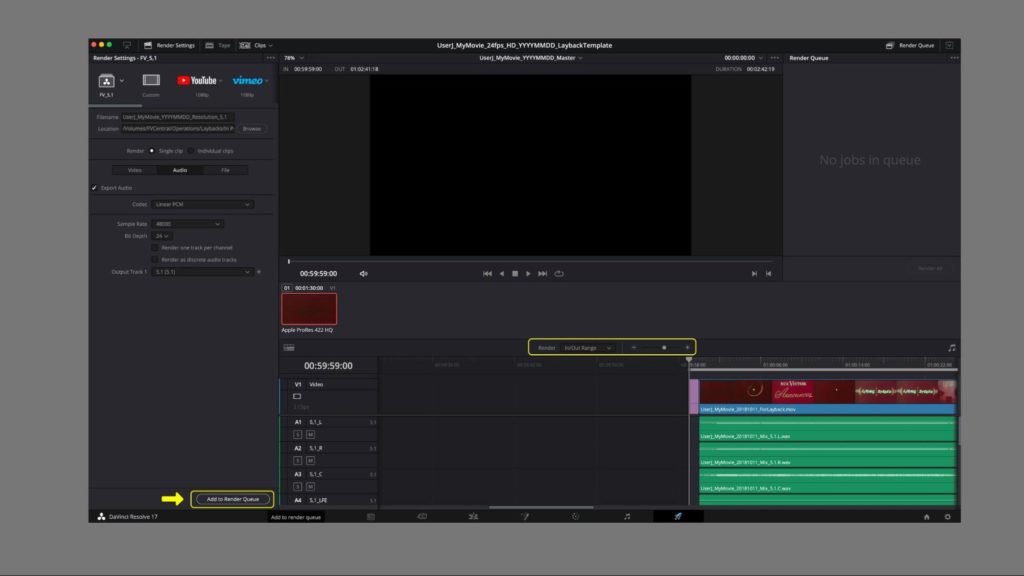
4. Above the timeline, make sure you have In/Out Range selected as your Render range (not Entire Timeline).

5. Click Add to Render Queue at the bottom of the preset window.
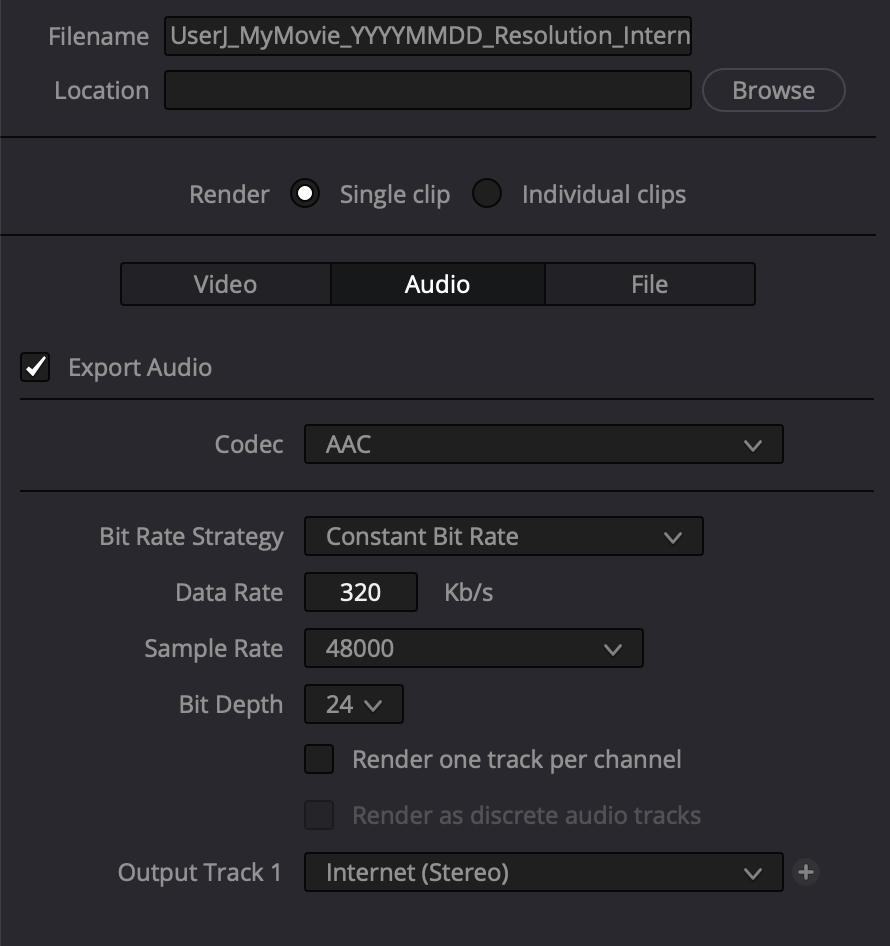
2. Internet Output:
a. Make sure the video settings and audio settings are as such. Set Resolution to HD and customize frame rate to project’s frame rate.
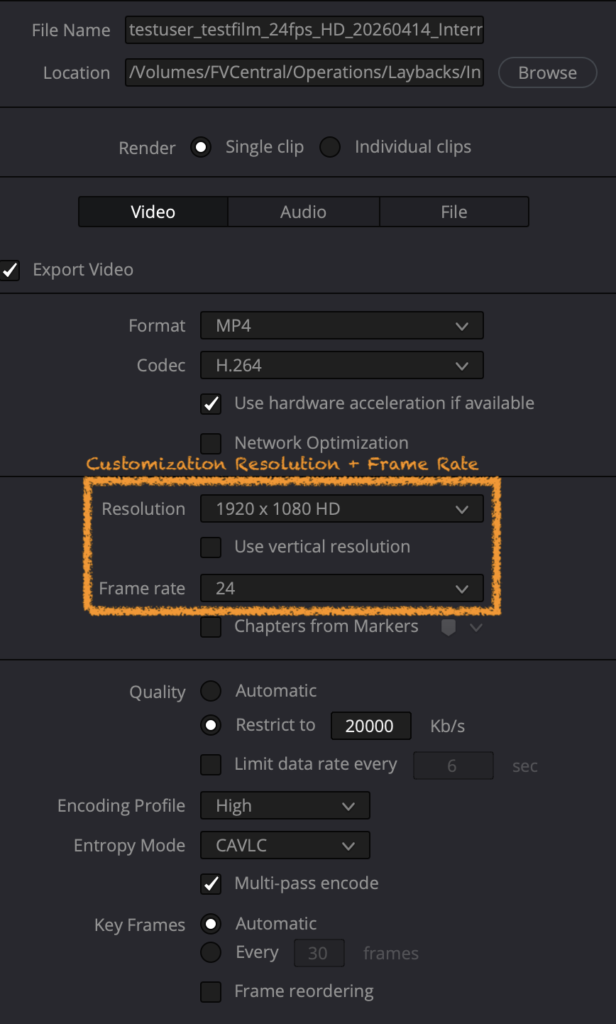
b. Check the render range is still In/Out Range above the timeline.
c. Then click Add to Render Queue.
Even 4K videos should have their internet files be rendered as HD. Resolve will automatically letterbox or pillarbox files with different aspect ratios.
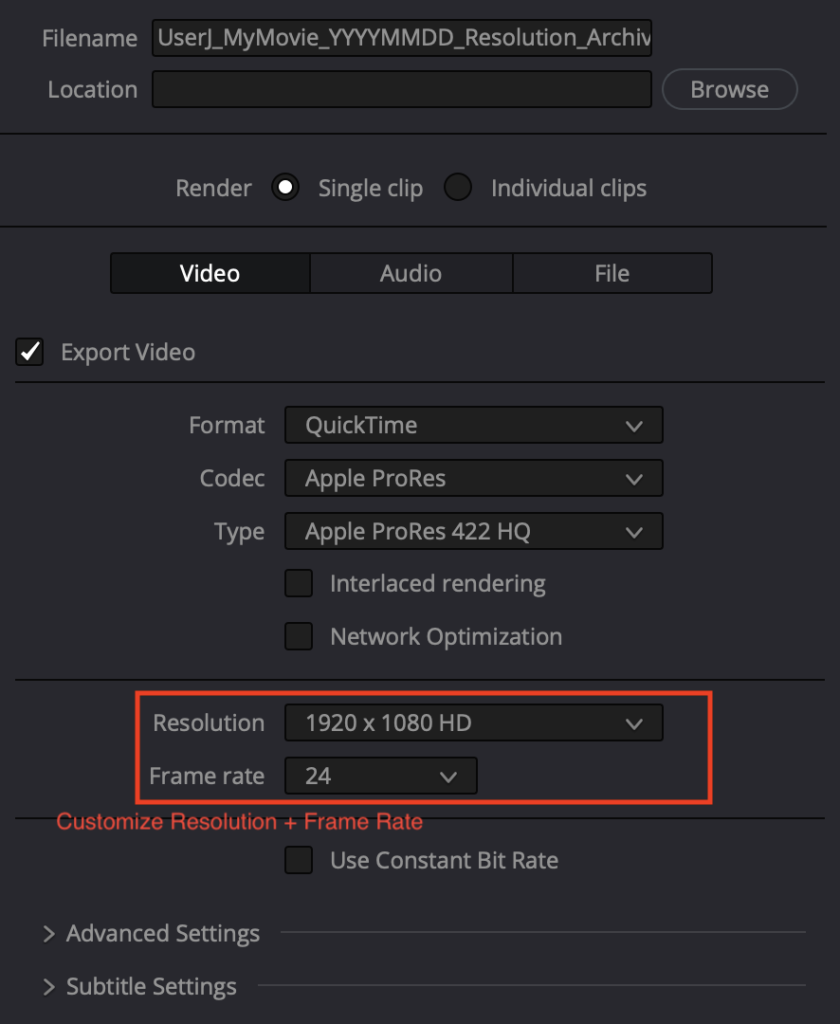
3. Archival Master Output:
a. Check the settings are as such. Customize Resolution and Frame Rate to original media’s resolution and frame rate. Then click Add to Render Queue.
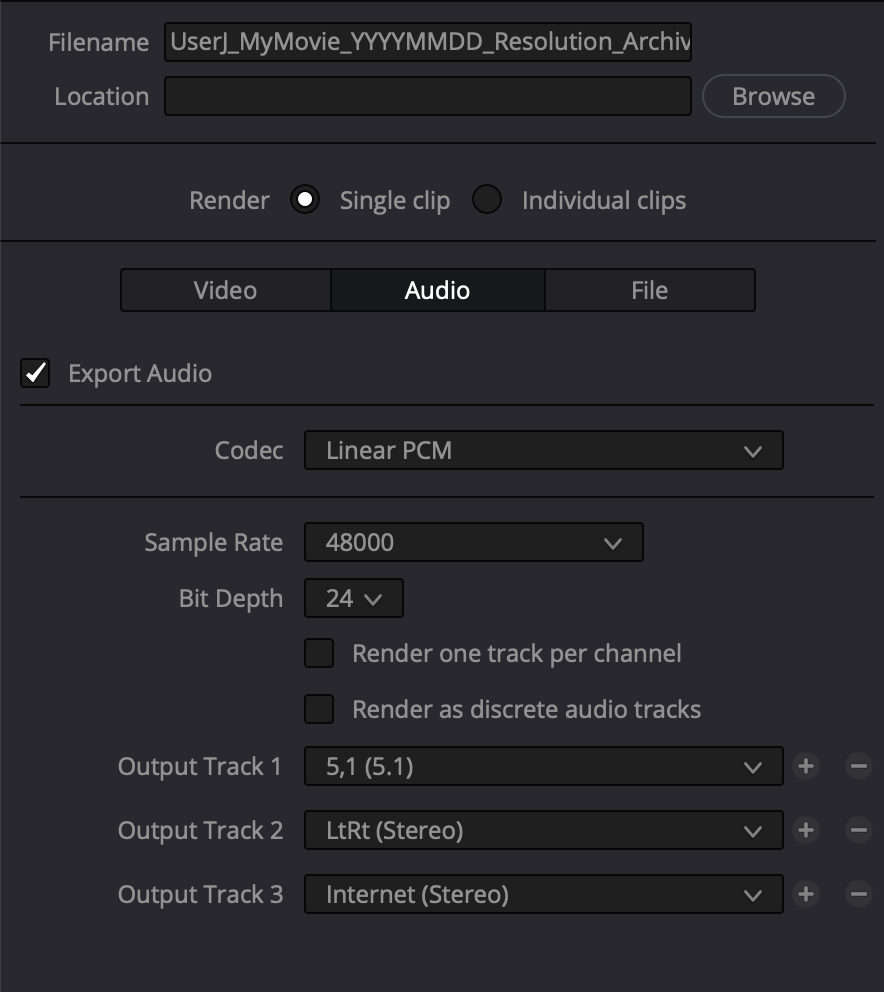
b. Check the render range is still In/Out Range above the timeline.
c. Select all 3 jobs in the Render Queue and click Start Render to render each clip from the render queue.
d. When done rendering, save your project, then return to the project manager window by clicking the house icon in the lower right corner or going to File > Project Manager.

Tidying Up
- In the Project Manager, right click on your project and click close to exit the editor. Right click again and choose Export Project Archive.
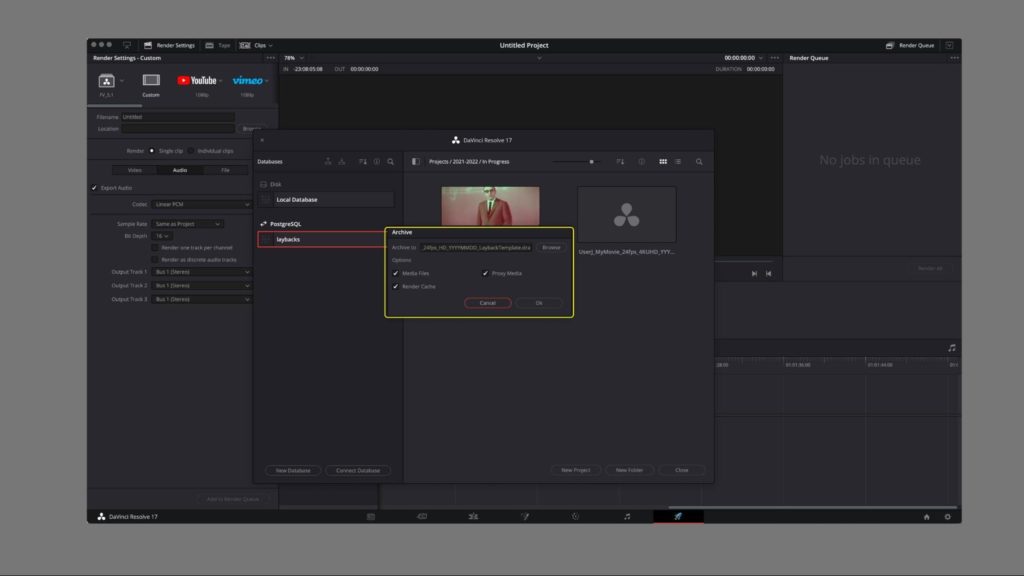
2. Then choose the folder you made on FVCentral to save the archive in: FVCentral > Operations > Laybacks > In Progress > UserJ_MyMovie_YYYYMMDD. It will save as a .DRA (DaVinci Resolve Archive) file. The Archive window will pop up. Leave the default settings and click OK to finish archiving. Resolve will copy all of the media used in your project into a new folder with the master layback folder.
3. Once you’ve finished archiving your project, move the entire layback folder to the appropriate Completed folder on FVCentral > Operations > Laybacks.
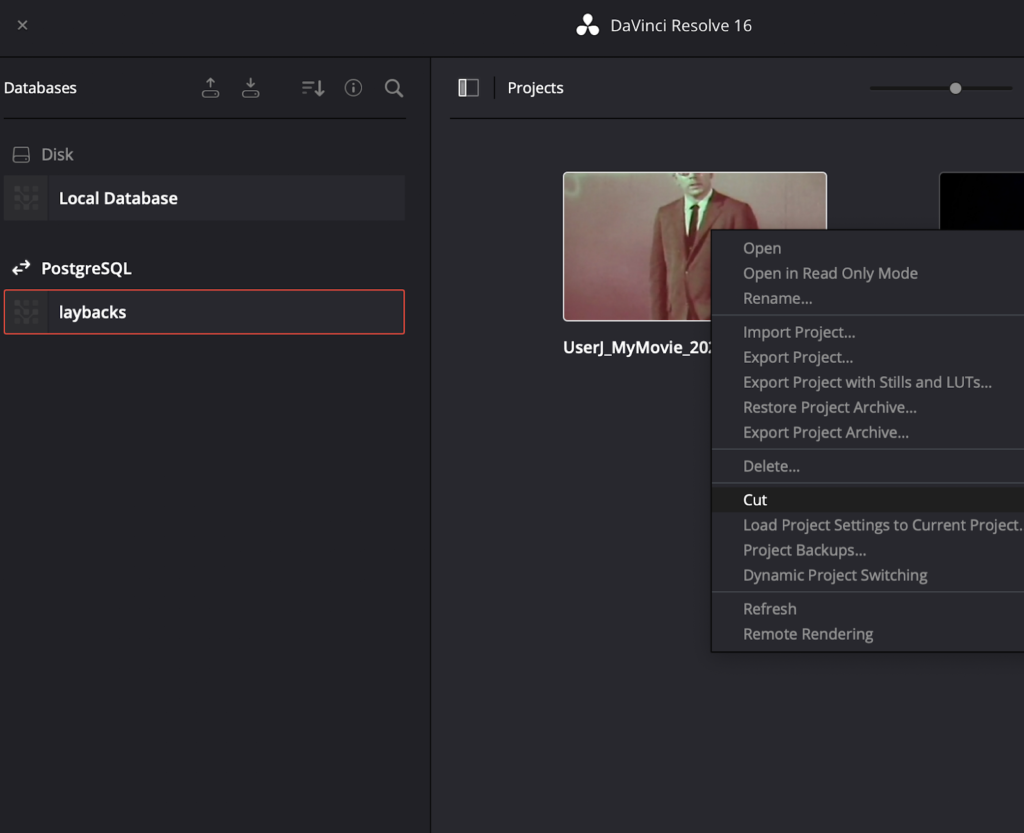
4. In the Resolve Project manager, move your DaVinci Resolve project into the Completed folder by navigating to the In Progress folder. Right click on your project> Cut.
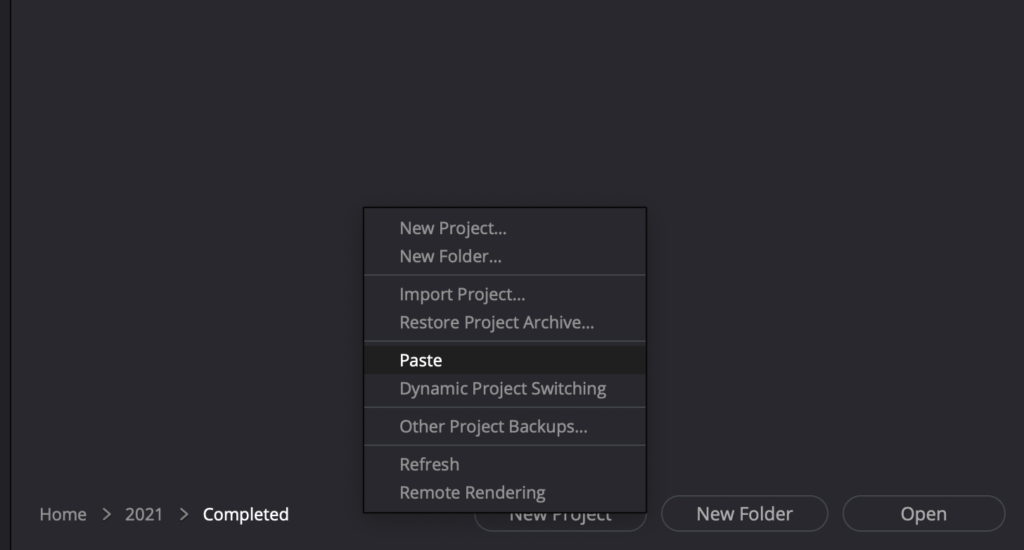
7. Then Navigate to the Completed folder and right click > Paste. Now your project has been moved.
Appendix
Reopening Projects
Although databases do not contain media, they do contain all of the metadata for every project. They also contain all of the timelines for each project you have worked on.
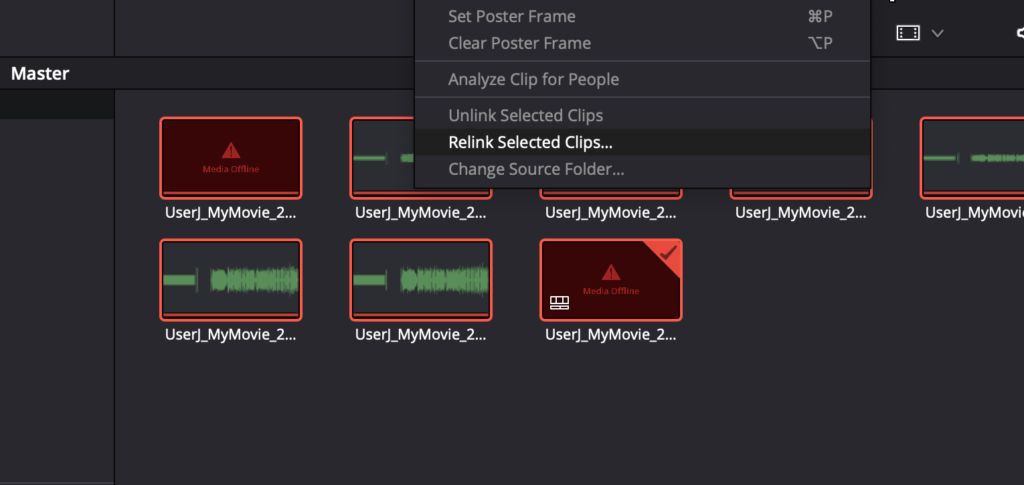
When you open the DaVinci Resolve project file (.drp), your audio and video files within the project may not be automatically relinked. To relink your media: select all clips that need to be relinked, right click > relink selected clips… > navigate to the correct project folder. (Make sure you add FVCentral as a storage location so that Resolve can access all required media.)
Creating Blu-ray Assets in Compressor
We don’t typically create Blu-ray and DVD assets by default but we can provide them upon request from students.
- Create a new subfolder within the student’s layback folder called Bluray & DVD Assets.
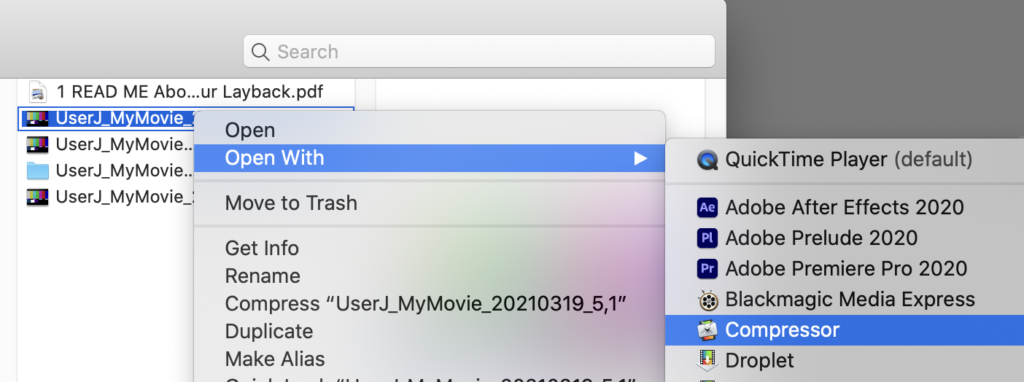
- Right click on the 5.1 video file > Open With > Compressor.
3. Once Compressor is open, click to select the appropriate preset (depending on what the student has requested) from the left panel and drag this on top of the video file.
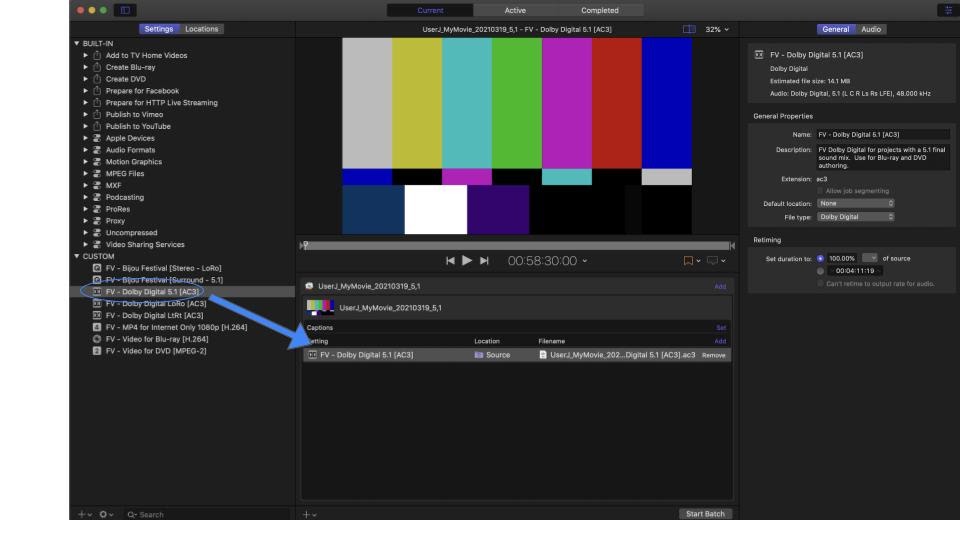
4. You can select and drag multiple templates onto the video file to cue up more than one job.
5. Right click on Source, go to location>other to choose the destination of your folder, put the file into the Blu-Ray & DVD folder that you created.
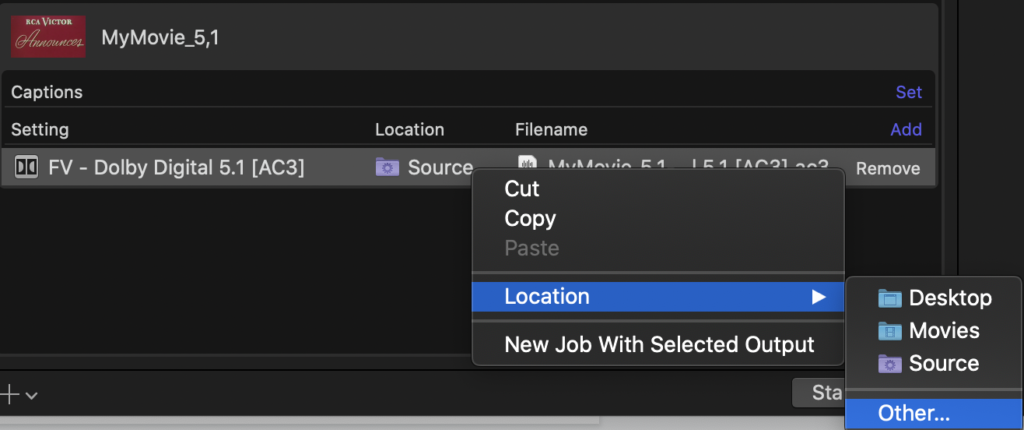

6. Click on Start Batch.
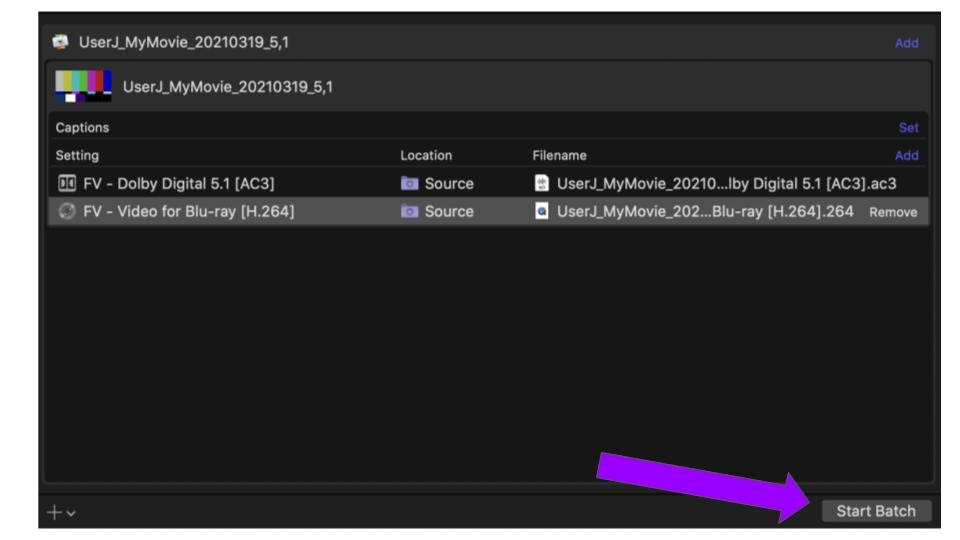
7. Compressor will now process the files and save them at the location you designated.