
Search Knowledge Base by Keyword
The Film/Video Render Farm
A render farm is a group of computers that work together to render frames of an animated or visual effects shot. This is achieved by parceling out the frames to be rendered amongst the networked computers. The networked computers that do the rendering are called “workers.”
Using a render farm can greatly speed up your rendering while also leaving your computer workstation available for you to continue working on other shots.
For example, if you have a shot that is 100 frames long and each frame takes 10 minutes to render on your workstation, you’d have to wait 1,000 minutes (16.7 hours!) for your workstation to finish rendering the shot. However, if you have a render farm comprised of 20 computers that are each as powerful as your workstation, your shot would render in just 50 minutes.
The School of Film/Video has a render farm that is comprised of six (6) Mac Pros, each with a 28-core Intel processor, 192 GB of RAM, and a Radeon Pro Vega II Duo MPX Module providing 64 GB of HBM2 memory.
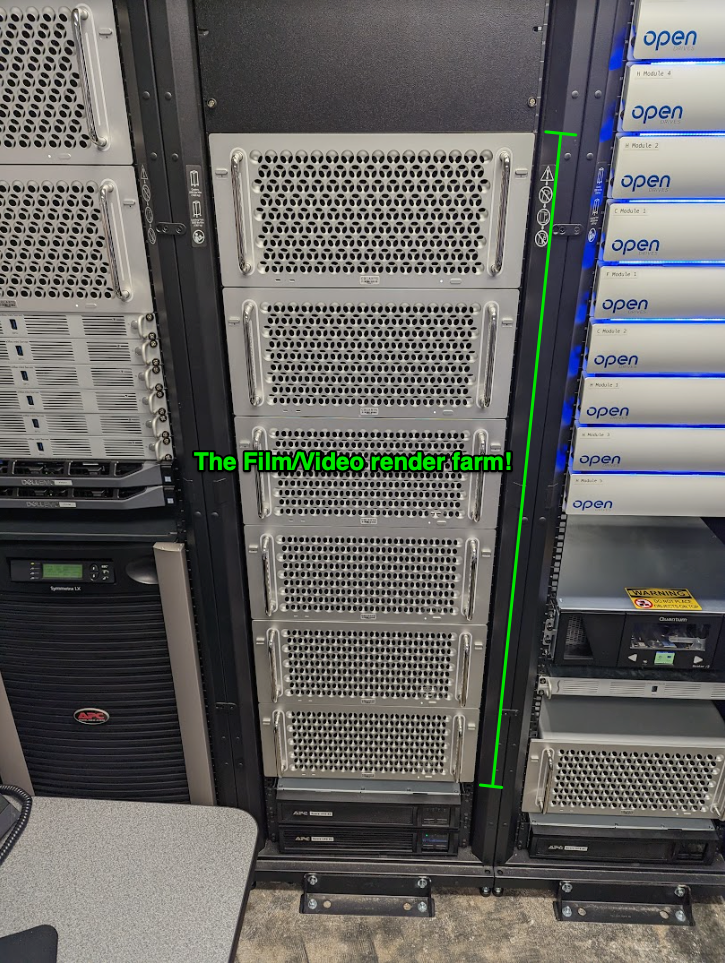
While six render workers may not seem like many, each one has more than twice the computing power of a lab workstation. Render farms are often measured in terms of “computer cores”, and a typical lab workstation has about 12 CPU cores. The render farm provides access to 168 CPU cores.
Our render farm currently works with After Effects, Blender, Cinema 4D, and Maya.
Your Renderfarm Folder
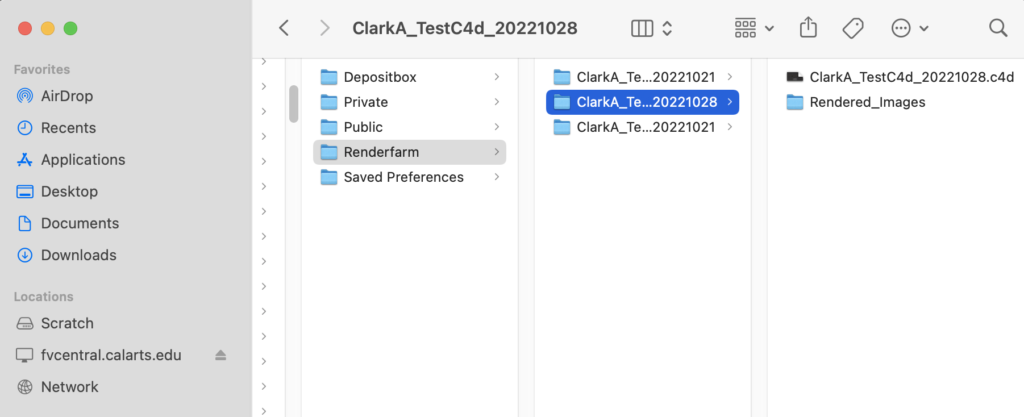
In order for the render farm workers to render your shot, the project file and all assets used by that project file need to be in your Renderfarm folder on FVCentral.
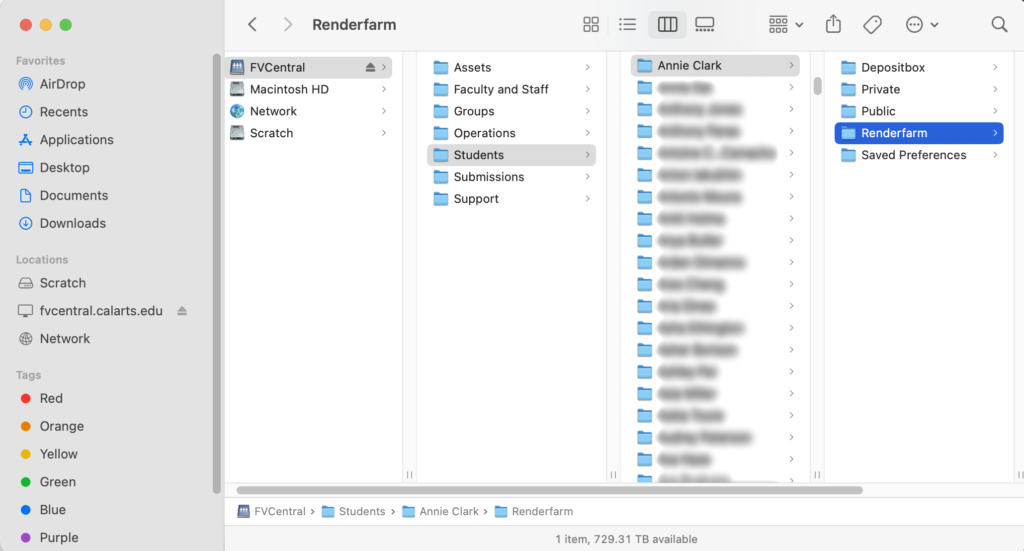
Copy your project file and all assets for that project to your Renderfarm folder if they are not already there.
When using Finder to copy files to a folder on FVCentral, it’s good practice to hold down the OPTION key on the keyboard as you drag-and-drop. This will ensure that Finder copies the file instead of moving it, and will help avoid weird permissions issues.
Submitting Render Jobs
Adobe After Effects
1. In order for the render farm workers to render your shot, the project file and all assets used by that project file need to be in your Renderfarm folder on the server. Copy your project file and all assets for that project to your Renderfarm folder if they are not already there.
If you are using fonts other than the default After Effects fonts or a plugin that is not installed on the lab workstations, those unique fonts/plugins will need to be installed on the render farm workers by the technical staff.
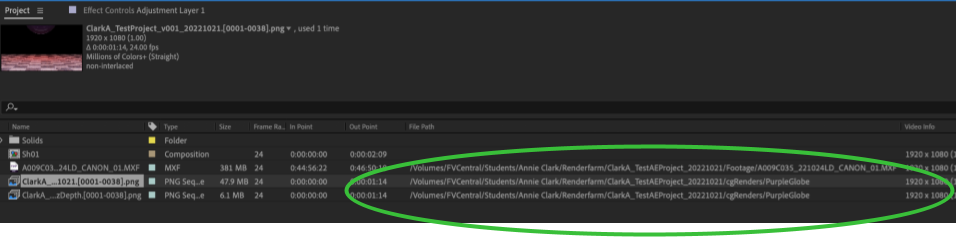
2. Open your project file from the Renderfarm folder on the server and check that all your assets/media are loading correctly. The paths to your assets/media files in After Effects should all point to locations in your Renderfarm folder on the server.
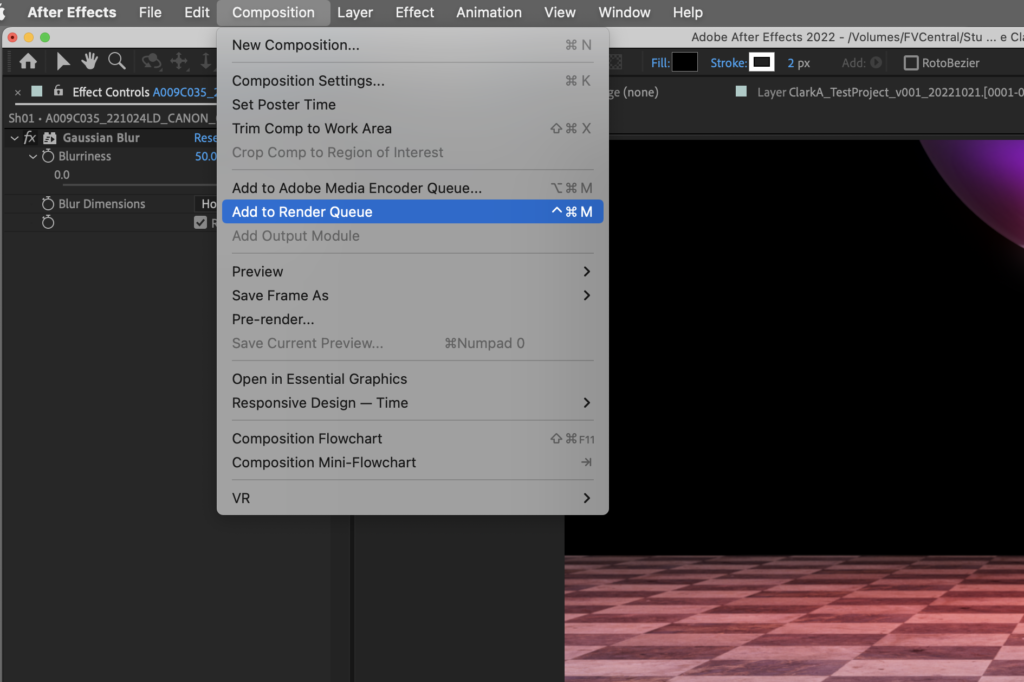
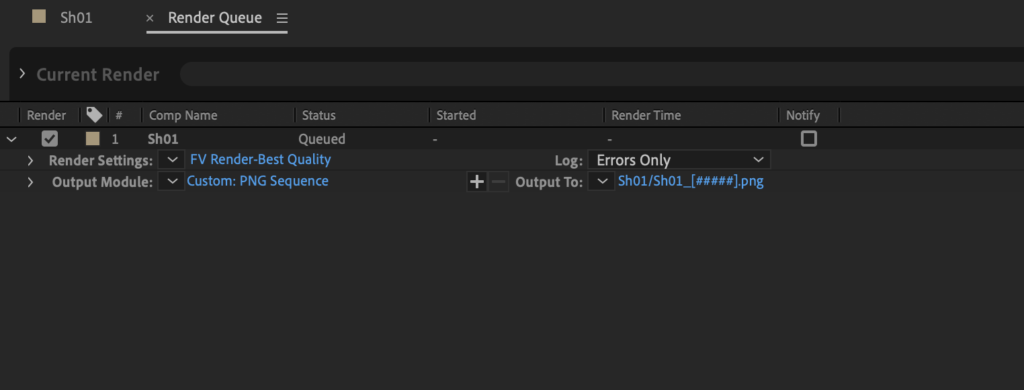
3. Go to the Composition menu and click on Add to Render Queue.
4. Your After Effects project file can only have one job in its render queue, so be sure to delete any old jobs that show up in your Render Queue. In the Render Queue, click on the blue text next to Output Mode. Under Format, select a type of image sequence, such as PNG sequence. Click Ok.
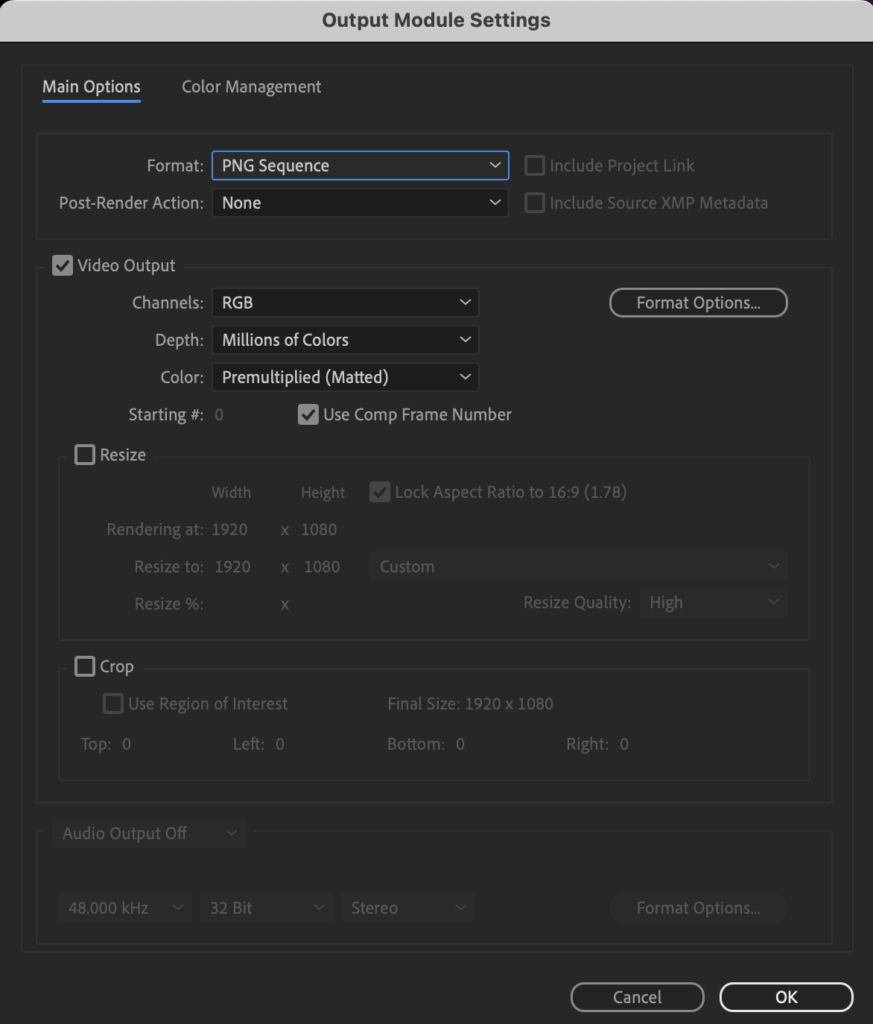
The render farm cannot render out videos. You can marry your image sequence to audio using Premiere later and export from Premiere as a video file.
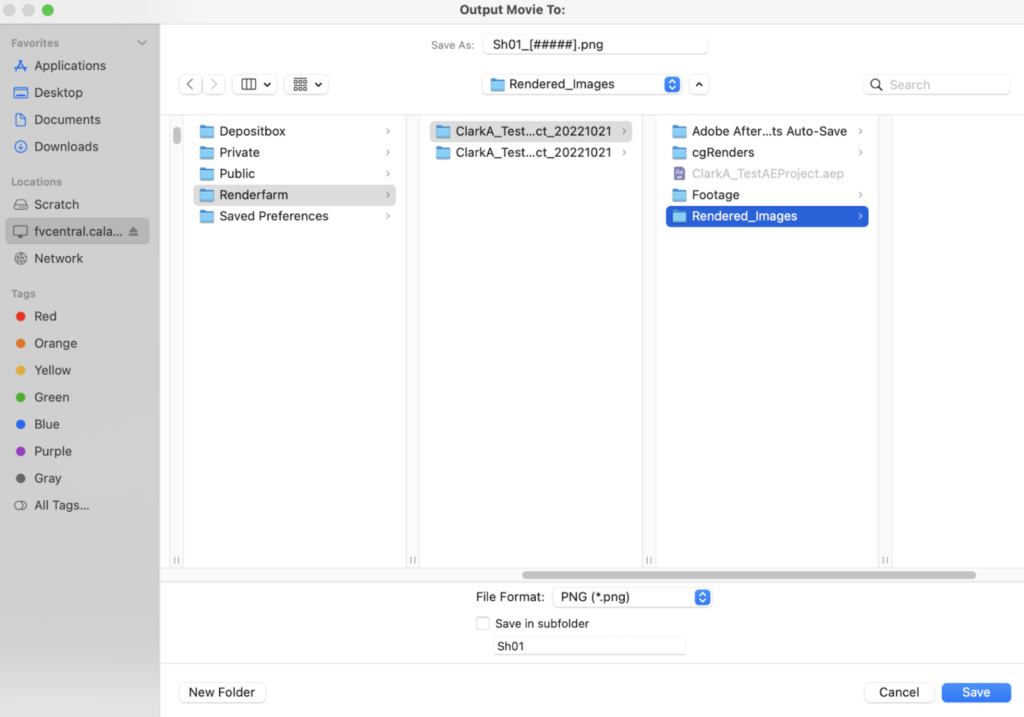
Click on the blue text next to Output To and select a location in your Renderfarm folder on the server. Make sure Save in subfolder is unchecked. Click Save.
6. Now that you’ve confirmed your job is queued in After Effects correctly, save your project.
7. From the File > Scripts menu, select DeadlineAfterEffectsClient.jsx
8. A Submit After Effects To Deadline pop-up window will appear. Click the Submit button.
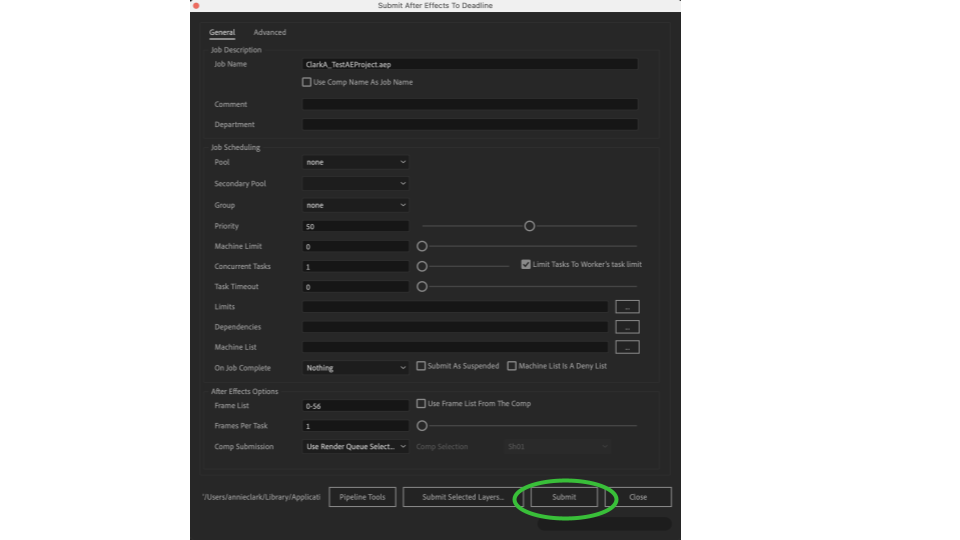
If you do not see the Deadline extension appear in the menu, please save your project, close After Effects and relaunch After Effects.
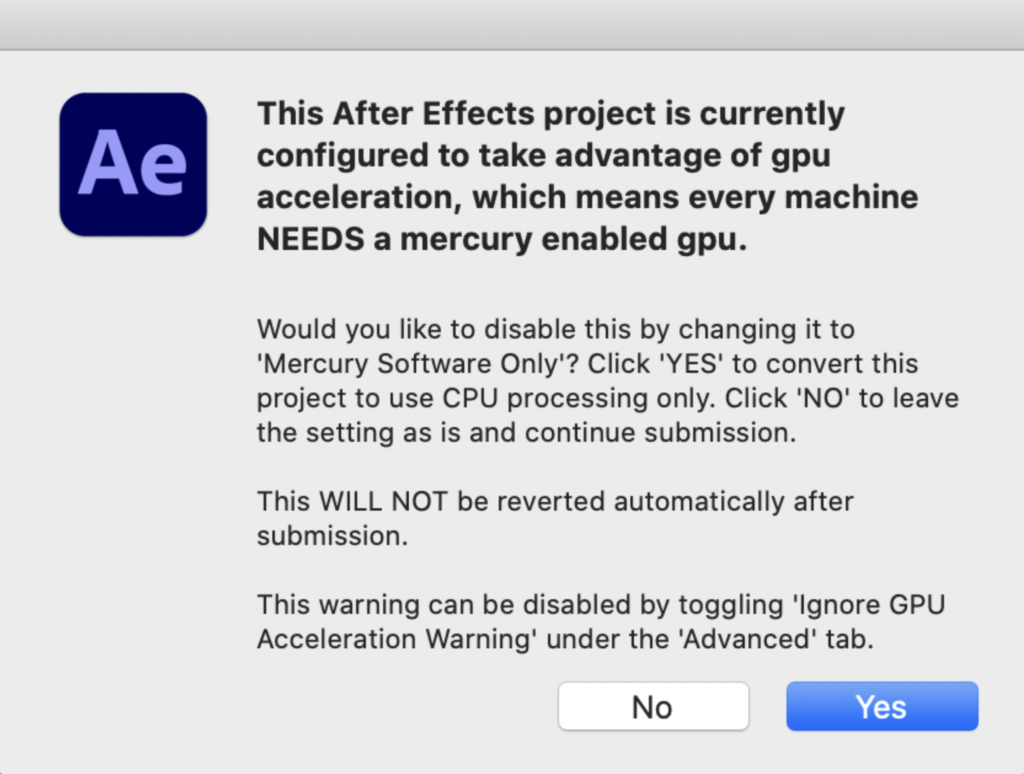
9. Click Yes in the pop-up window that appears asking if you want to use Mercury Software Only.
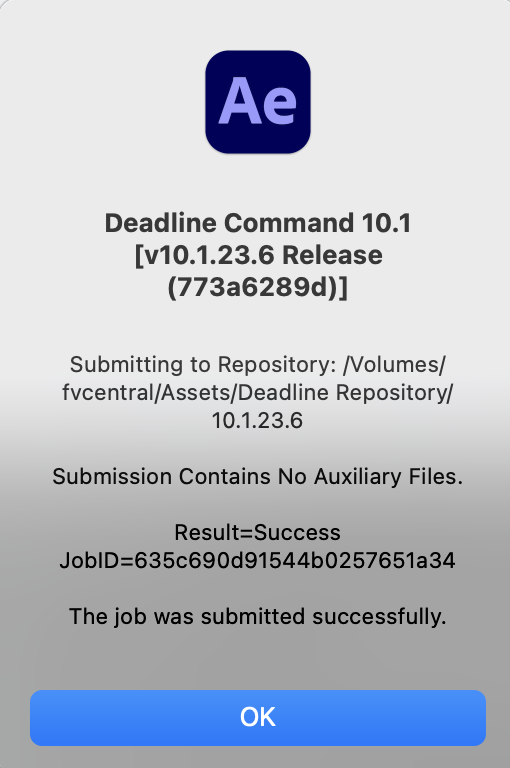
10. A pop-up window will appear letting you know that your job was submitted successfully. Click OK.
11. In the Submit After Effects To Deadline window, click the Close button.

12. Close your After Effects project file without saving.
Autodesk Maya
In order for the render farm workers to render your shot, the project file and all assets (including textures) used by that project file need to be in your Renderfarm folder on the server.
Make sure your Maya project is saved, and that Maya is closed before beginning.
1. Copy your Maya project directory and all assets for that project to your Renderfarm folder if they are not already there.
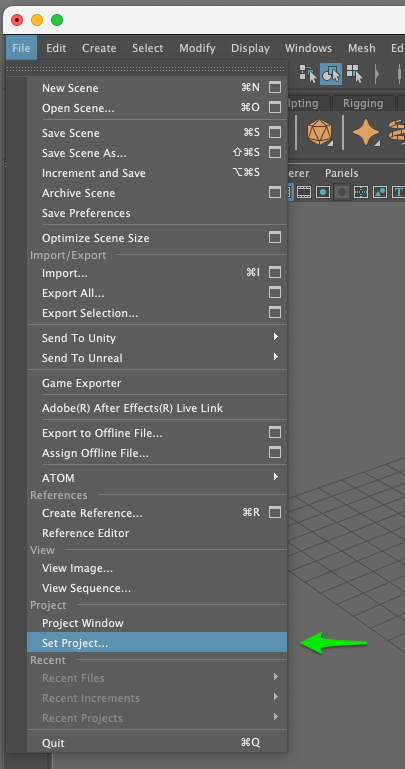
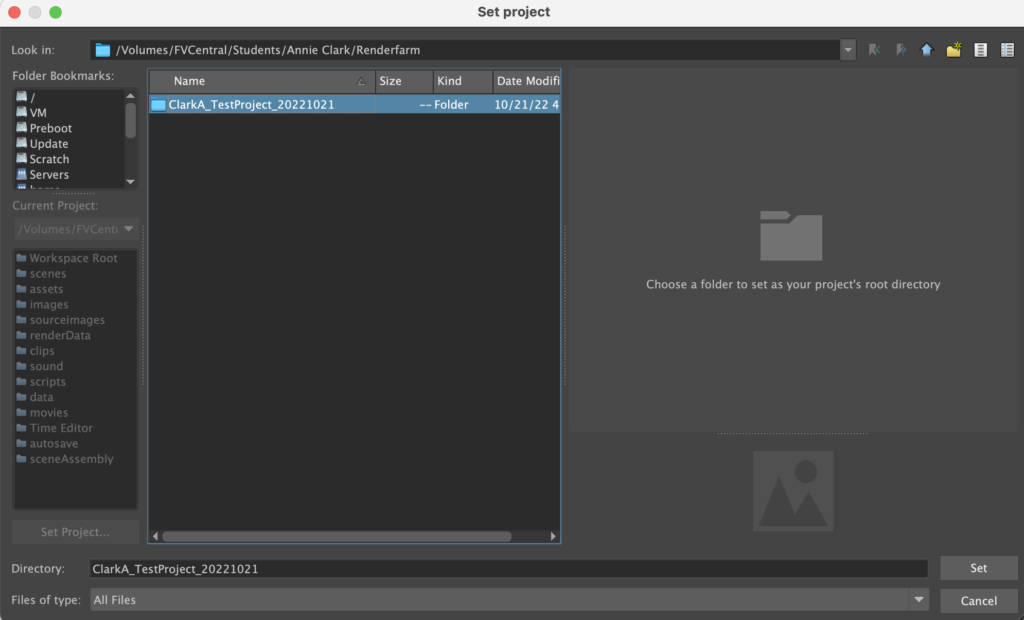
2. Now that your Maya project directory is in your Renderfarm folder, launch Maya and go to File → Set Project.
This will bring up the Set Project window. In this window, select your scene’s Maya project directory in your FVCentral Renderfarm folder and click Set.
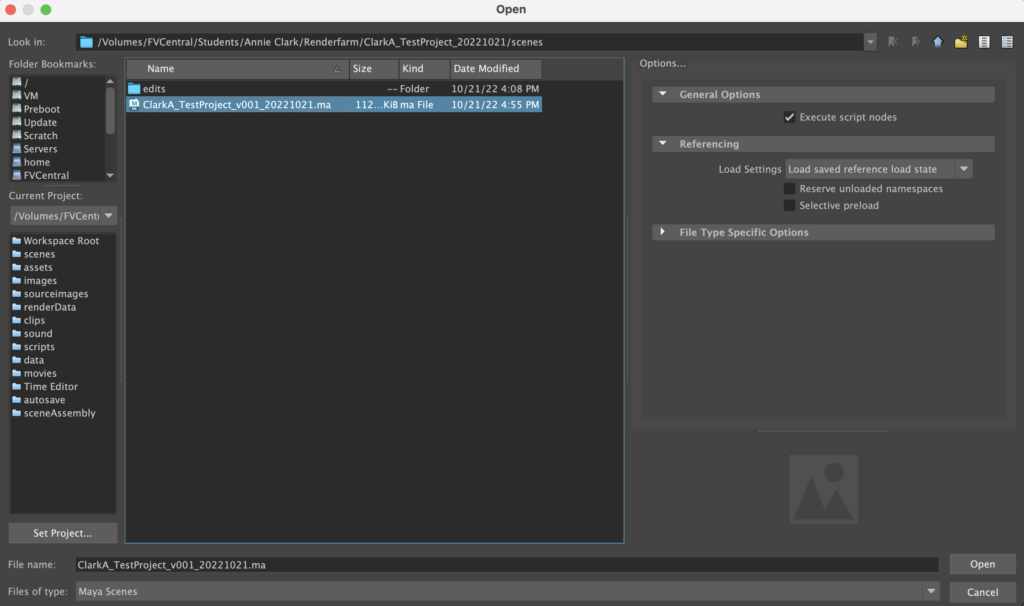
3. Now, go to File → Open Scene… and open your scene file from your Maya project directory in your Renderfarm folder on the server.
4. Check that all your assets are loading correctly. The paths to your assets (such as texture files) in your Maya scene should all point to locations in your Renderfarm folder on the server.

If your Maya scene is referencing other Maya scene files, those referenced scene files will also need to be in your Renderfarm folder on the server along with their textures. You may need to reconnect your references using Maya’s Reference Editor if their location has changed.
Alternatively, you could import your referenced scene files into your Maya scene using the “Import Objects from Reference” command from the Reference Editor. However, before importing references you should save your Maya scene as a new version. This new version of the scene will only be used for rendering.
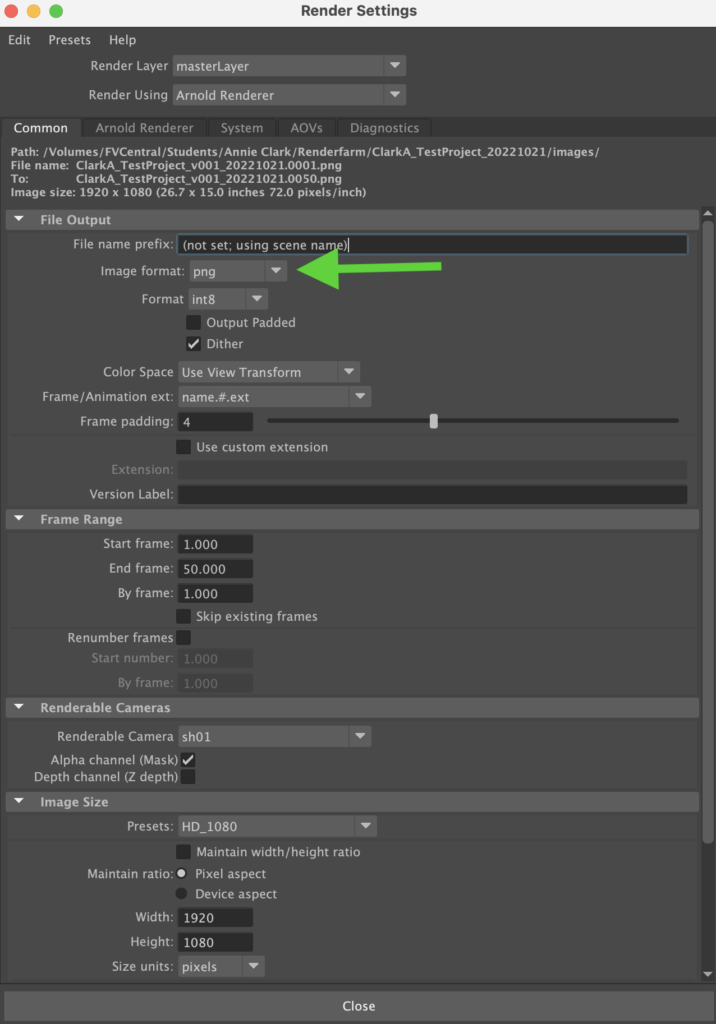
5. The render farm can only render out image sequences. Make sure that your scene’s Render Settings are set to render out an image sequence (for example, a PNG or EXR sequence).
6. Now that you’ve confirmed your render settings are correct, Save your scene file.
7. Afterwards, navigate to the Deadline Shelf in Maya and click on the green icon in that shelf.
If you do not see the Deadline Shelf, please save your project, then close and relaunch Maya.

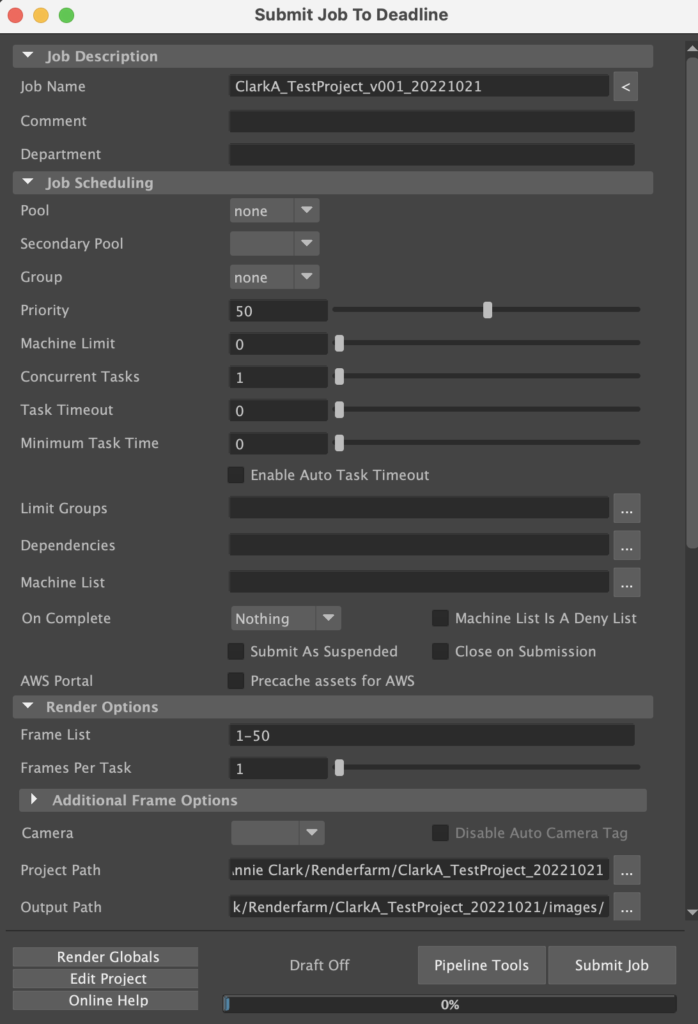
The Submit Job To Deadline pop-up window will appear.
You can basically leave all settings as default. However, for the Output Path field, be sure to select a location in your Renderfarm folder on the server where you want your images to get rendered out to. Finally, click Submit Job.
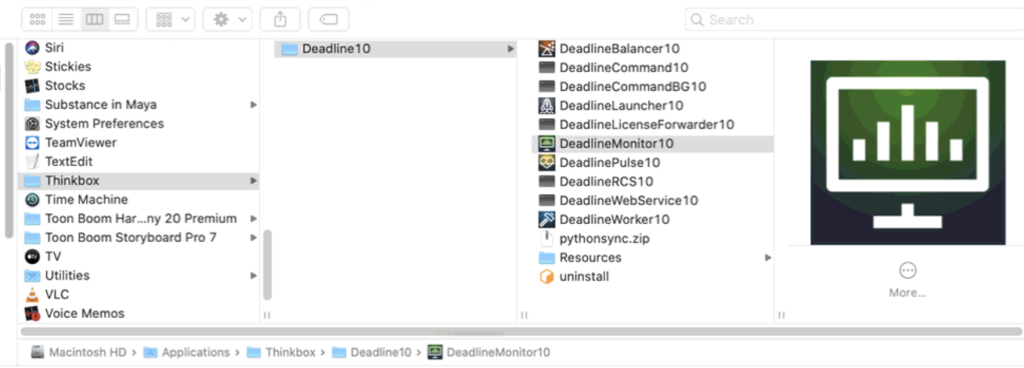
Done! At any time, from any computer, you can keep an eye on the progress of your render job using the Deadline Monitor app, found under Applications → Thinkbox → Deadline10 → DeadlineMonitor10.
Blender
In order for the render farm workers to render your Blender project, the project file and all assets (including textures) used by that project need to be in your Renderfarm folder on FVCentral. Copy your project file and all its assets to your Renderfarm folder.

- Open your project file from the Renderfarm folder on FVCentral and check that all your assets are loading correctly. The paths to your assets (such as texture files) in your Blender project should all point to locations in your Renderfarm folder on FVCentral.
- The render farm can only render out image sequences, so make sure that your scene is set to render out an image sequence (for example, a PNG sequence). Also, be sure that your output folder is set to render to a location inside your Renderfarm folder on FVCentral.
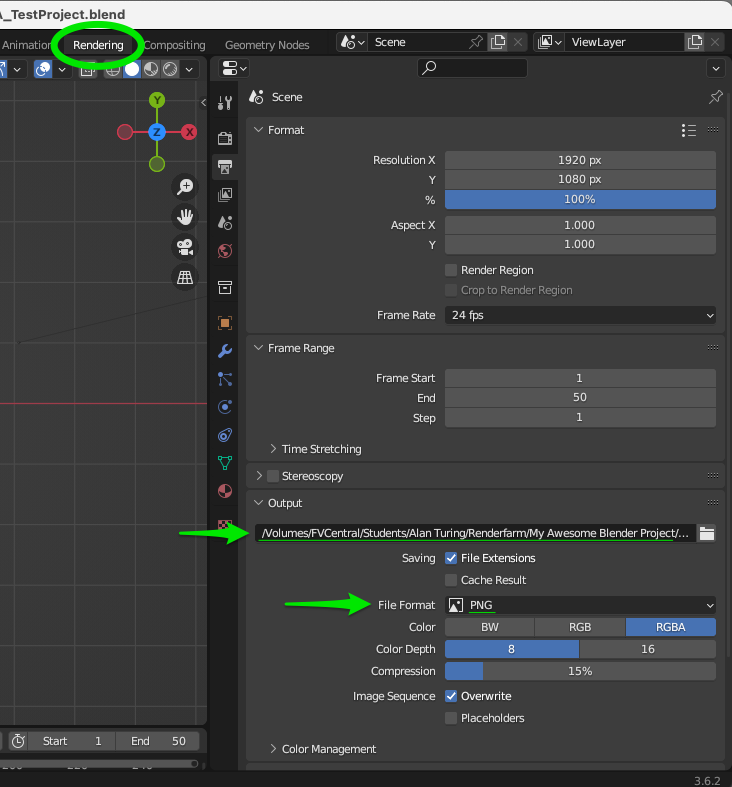
3. Add a unique project or render job name to the end of the output folder path name to ensure that you do not overwrite your files when submitting multiple render jobs.
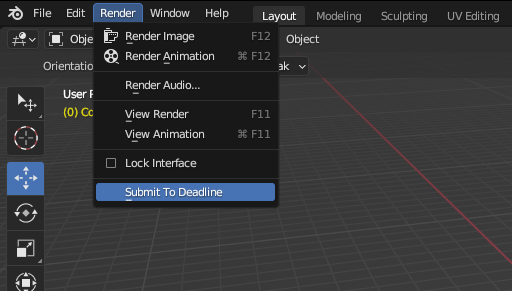
4. To submit your project to the render farm, click the Render menu and select Submit to Deadline.
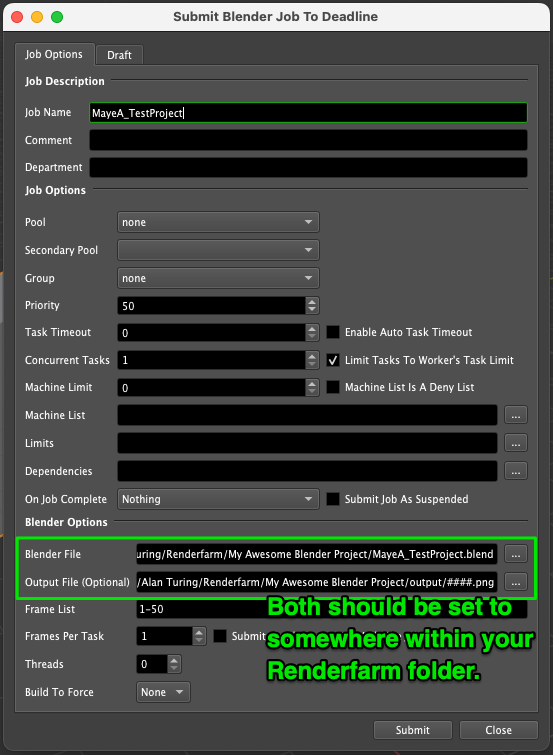
5. The Submit Blender Job to Deadline window will appear. Be sure that both the Blender File and the Output File are set to locations within your Renderfarm folder on FVCentral. Then click Submit.
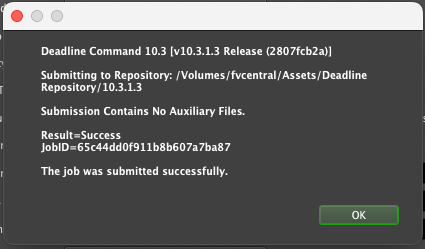
6. A pop-up window will appear confirming that your job was submitted successfully.
7. Quit Blender without saving your project.
Maxon Cinema 4D
In order for the render farm workers to render your shot, the project file and all assets (including textures) used by that project file need to be in your Renderfarm folder on the server. Copy your project file and all assets for that project to your Renderfarm folder if they are not already there.
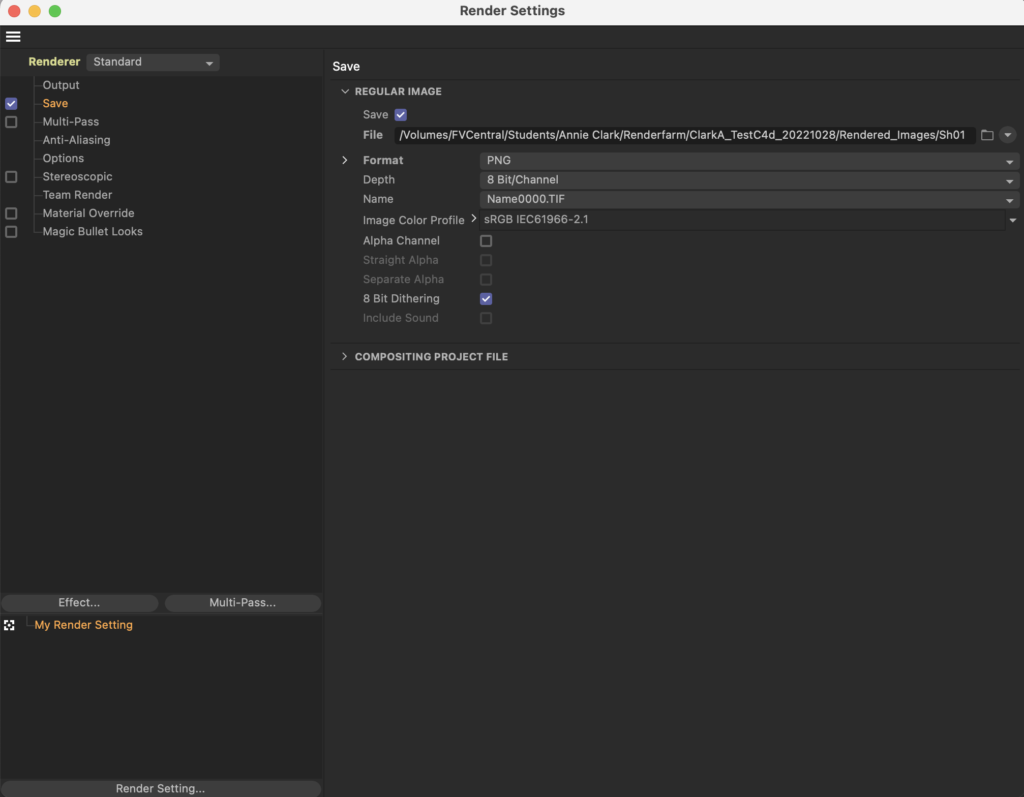
Open your project file from the Renderfarm folder on the server and check that all your assets are loading correctly. The paths to your assets (such as texture files) in your Cinema4D scene should all point to locations in your Renderfarm folder on the server.
2. The render farm can only render out image sequences, so make sure that your scene is set to render out an image sequence (for example, a PNG sequence). Also, be sure that your scene is set to render to a location inside your Renderfarm folder on the server.
3. To submit your shot to the render farm, go to the Extensions menu and select Submit to Deadline.
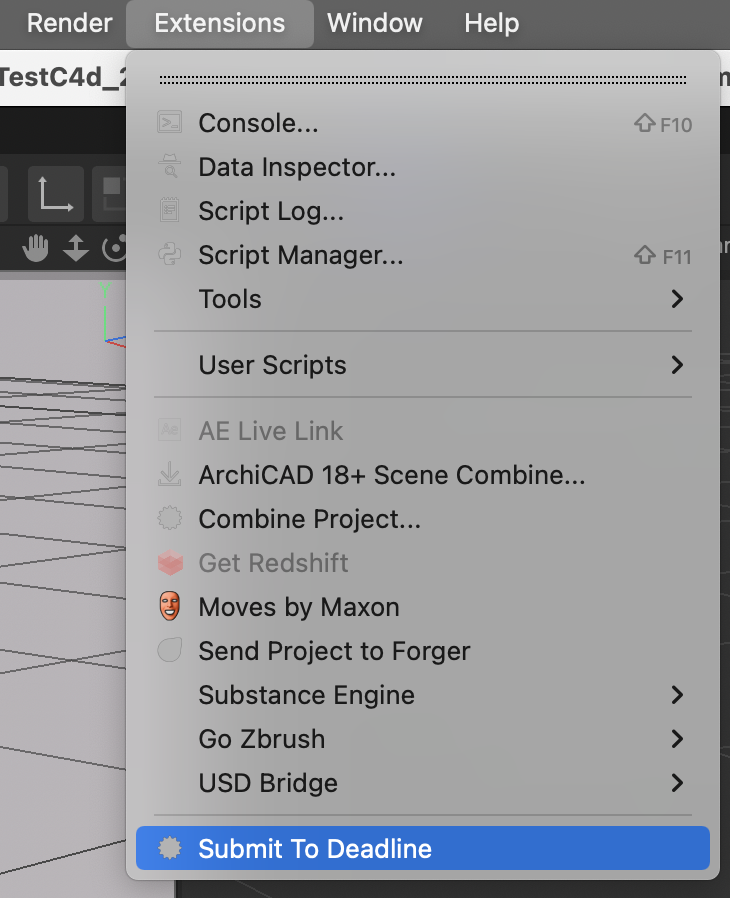
If you do not see the Submit to Deadline option appear in the menu, please save your project, then close and relaunch C4D.
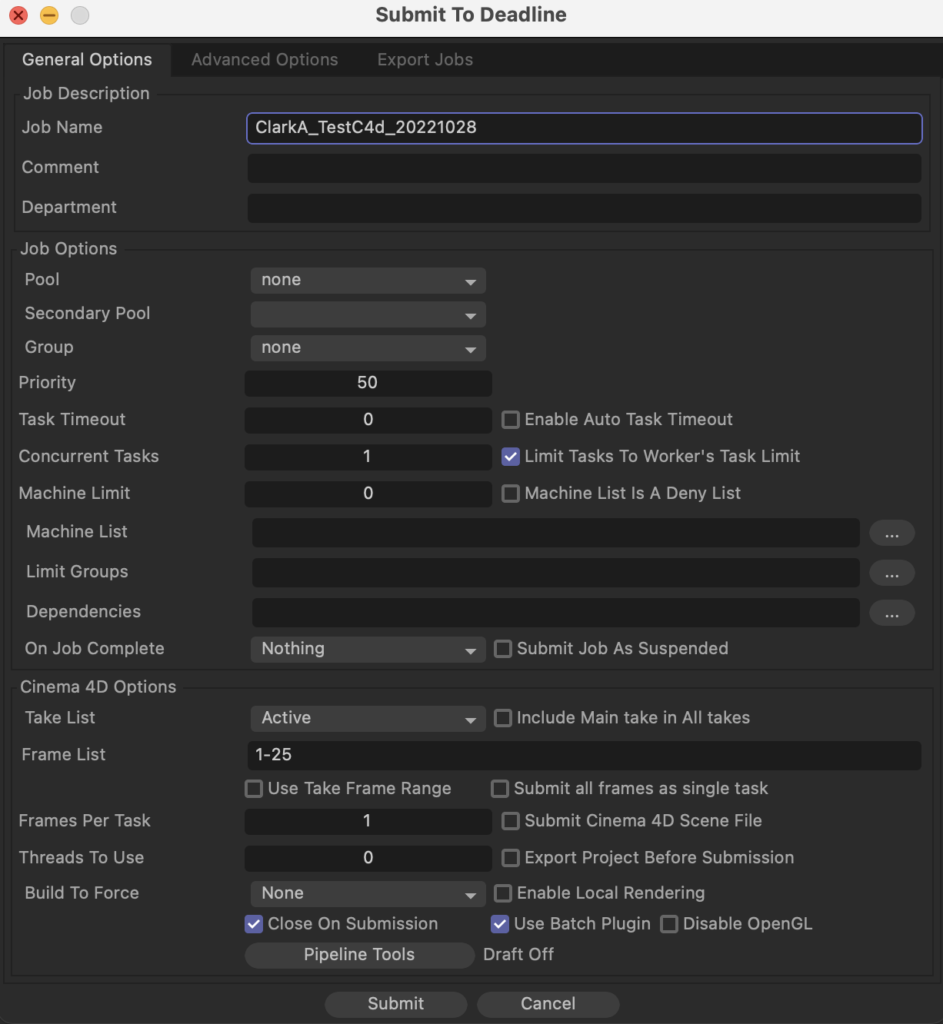
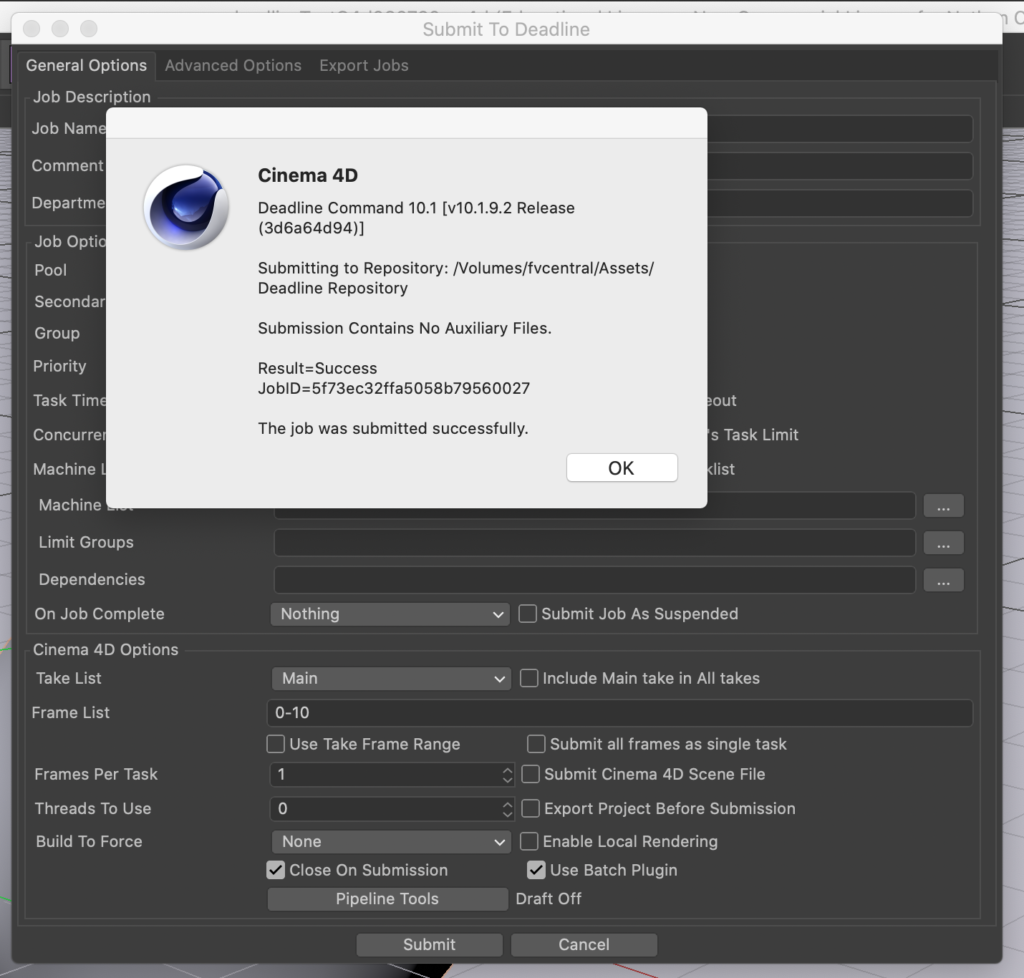
4. The Submit To Deadline pop-up window will appear. Click Submit.
5. A pop-up window will appear confirming that your job was submitted successfully.
6. Quit Cinema 4D without saving changes to your project.
Film/Video students can wrangle their own render jobs using the Deadline Monitor application. Please do not make any modifications to other students’ render jobs.
For render farm tech support, submit a ticket or send an email to 2popsupport@calarts.edu.
Monitoring Your Render Farm Jobs
To view the progress of a render job you’ve and the other jobs in the render queue, launch the Deadline Monitor application.
To launch the Deadline Monitor application, first make sure that FVCentral is mounted on your computer. Then go to Applications > Thinkbox > Deadline10 and double-click the DeadlineMonitor10 icon.
To modify a job’s properties, right-click on the job in the queue and choose Modify Job Properties.
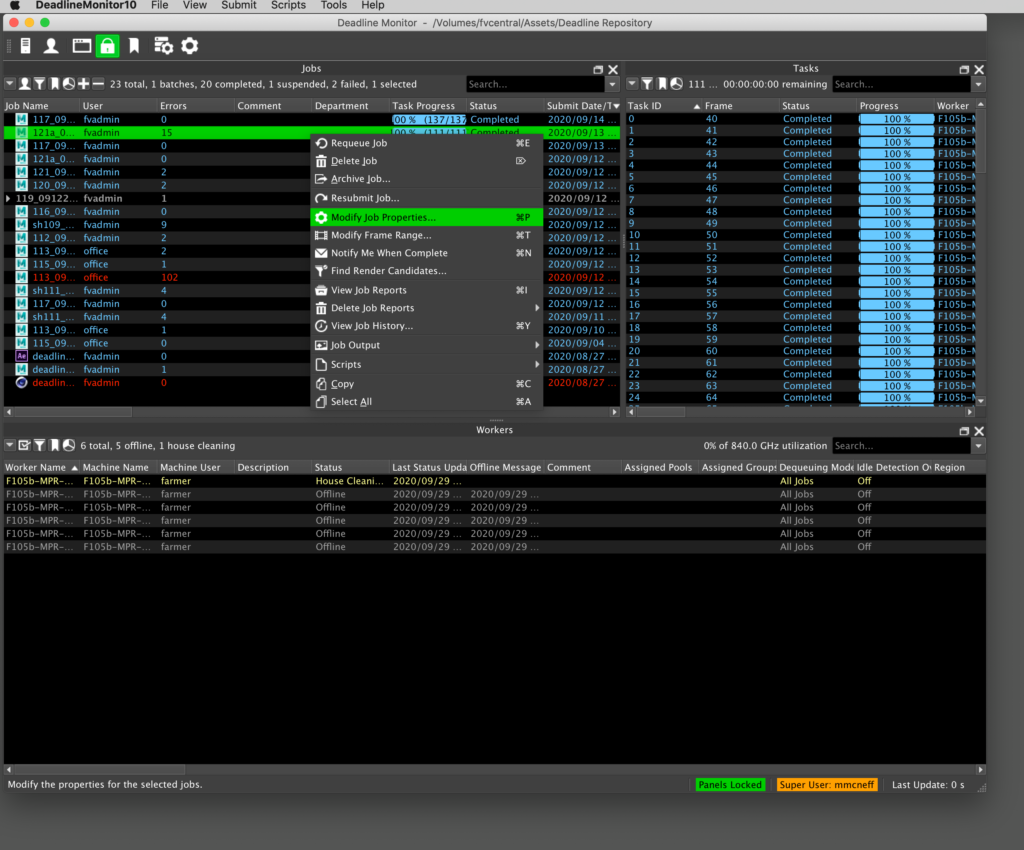
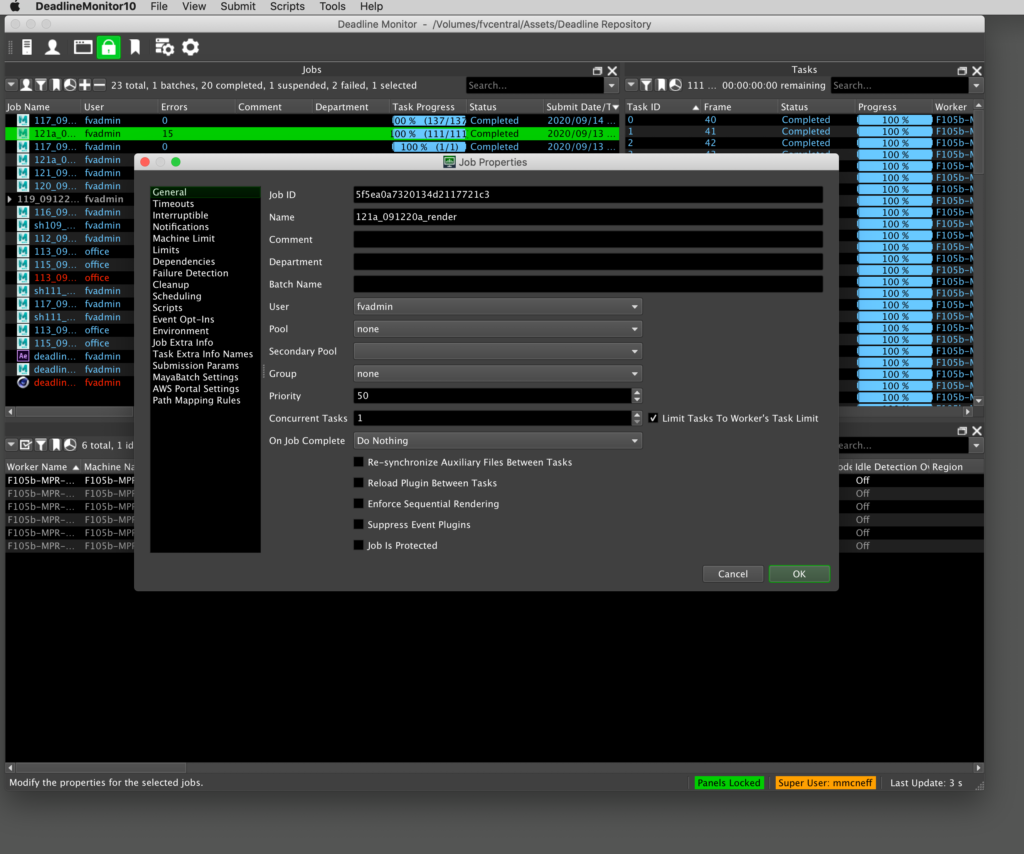
In the Job Properties window, you can make some changes to the job including adjusting the job’s priority value. Please do NOT change the priority level of your render jobs. If you would like to request that your job(s) have a higher priority level, please submit a 2 Pop Ticket.
If your job on the farm is failing, you can right-click on the job and select Suspend Job or Fail Job. You are also welcome to open a 2 Pop ticket to let staff know that a job is failing due to a problem. You should never modify another student’s job in the render queue. Here are some of the options available to you when you right-click on a job in the render queue.
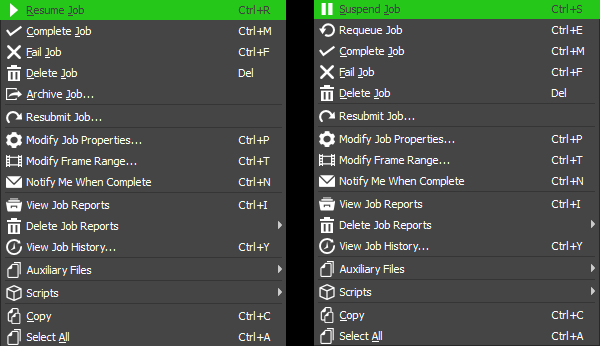
Here are a few options you might utilize for your own render farm jobs:
- Suspend Job: This pauses the job.
- Resume Job: This will unpause a job that has been suspended.
- Complete Job: This marks a job as complete. This could be useful if a job has finished rendering all of its frames, but is still listed in the queue as rendering.
- Fail Job: This will mark a job as failed and stop it from continuing to render.
- Resubmit Job: This will resubmit a job to the render queue.
- Delete Job: This will delete a job from the render queue. It is not necessary to delete your jobs from the render queue after they are finished.
If the farm is not being utilized efficiently, please submit a ticket to let the tech staff know.
Getting Support
For render farm support, submit a ticket or send an email to 2popsupport@calarts.edu.