Moving from Final Cut X to Pro Tools
You’ve locked picture. That’s great, you’re on your way. Now it’s time for intensive sound editing and design. You need to get sound and picture out of Final Cut Pro X.
You will create two files out of Final Cut Pro X:
- A Quicktime Movie optimized for working in Pro Tools
- An XML file to create an AAF using either DaVinci Resolve or X2Pro Audio Convert
Before You Begin
- In order to maintain sync throughout this process, ensure that you are using 1:30-long head leader and that your project timeline beings at 00:58:30:00.
Technical Staff have created 1:30 leader files to match various project settings. They can be found in FVCentral > Support > Leader [ProResHQ].
- To check your start time, select your project in the Browser. Click the Inspector button in the toolbar above the timeline to show the Info Inspector. Under the Info tab, click Modify. If your start time is not 00:58:30:00, adjust it here and click Ok.
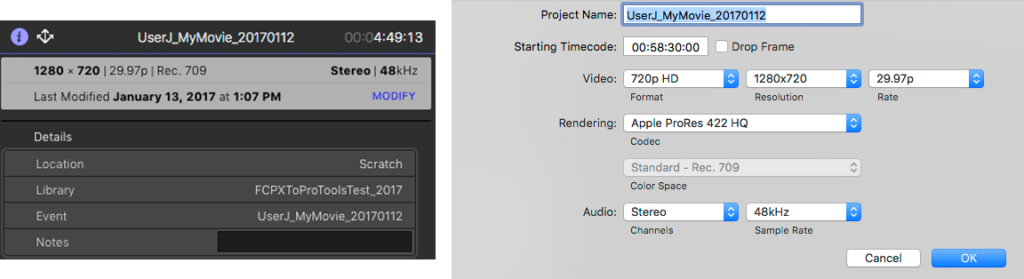
If you modified the starting timecode of your project, make sure your picture begins at 01:00:00:00. No picture or sound should be used before 01:00:00:00!
Exporting Your Image
- Select your project and go to File > Share > Export File.
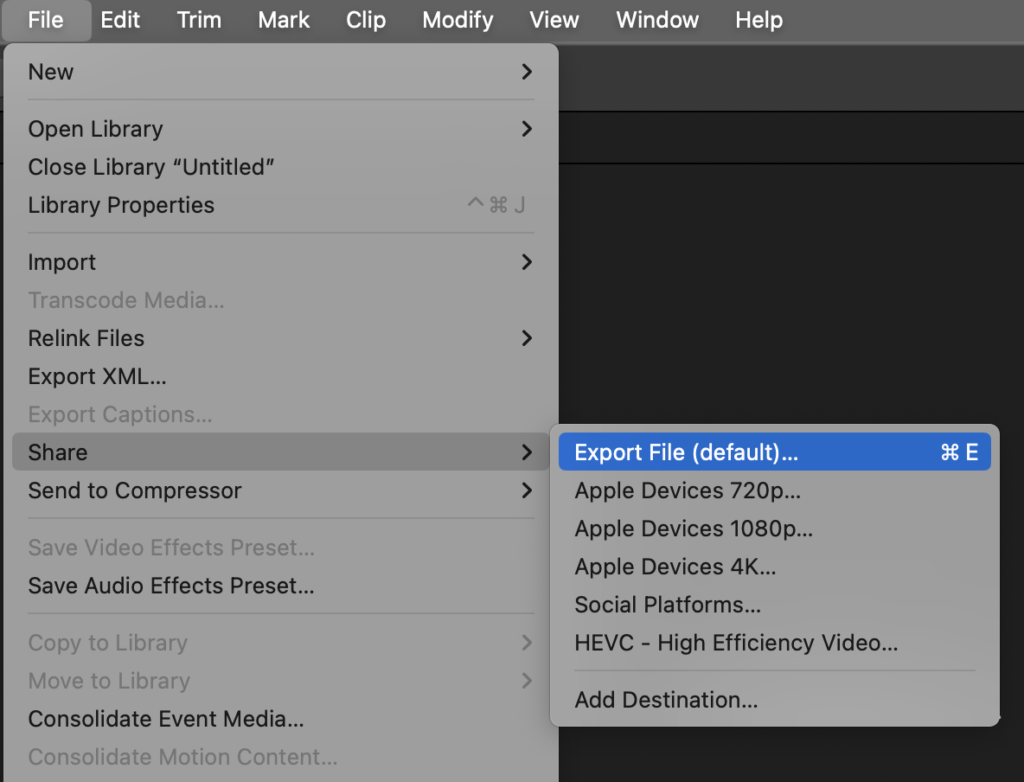
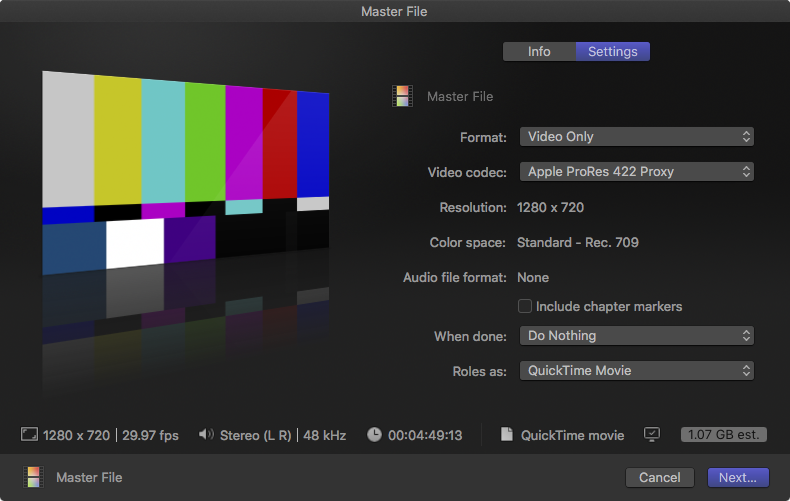
- Click on the Settings tab in the Master File dialogue box. Select Video Only under Format, Apple ProRes 422 Proxy as the Video Codec. Uncheck Include Chapter Markers. Select Do Nothing under Open With (it will then change to When Done) and Quicktime Movie under Role As. Click Next. Set the destination of your export and click Save.
Exporting Sound
An XML file has to be exported from FCPX to then create an AAF in another program, Davinci Resolve or X2Pro Audio Convert. There are a few steps to make sure all audio will be included in the AAF.
Audio effects will not carry over in the XML file to the AAF. Only edits and volume changes will be properly included in the AAF. Fades are preserved in Pro Tools as volume automation; expect to have to recreate specific choices. Panning choices do not carry over. Reversed audio clips do not carry over. Re-timed audio clips carry over only at normal speed. It is recommended to do the bulk of sound editing and design in Pro Tools, rather than FCPX.
The software used to create the AAf file must reference your FCPX library via the same filepath used when exporting the XML file. In other words, do not move your FCPX library during this process.
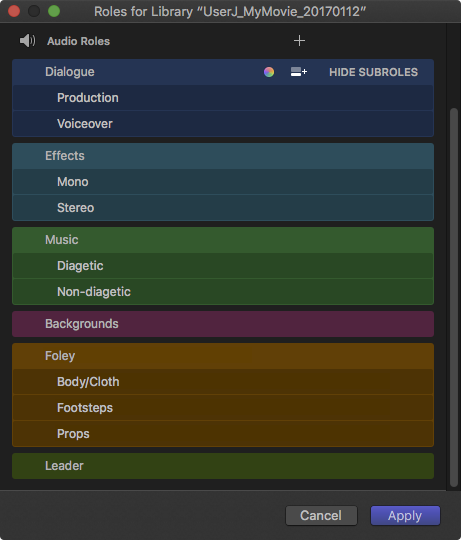
- It is recommended to group audio using Roles in FCPX. This will allow for easier organization during and after the transfer to Pro Tools. The default audio roles in FCPX are Dialogue, Music, and Effects. Additional roles and/or subroles can be created if needed (for example, if your film has multiple characters with dialogue, you can make a role for each, or a dialogue subrole for each). Audio roles effectively translate into track names and clip placement in those tracks in Pro Tools. This will make things much easier when moving these clips into the FV Edit Template tracks.
- To make additional roles, go to Modify > Edit Roles…. In the Role Editor window, click on the plus button next to Audio Roles. Name the new audio role and repeat as necessary. To add subroles, hover to the right of the roles and click on Show Subroles. Then click on the small box with a plus sign to add a subrole. When done, click Ok.
Don’t forget to make a new role for the head leader!
- In the timeline, select all the audio clips that need to be assigned to a specific role. Click on the Info tab in the Info Inspector and choose a role to assign them to. Be sure to assign your leader audio to its role.
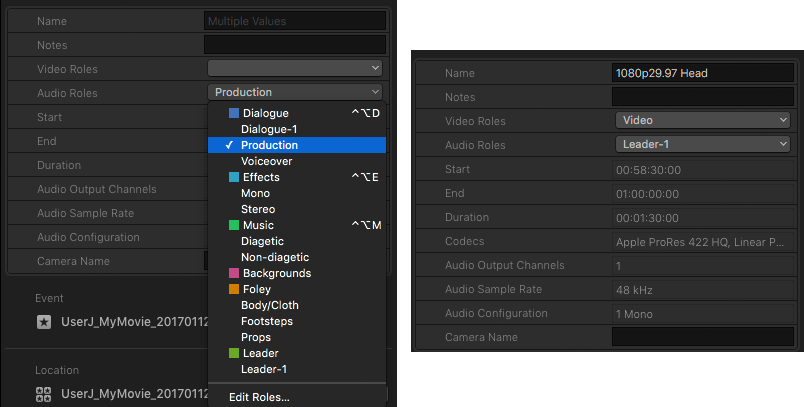
If your video clips have audio attached to them, be sure to assign audio roles to them as well!
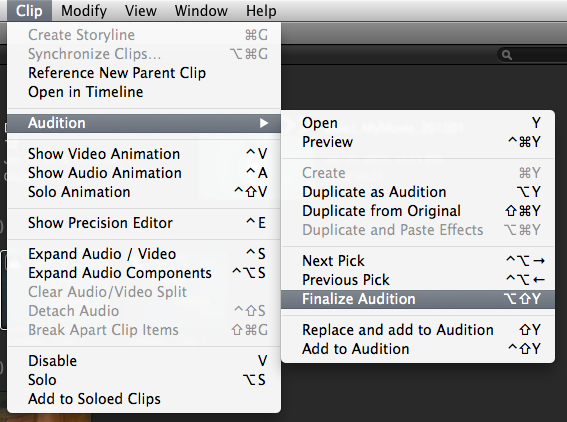
- Make sure to finalize any auditioned clips. If clips are left as auditioned, they will not transfer correctly in the XML file. To finalize auditioned clips, select the audition in the timeline and go to Clip > Audition > Finalize Audition.
You can double check that all your auditioned clips are finalized by selecting all clips and when you go to Clip > Audition > Finalize Audition, Finalize Audition is greyed out.
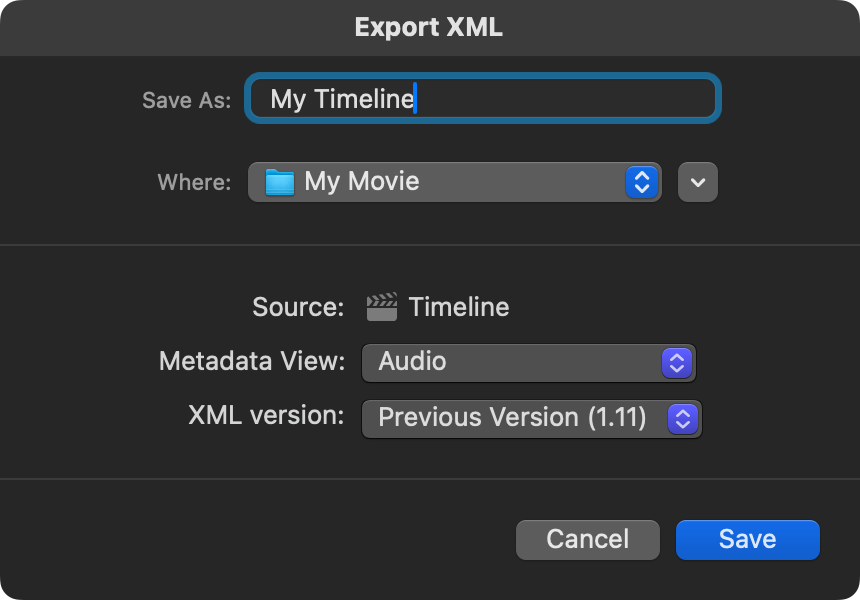
- Now it’s time to export the XML file. Select the project. Go to File > Export XML…. The Export XML dialogue box will open. Set the destination and choose the General option for Metadata view. You must manually change the XML version to the previous version 1.11 before exporting. Then click Save.
Do not move your FCPX library after the XML export and before the conversion process. The XML file uses the specific filepath associated with your FCPX library and connected media at the time of XML export; if the filepaths do not match, Davinci and X2Pro will be unable to find your media, even if it is contained entirely in your FCPX library.
Making an AAF in DaVinci Resolve (Method 1)
- Create a new DaVinci Resolve project. To import your XML, go to File > Import > Timeline and select your XML file that you exported from FCPX

- In the import settings, ensure that Timeline start timecode is set to 00:58:30:00
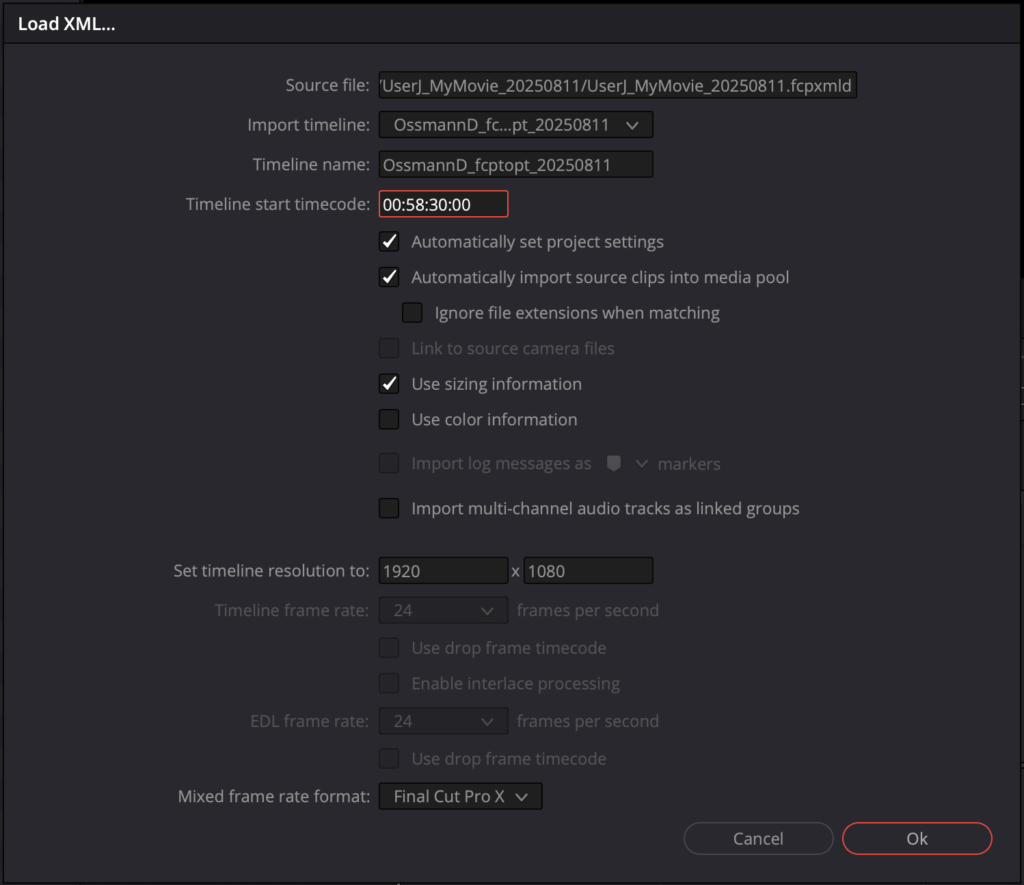
- Edit the imported timeline’s name to reflect this file is for AAF use only. You won’t be able to change this name in the export process. example: UserJ_MyMovie_YYYYMMDD_Resolution_FrameRate_AAF.

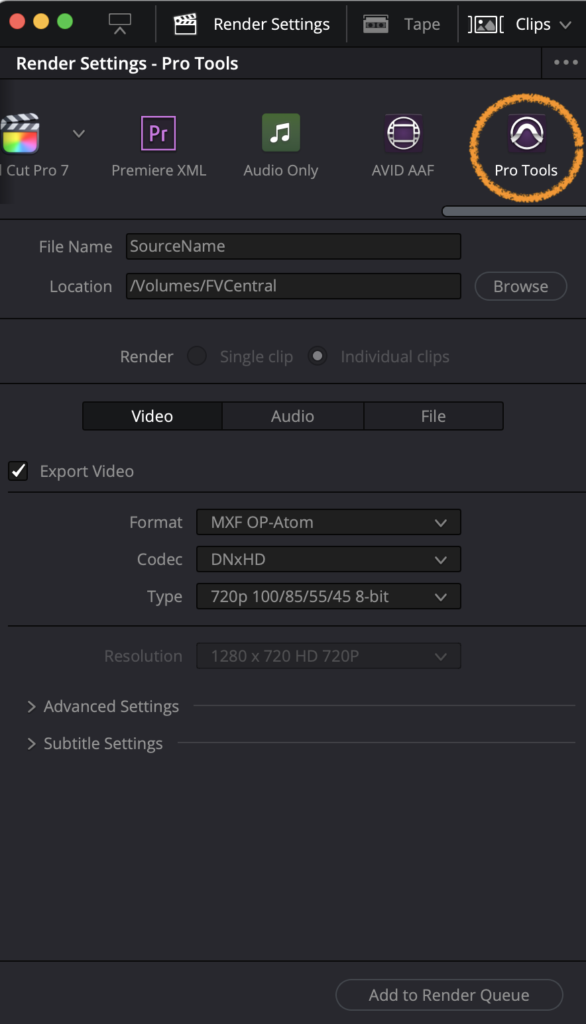
- Go to the Deliver Tab. In the Render Settings panel, scroll all the way right and select Pro Tools.
- Set the export location to a place you have easy access to, or simply within your Pro Tools Project folder, if you’ve already created it. Make sure you deselect Export Video.
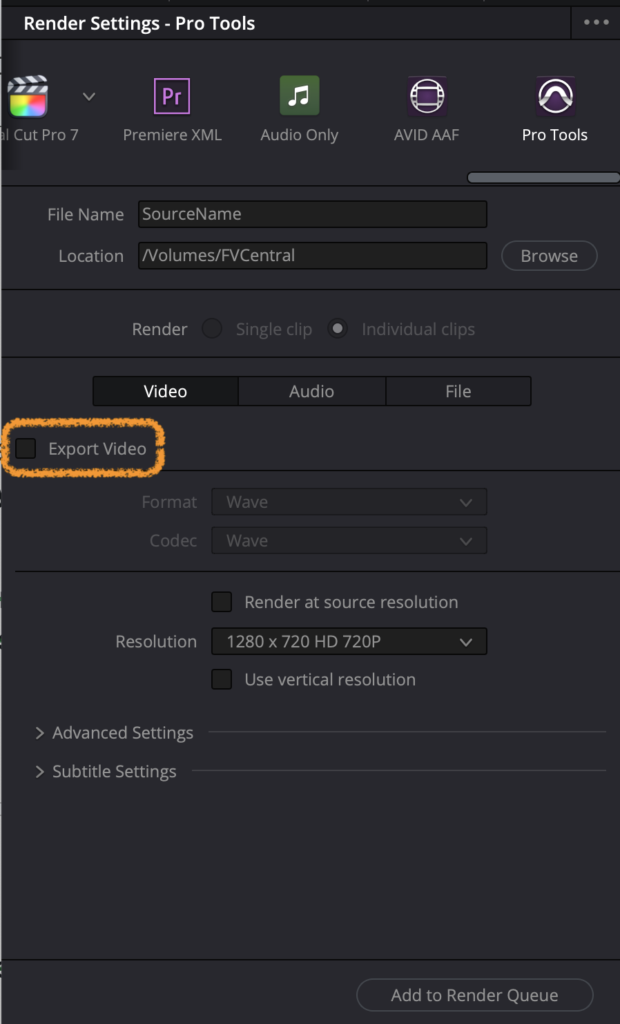
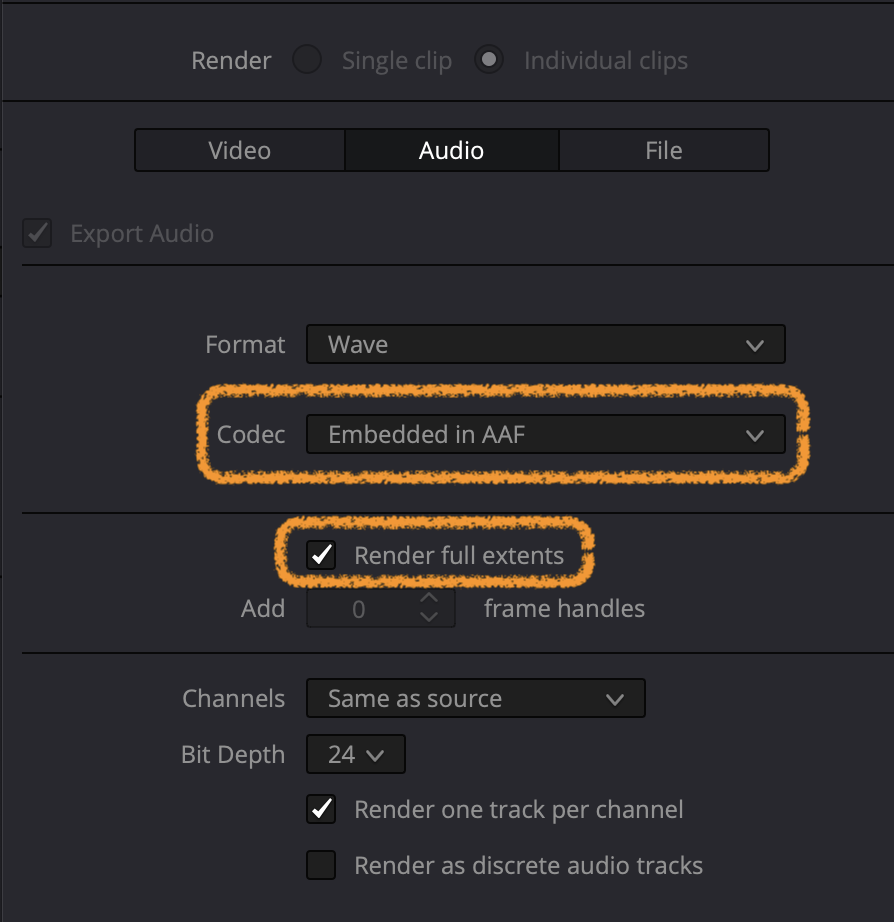
6. Set your audio export settings to the following:
- Format: Wave
- Codec: Embedded in AAF. And that render one track per channel is selected
- Click Render full extents
- This will copy over each complete audio file; this will give you handles for the full length of each original audio file when you’re in Pro Tools.
- Select Render one track per channel
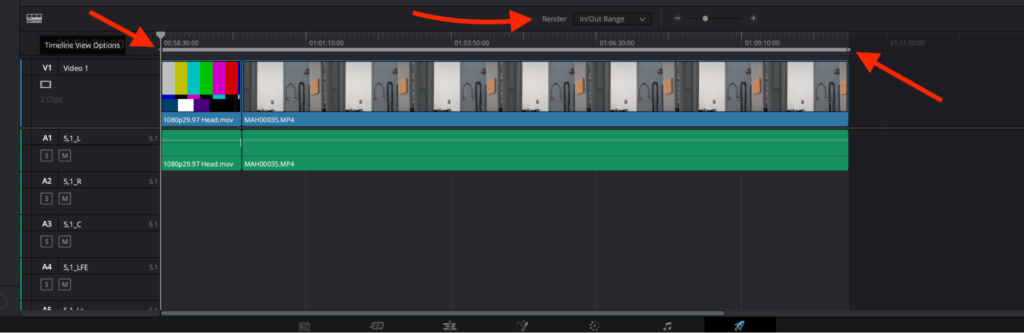
- Above the timeline, make sure you have In/Out Range selected as your Render range (not Entire Timeline). Then set the In Point to the very beginning of the project (including the head leader), and the Out Point to the end of the project (including tail leader if applicable).
- Click Add to Render Queue at the bottom of the settings window. In the Render Queue, select the Job, then click Render All. Resolve should export an AAF file to the location you selected.
Making an AAF in X2Pro Audio Convert (Method 2)
- Launch X2Pro Audio Convert. Go to X2Pro Audio Convert > Preferences.
X2Pro Audio Convert has been installed on one computer in E104. Plan accordingly.
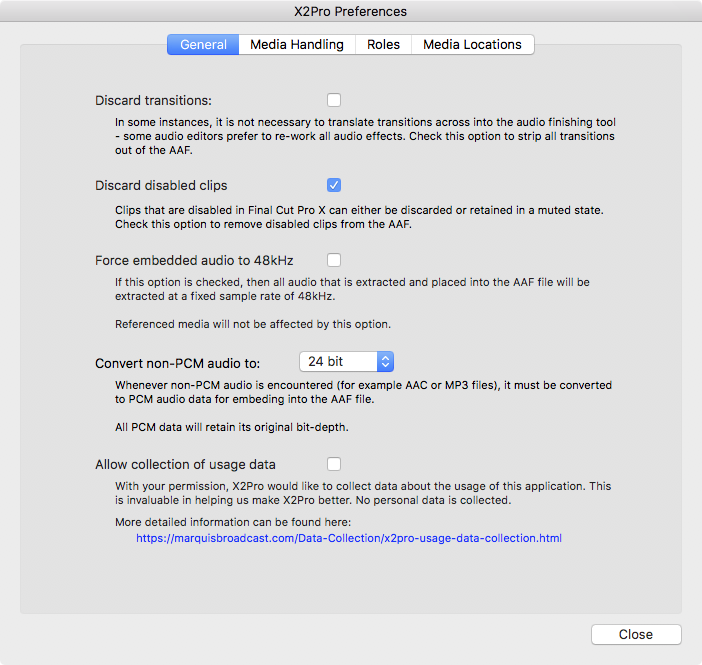
- In the General tab, make sure Discard disabled clips is checked and change the Convert non-PCM audio to 24 bit.
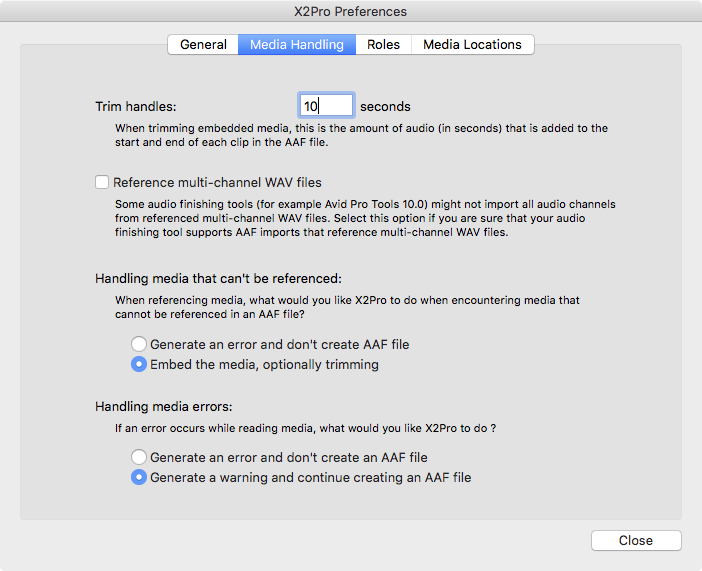
- In the Media Handling tab, change the trim handles to 10 seconds. Make sure Reference multi-channel WAV files is unchecked and Embed media, optionally trimming is checked under Handling media that can’t be referenced. Under Handling media errors, check Generate a warning and continue creating an AAF file.
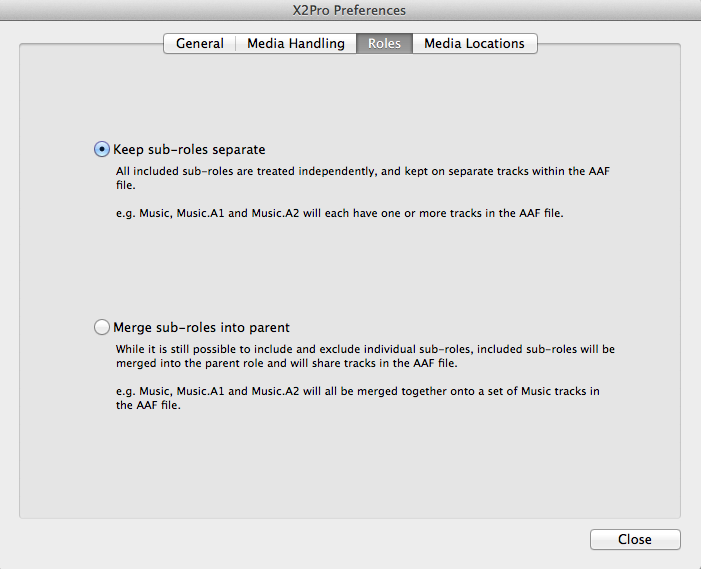
- In the Roles tab, make sure Keep sub-roles separate is selected.
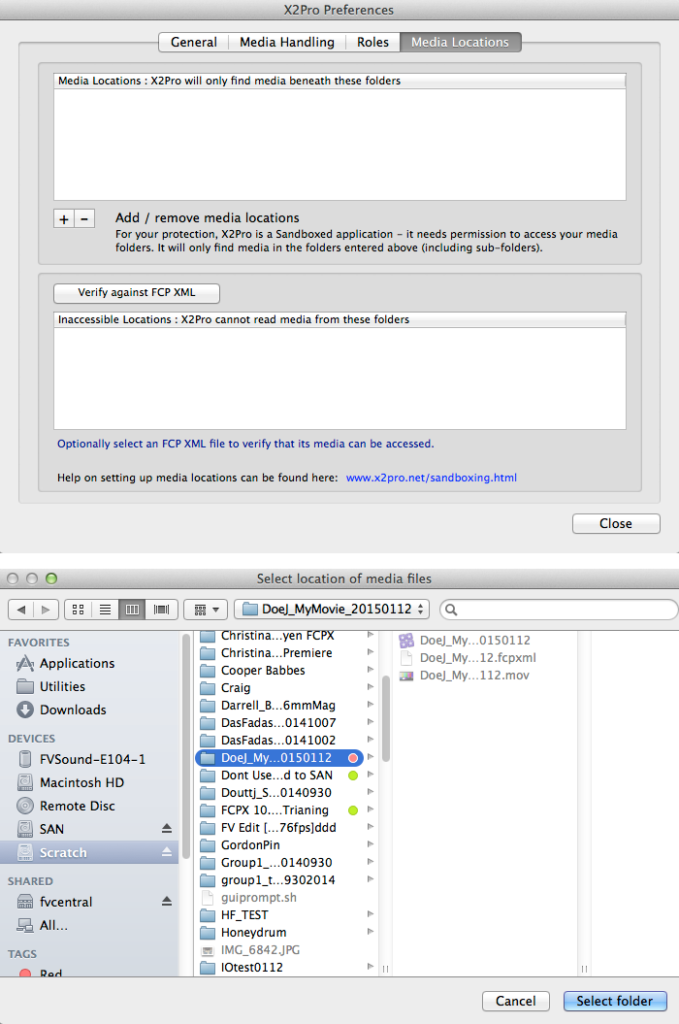
- In the Media Locations tab, the media location has to be added. Click on the + button and find the folder with your FCPX library. Click Select Folder. This will give X2Pro Audio Convert access to the audio files. Click Close.
- In the X2Pro Audio Convert dialogue box, select the source by clicking Browse. Find the XML file and click Open. Set a destination for the AAF. Under the settings, click Trim embedded audio.

- To check what Roles are in the XML, click on Roles. A side menu will pop out with a list of the Roles that will be carried over to the AAF. To close this list, click on Roles again.
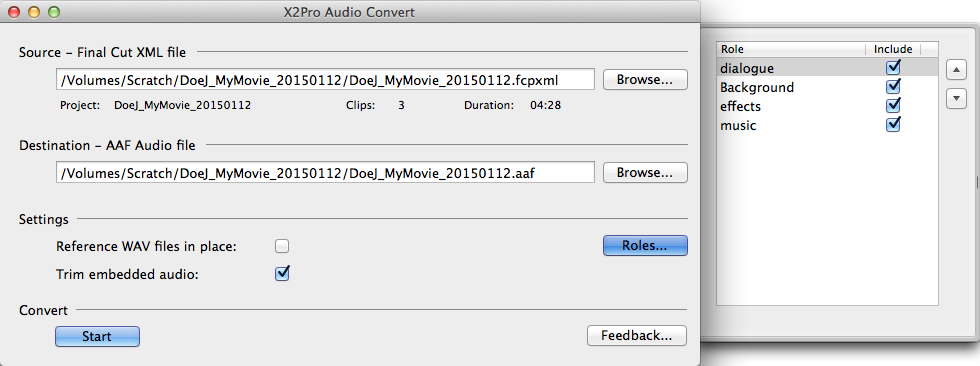
- To convert the XML to AAF, click Start.
A window listing the details or errors during the conversion process will pop up. It may be useful to copy and paste or screenshot the details in case you need to return to FCPX and make changes.
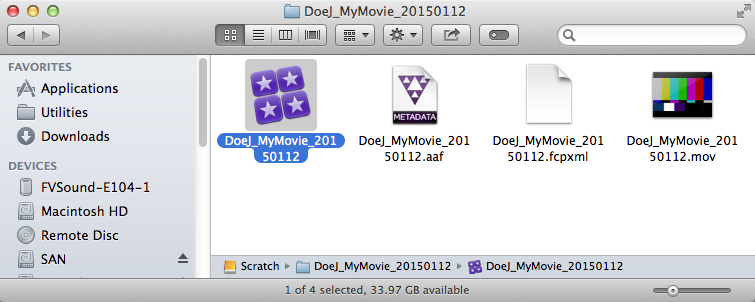
- X2Pro will create an AAF in the folder destination.
Importing AAF into Pro Tools
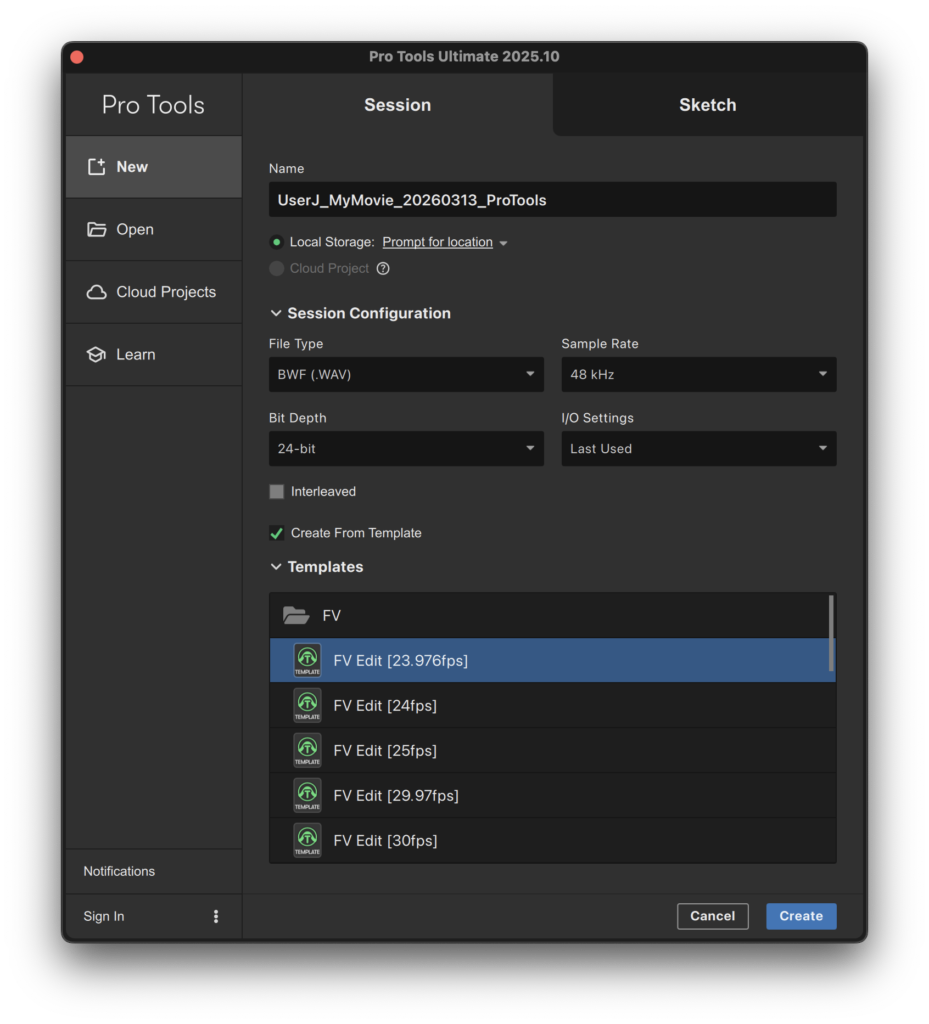
- Launch Pro Tools. Check Create from Template. Choose the FV Edit template which matches your project frame rate.
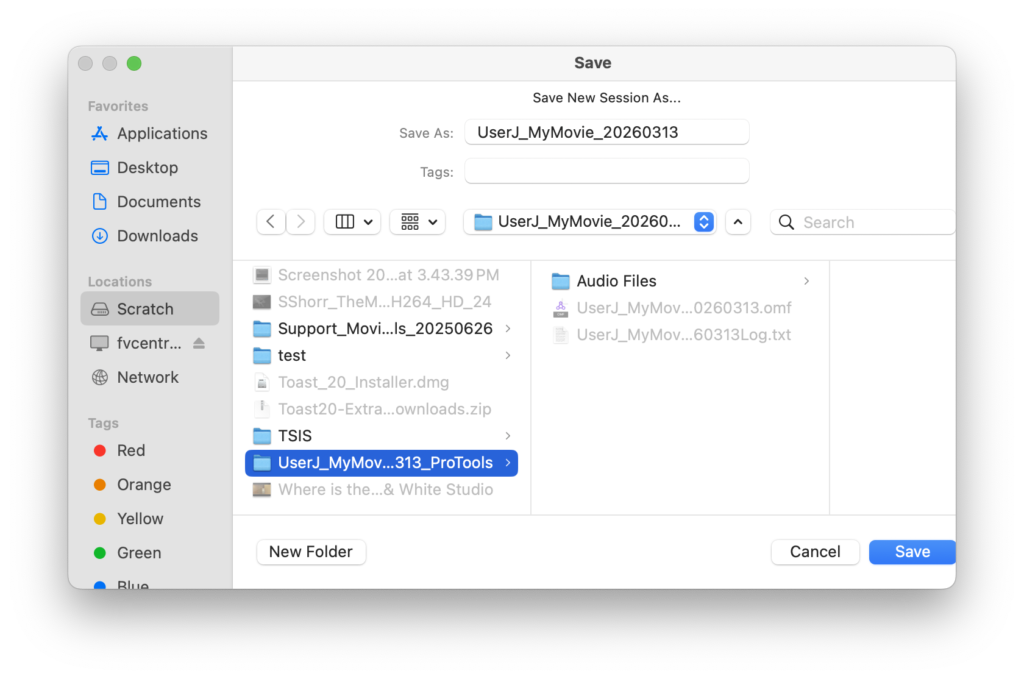
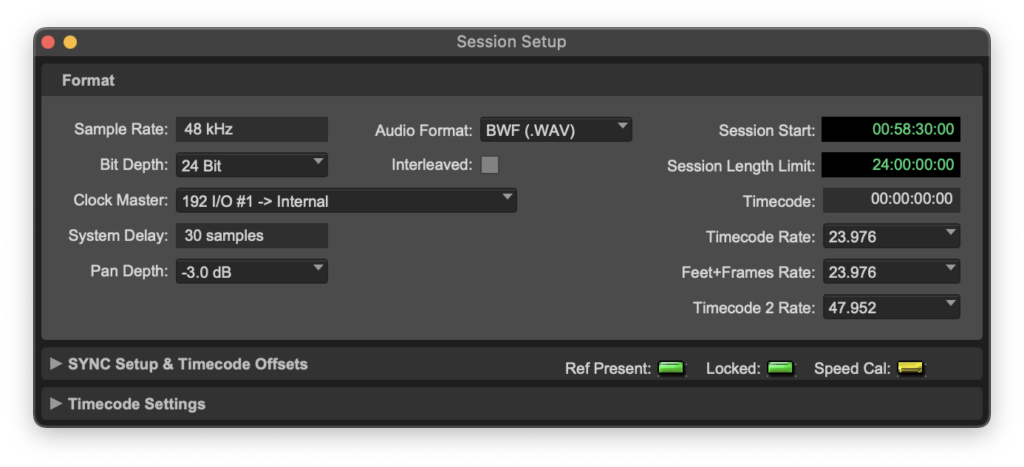
- Ensure that File Type is set to BWF (.WAV), Sample Rate is set to 48kHz, and Bit Depth is set to 24 Bit. Leave I/O settings on Last Used. Make sure interleaved remains unchecked and Prompt for Location is checked. Click Create and select a destination for your Pro Tools Session folder, then click Save.
Be sure to save your session onto the Scratch drive or your external drive. Remember, home folders are deleted at log out!
- The Edit window of your currently blank Pro Tools session will come up.

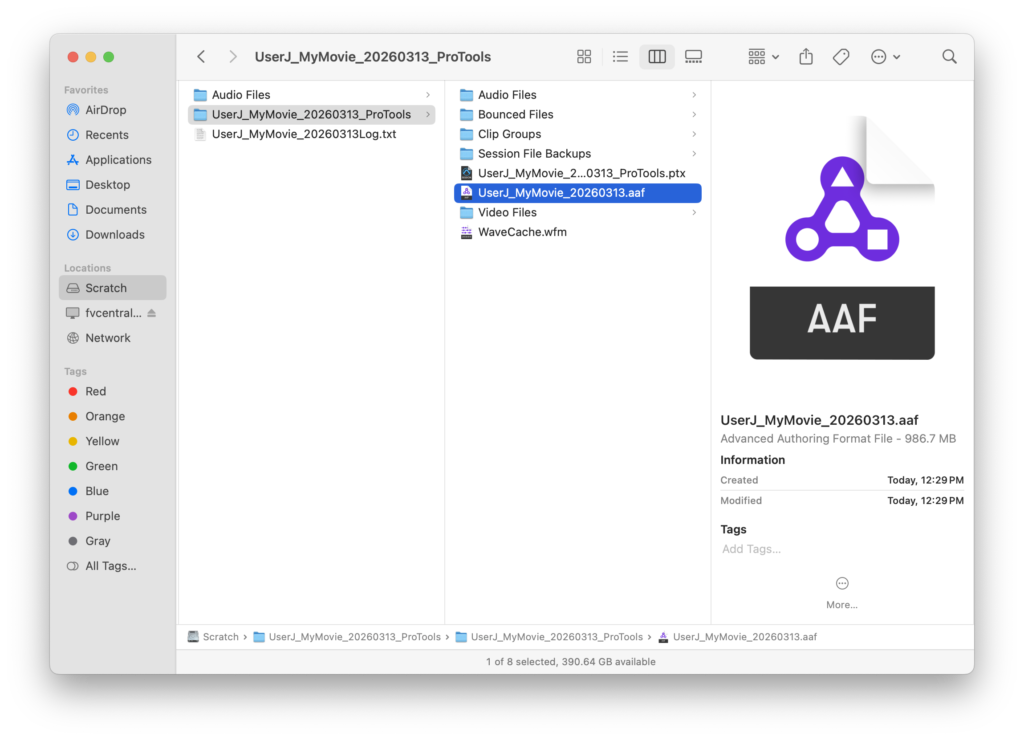
- Before you import your AAF file, copy it from the location you specified during the export into your newly created Pro Tools Session Folder. This ensures that all the media for your Pro Tools Session is always in the same location.
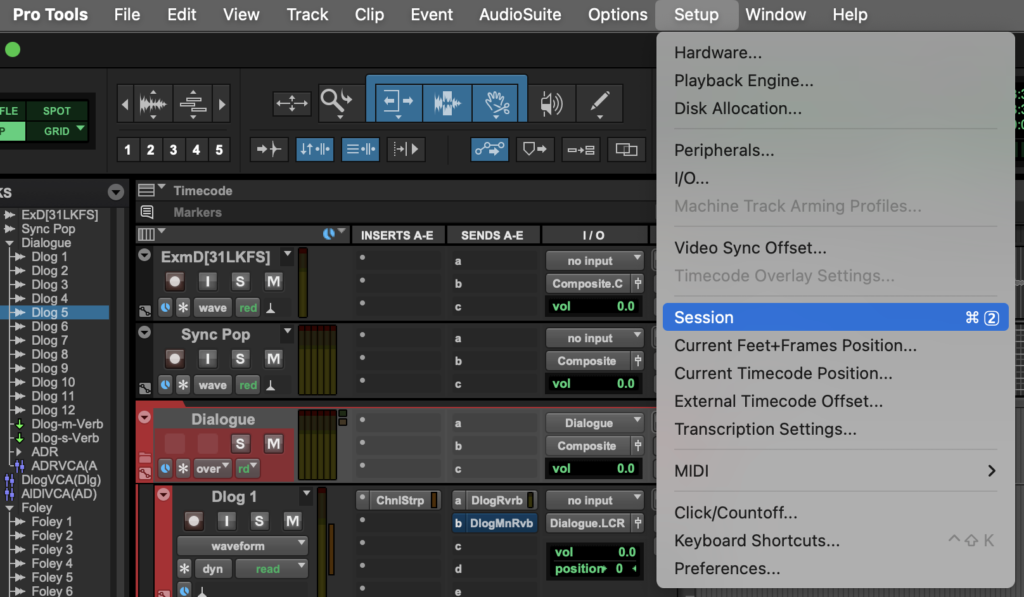
- Now go to Setup > Session and check that the Session Start reads 00:58:30:00 and the Timecode Rate matches your project frame rate. Then close the Session Setup window.
- Click on the name of the Sync Pop track to select it. This way, the imported tracks from your AAF file will appear directly between Sync Pop and Dlog 1.
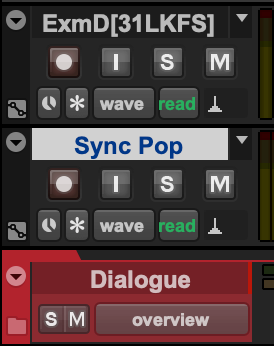
Imported tracks appear directly below whatever track you have selected prior to import. If you need to move a track, click on its name and drag it to the desired location.
- Now to import your copied AAF file. Go to File > Import > Session Data. Select the AAF file from your Pro Tools Session Folder. Click Open. You may get a message saying that the source start time is earlier than the current session start time. This is not a problem as long as your Premiere timeline used the standard leader beginning at 00:58:30:00.

- The Import Session Data window will open. Review Source Properties. Then Set Timecode Mapping Options to Maintain absolute timecode values, unless it is grayed out, in which case, select Maintain relative timecode values. Note that maintaining relative values will only work properly if you are using 1:30-long head leader. Set Audio Media Options to Force to target session format.
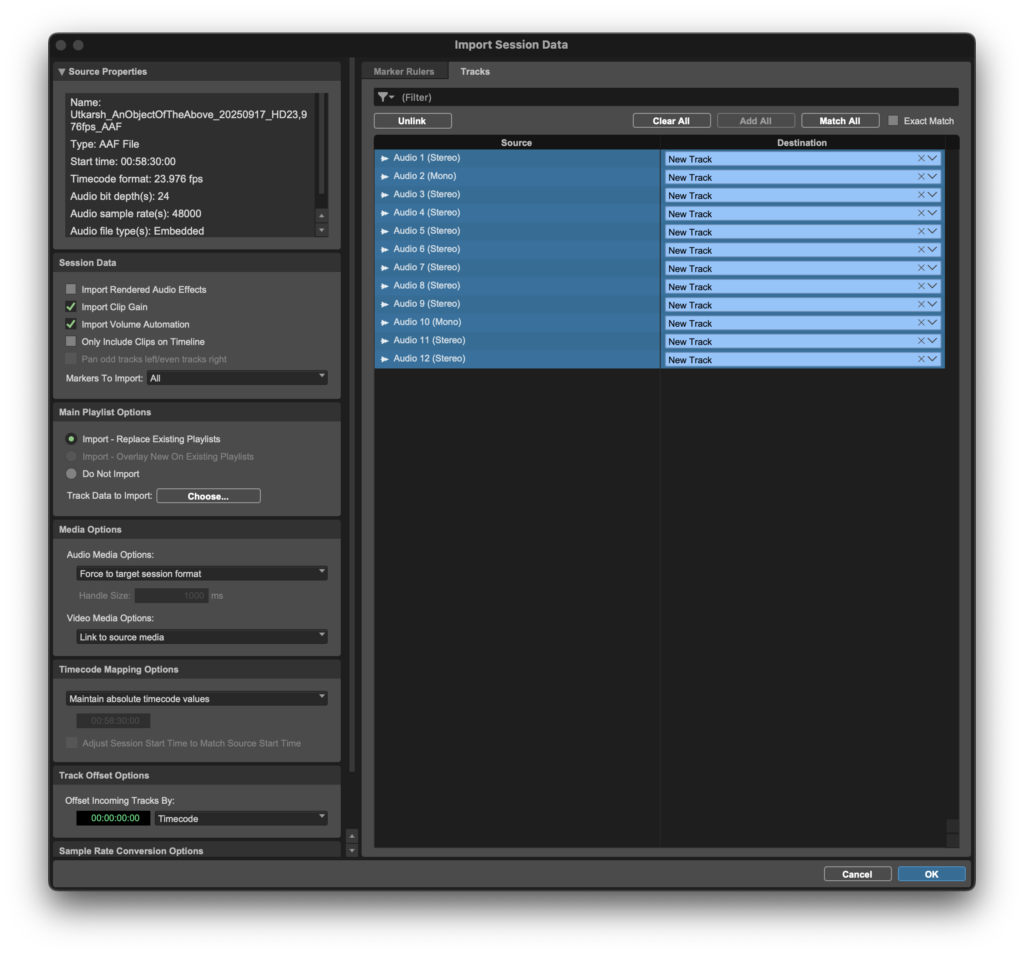
- If your AAF contains a video track, click on said Video track under Source to deselect it – the Destination will change to (none). Then under Session Data, check Import Clip Gain and Import Volume Automation. Leave Import Rendered Audio Effects and Only Include Clips on Timeline unchecked. Then click Ok.
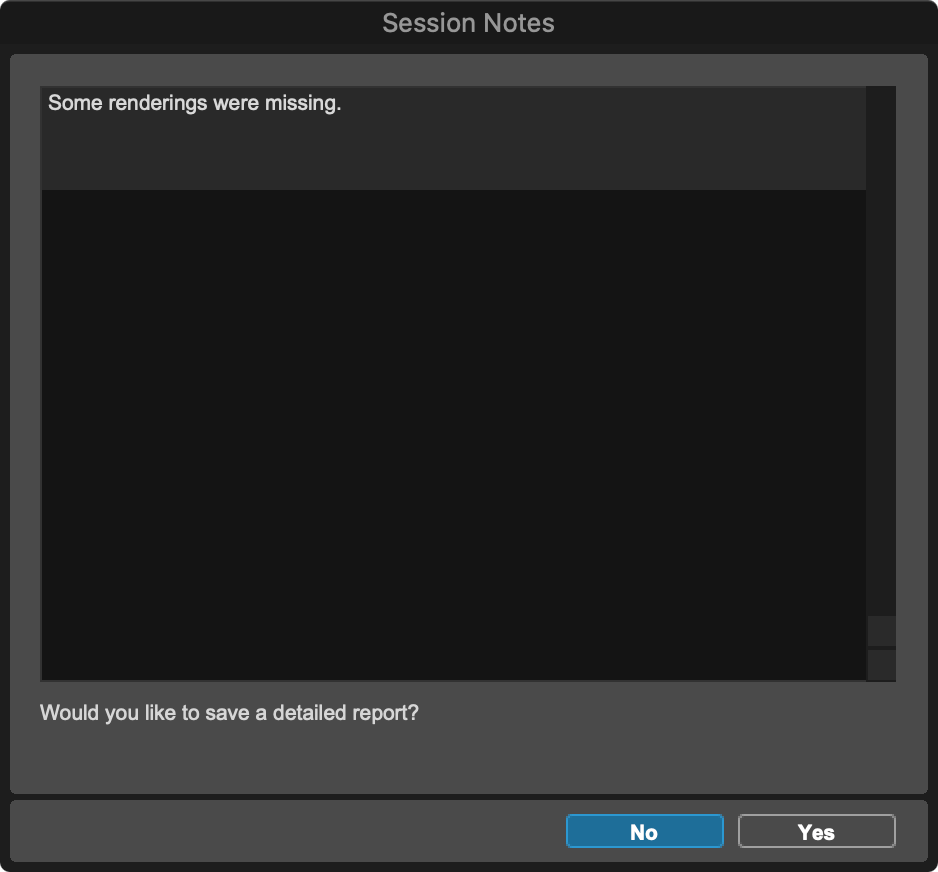
- A Session Notes window may open saying “Some effects were ignored” and “Pro Tools does not support AAF/OMF references to multichannel audio files.” This is fine; audio effects have already been rendered into new clips and any multichannel audio files you exported have been split into mono. Do not save a detailed report; click No.
- Your Pro Tools Session Edit window will now display your imported tracks and clips. Pro Tools will link the clips to the media in the AAF and then draw their waveforms. This may take several minutes to complete, depending on the size of the project.
You may see a window saying that there are missing files and asking how you would like to relink them. Sometimes, AAFs from Premiere will try to bring over non-existent audio files named after video clips. Pro Tools is obviously unable to locate these non-existent files, so you can select Skip All.
Importing Video into Pro Tools
- In the Finder, locate the video reference file that you exported from Premiere Pro. Copy it into the Video Files folder in your Pro Tools session folder.
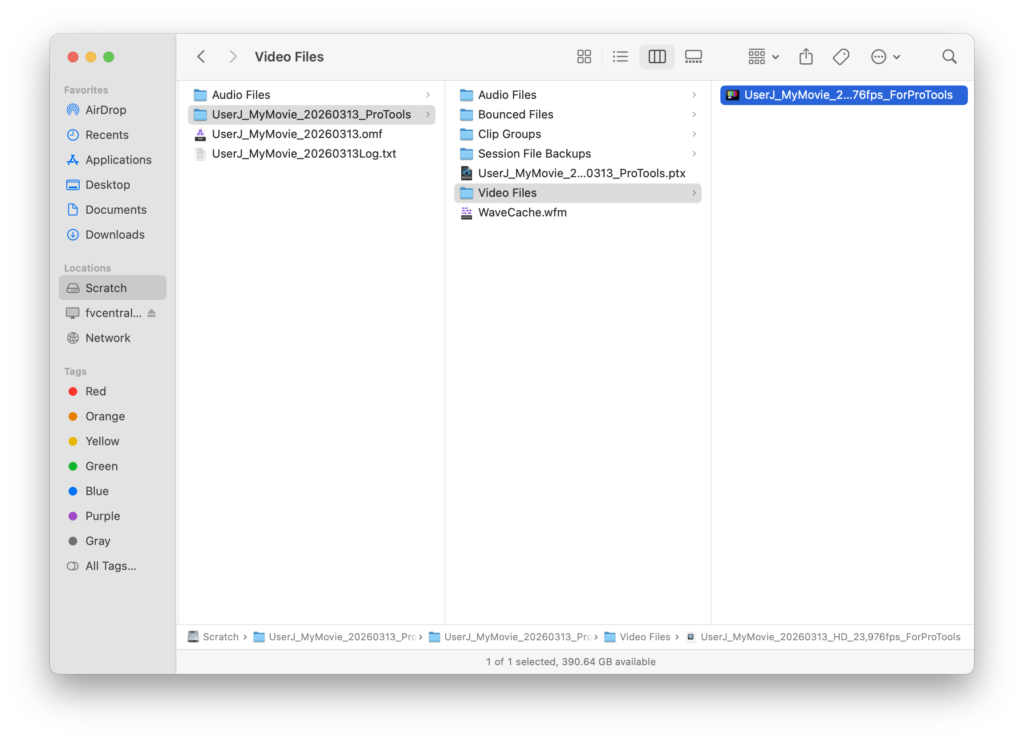
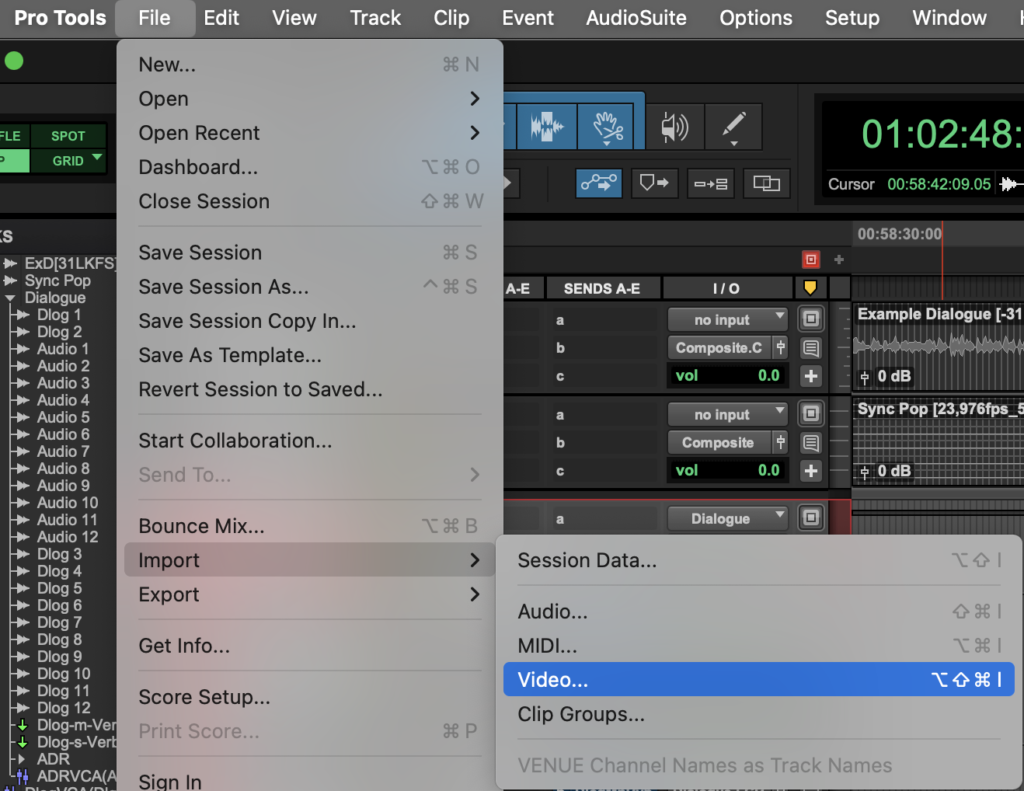
- In Pro Tools, go to File > Import > Video and select the video reference file that you just copied into the Video Files folder in your Pro Tools session folder. Click Open.
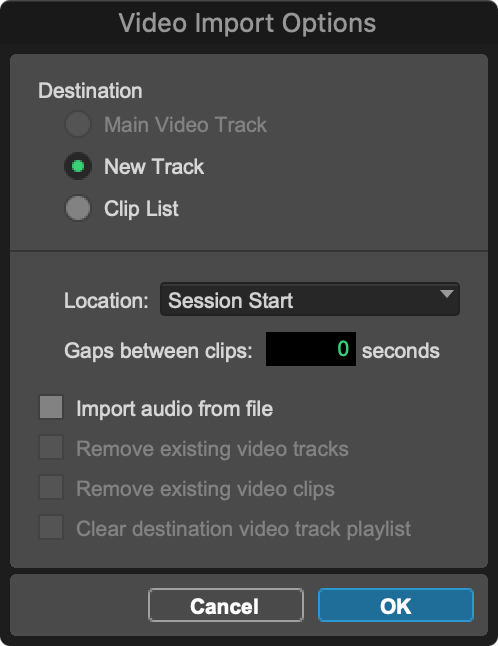
- The Video Import Option window will open. Ensure the Destination is set to New Track. Location is set to Session Start, Import audio from file is unchecked. Click Ok.
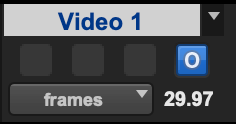
- Your video will appear in the Pro Tools Session Timeline. If the frame rate on the video track is red, your video and session timecode rate do not match and may not sync correctly. Check your session timecode by going to Setup > Session. When the video frame rate and session timecode rate match, the video frame rate will turn white.
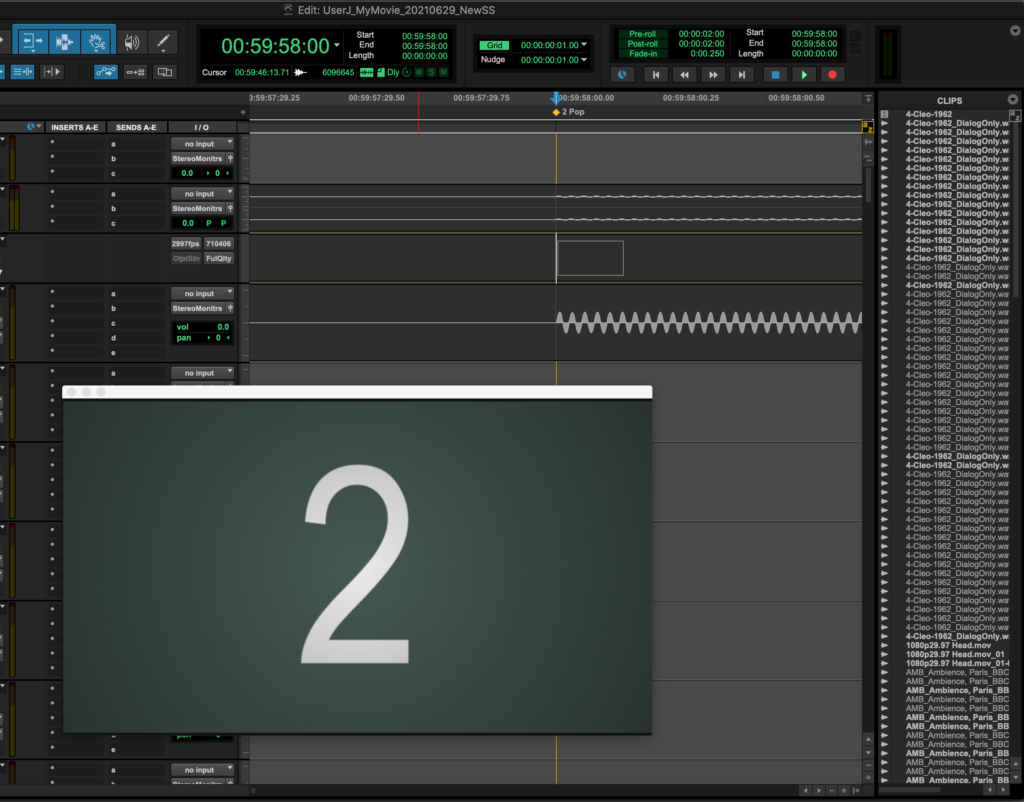
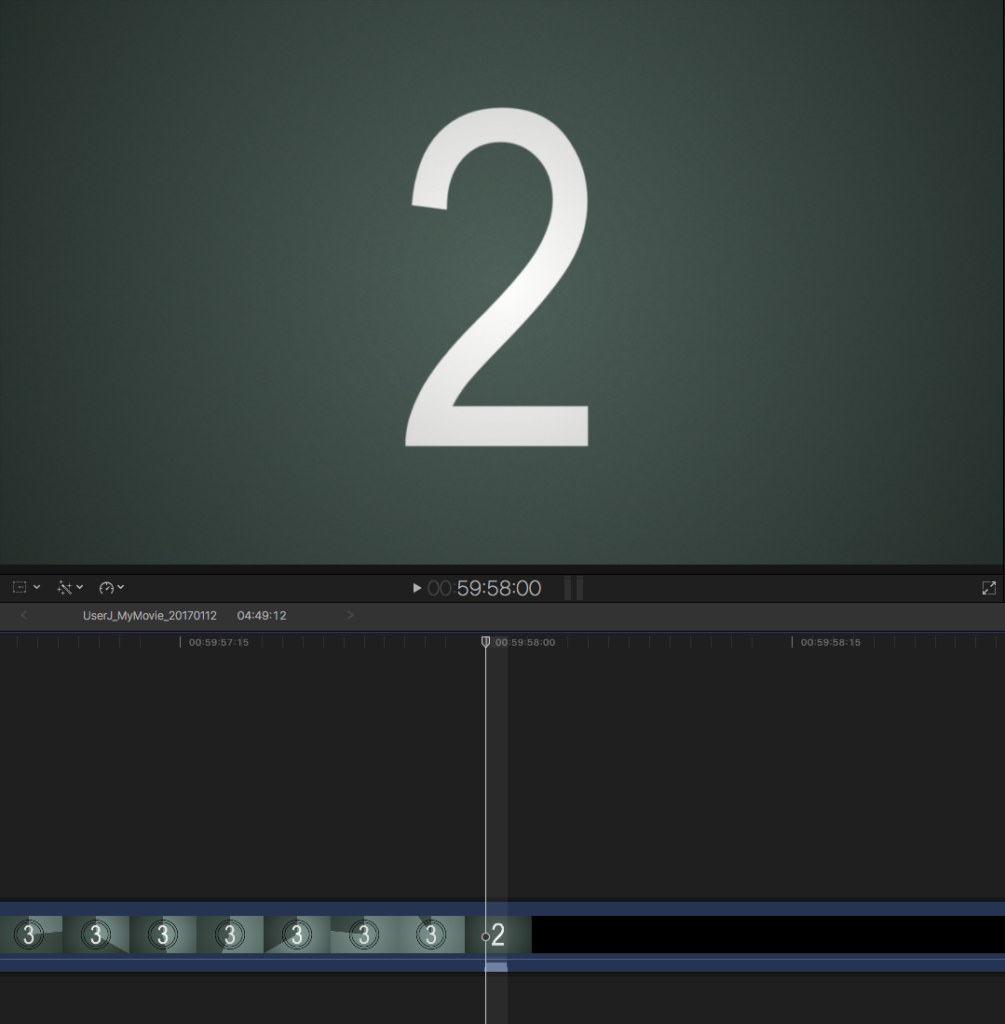
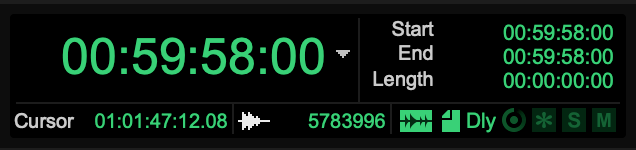
- To ensure sync, you must check that the 2 frame of your video leader lines up exactly with the 2 pop from your AAF. Click on the Main Counter and type in 00595800. Press Enter.
You can also get the 2 pop by simply clicking on the yellow diamond 2 Pop marker.
- Zoom into the waveform of the leader. If the 2 frame and the sync pop from the leader align, you’re in business.