Search Knowledge Base by Keyword
Moving from DaVinci Resolve to Pro Tools
You’ve locked picture. That’s great, you’re on your way! Now it’s time for intensive sound editing and design. You need to get sound and picture out of DaVinci Resolve.
You will export two files out of DaVinci Resolve:
- A ProRes 422 Proxy movie file optimized for working in Pro Tools
- An AAF file, or Advanced Authoring Format, which is a multimedia file format that allows the interchange of media and editorial metadata between compliant applications such as DaVinci Resolve and Pro Tools
Luckily, Davinci makes this process simple, and you only have to go through one batch of exporting to make these two files.
Before You Begin
In order to maintain sync throughout this process, ensure that you are using 1:30-long head leader and that your timeline starts at timecode 00:58:30:00. Your leader also must include a 2 pop at 00:59:58:00.
Technical Staff have created 1:30 leader files to match various project settings. They can be found at FVCentral > Support > Leader [ProResHQ].
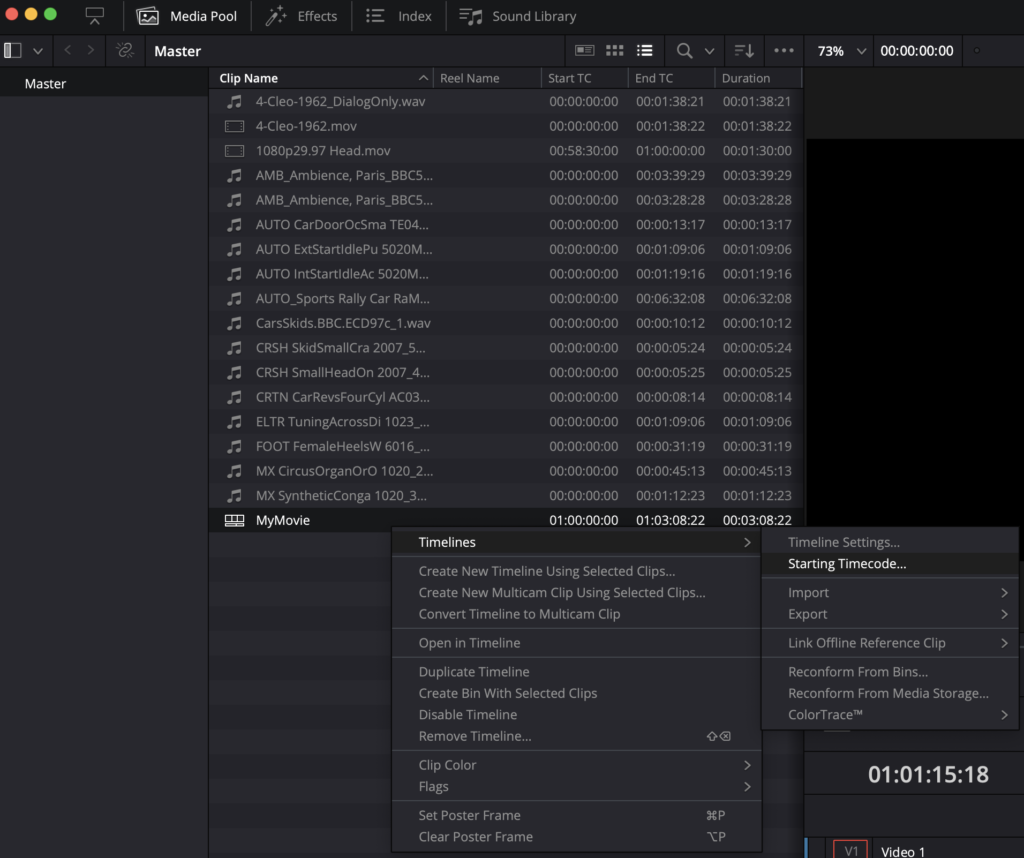
To check your start time, go to your Media Pool and right click on your timeline. In the panel menu that opens, choose Timelines > and then Starting Timecode.
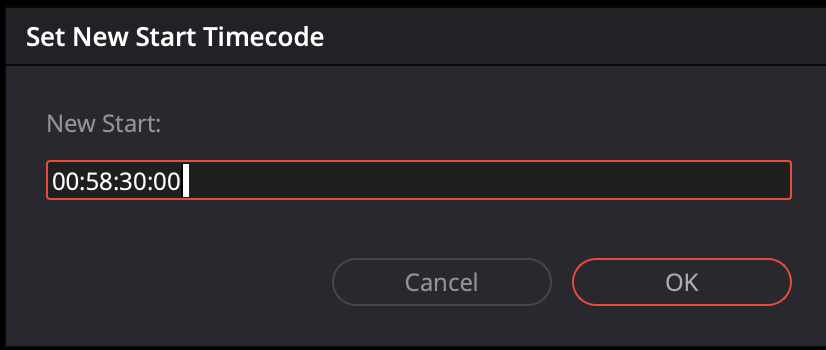
In the Set New Timecode window that appears, enter 00:58:30:00. Click Ok.
If you modified the starting timecode of your project, make sure your picture begins at 01:00:00:00. No picture or sound should be before 01:00:00:00!
Exporting for Pro Tools
To export from DaVinci Resolve to Pro Tools, you need export an AAF file which contains all of your audio elements and a separate video file.
How to export the AAF (audio)
- Duplicate your Main Timeline by right clicking and selecting Duplicate.
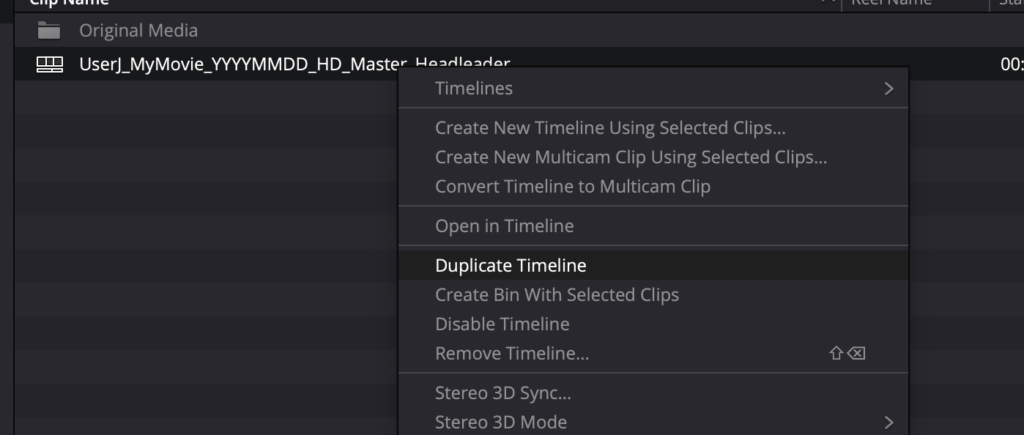
a. Customize the copied file’s name to reflect this file is for AAF use only. You won’t be able to change this name in the export process. example: UserJ_MyMovie_YYYYMMDD_Resolution_FrameRate_AAF.
b. With the AAF Timeline open, Go to the Deliver Tab. In the Render Settings panel, scroll all the way right and select Pro Tools.

a. Set the export location to a place you have easy access to, or simply within your Pro Tools Project folder, if you’ve already created it.
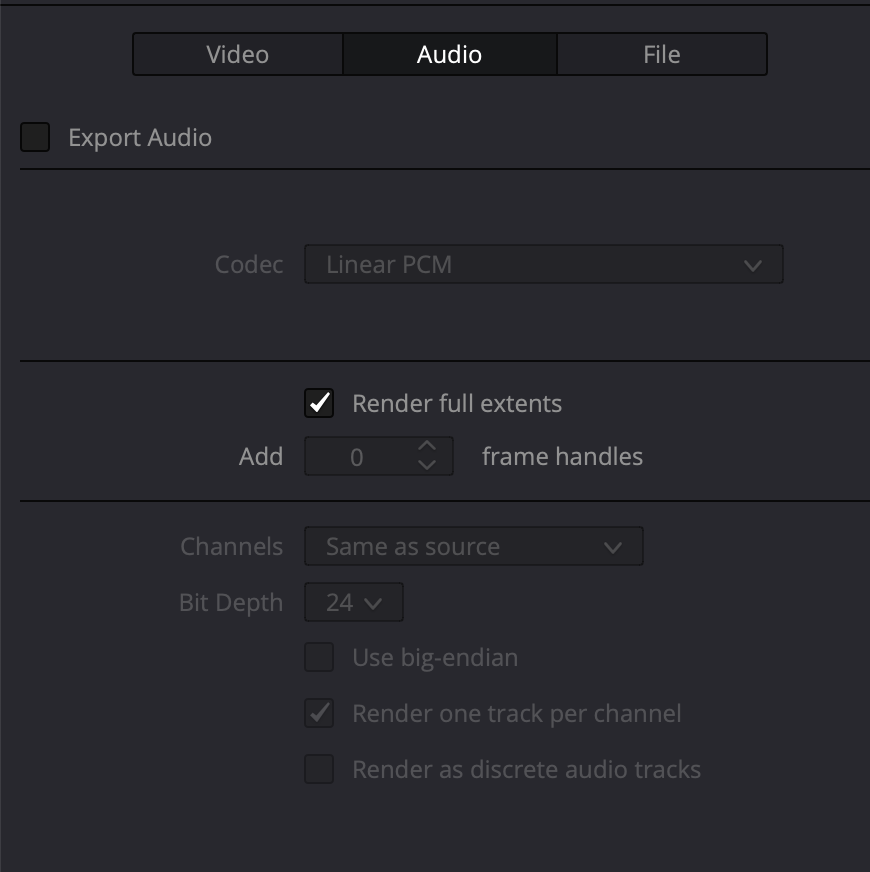
b. Make sure you deselect Export Video.
c. Set your audio export settings to the following:
- Format: Wave
- Codec: Embedded in AAF. And that render one track per channel is selected
- Click Render full extents
- This will copy over each complete audio file; this will give you handles for the full length of each original audio file when you’re in Pro Tools.
- Select Render one track per channel

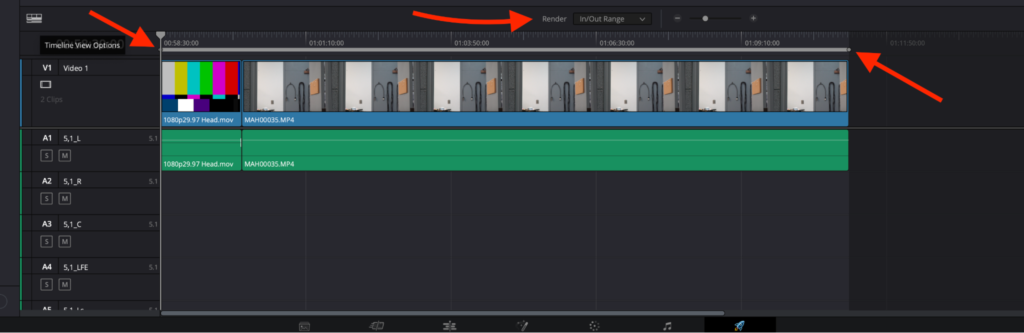
d. Above the timeline, make sure you have In/Out Range selected as your Render range (not Entire Timeline). Then set the In Point to the very beginning of the project (including the head leader), and the Out Point to the end of the project (including tail leader if applicable).
e. Click Add to Render Queue at the bottom of the settings window. In the Render Queue, select the Job, then click Render All.
f. Resolve should export an AAF file to the location you selected.
How to export the video file
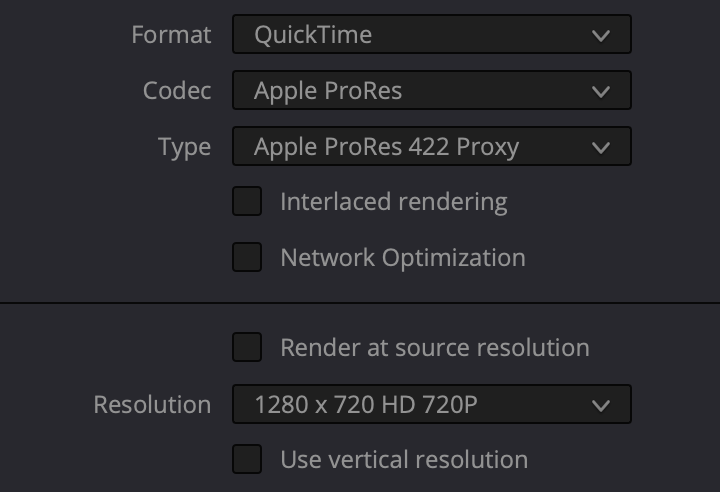
- Set the export’s video settings to match below.
- Customize Frame Rate to the project’s frame rate
- Format: QuickTime
- Codec: Apple ProRes
- Type: Apple ProRes 422 Proxy
- Resolution: 1280×720 (HD), regardless of your film’s actual resolution.
Pro Tools can be very picky about video. The frame rate is an important factor for maintaining sync, and must match your final delivered framerate. However, for editing purposes, you will avoid most problems by exporting from Resolve as 1280×720, and Resolve will add letter/pillarboxing if your film isn’t already 16:9.
2. Deselect Audio
Importing into Pro Tools
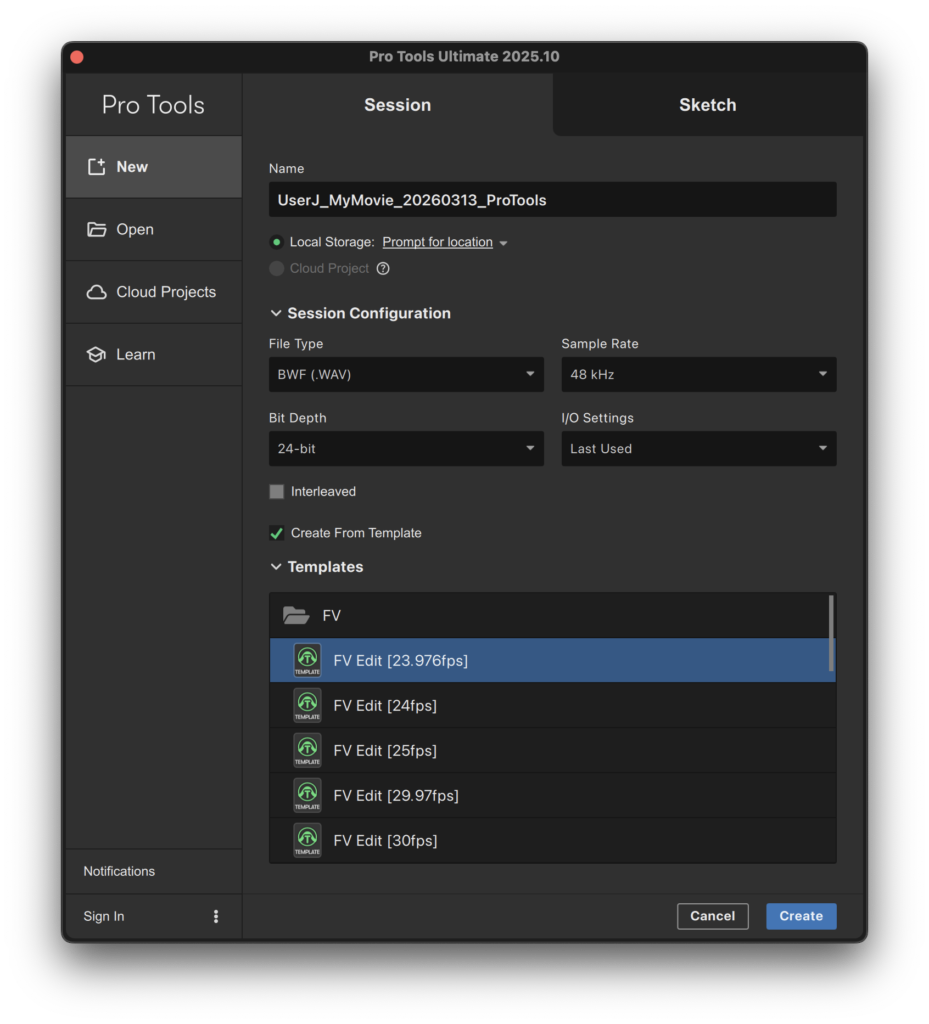
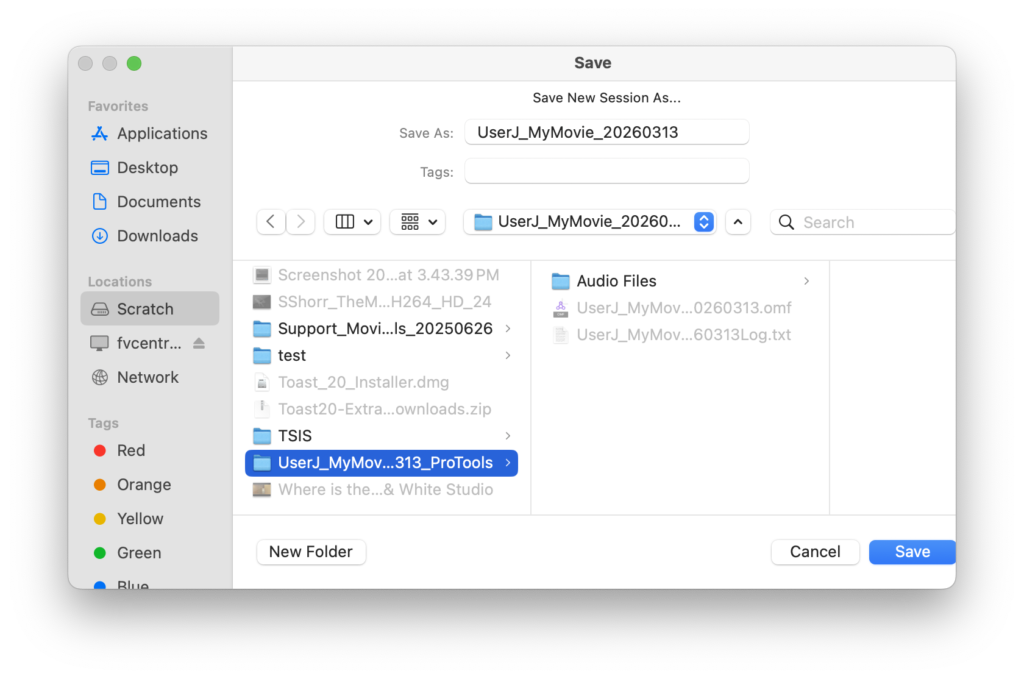
- Launch Pro Tools. If you don’t yet have a Pro Tools project started, check Create from Template. Choose the FV Edit template which matches your project frame rate. Ensure that File Type is set to BWF (.WAV), Sample Rate is set to 48kHz, and Bit Depth is set to 24 Bit. Leave I/O settings on Last Used. Make sure interleaved remains unchecked and Prompt for Location is checked. Click Create and select a destination for your Pro Tools Session folder, then click Save.
Be sure to save your session onto the Scratch drive or your external drive. Remember, home folders are deleted when you log out!
2. The Edit window of your currently blank Pro Tools session will come up.

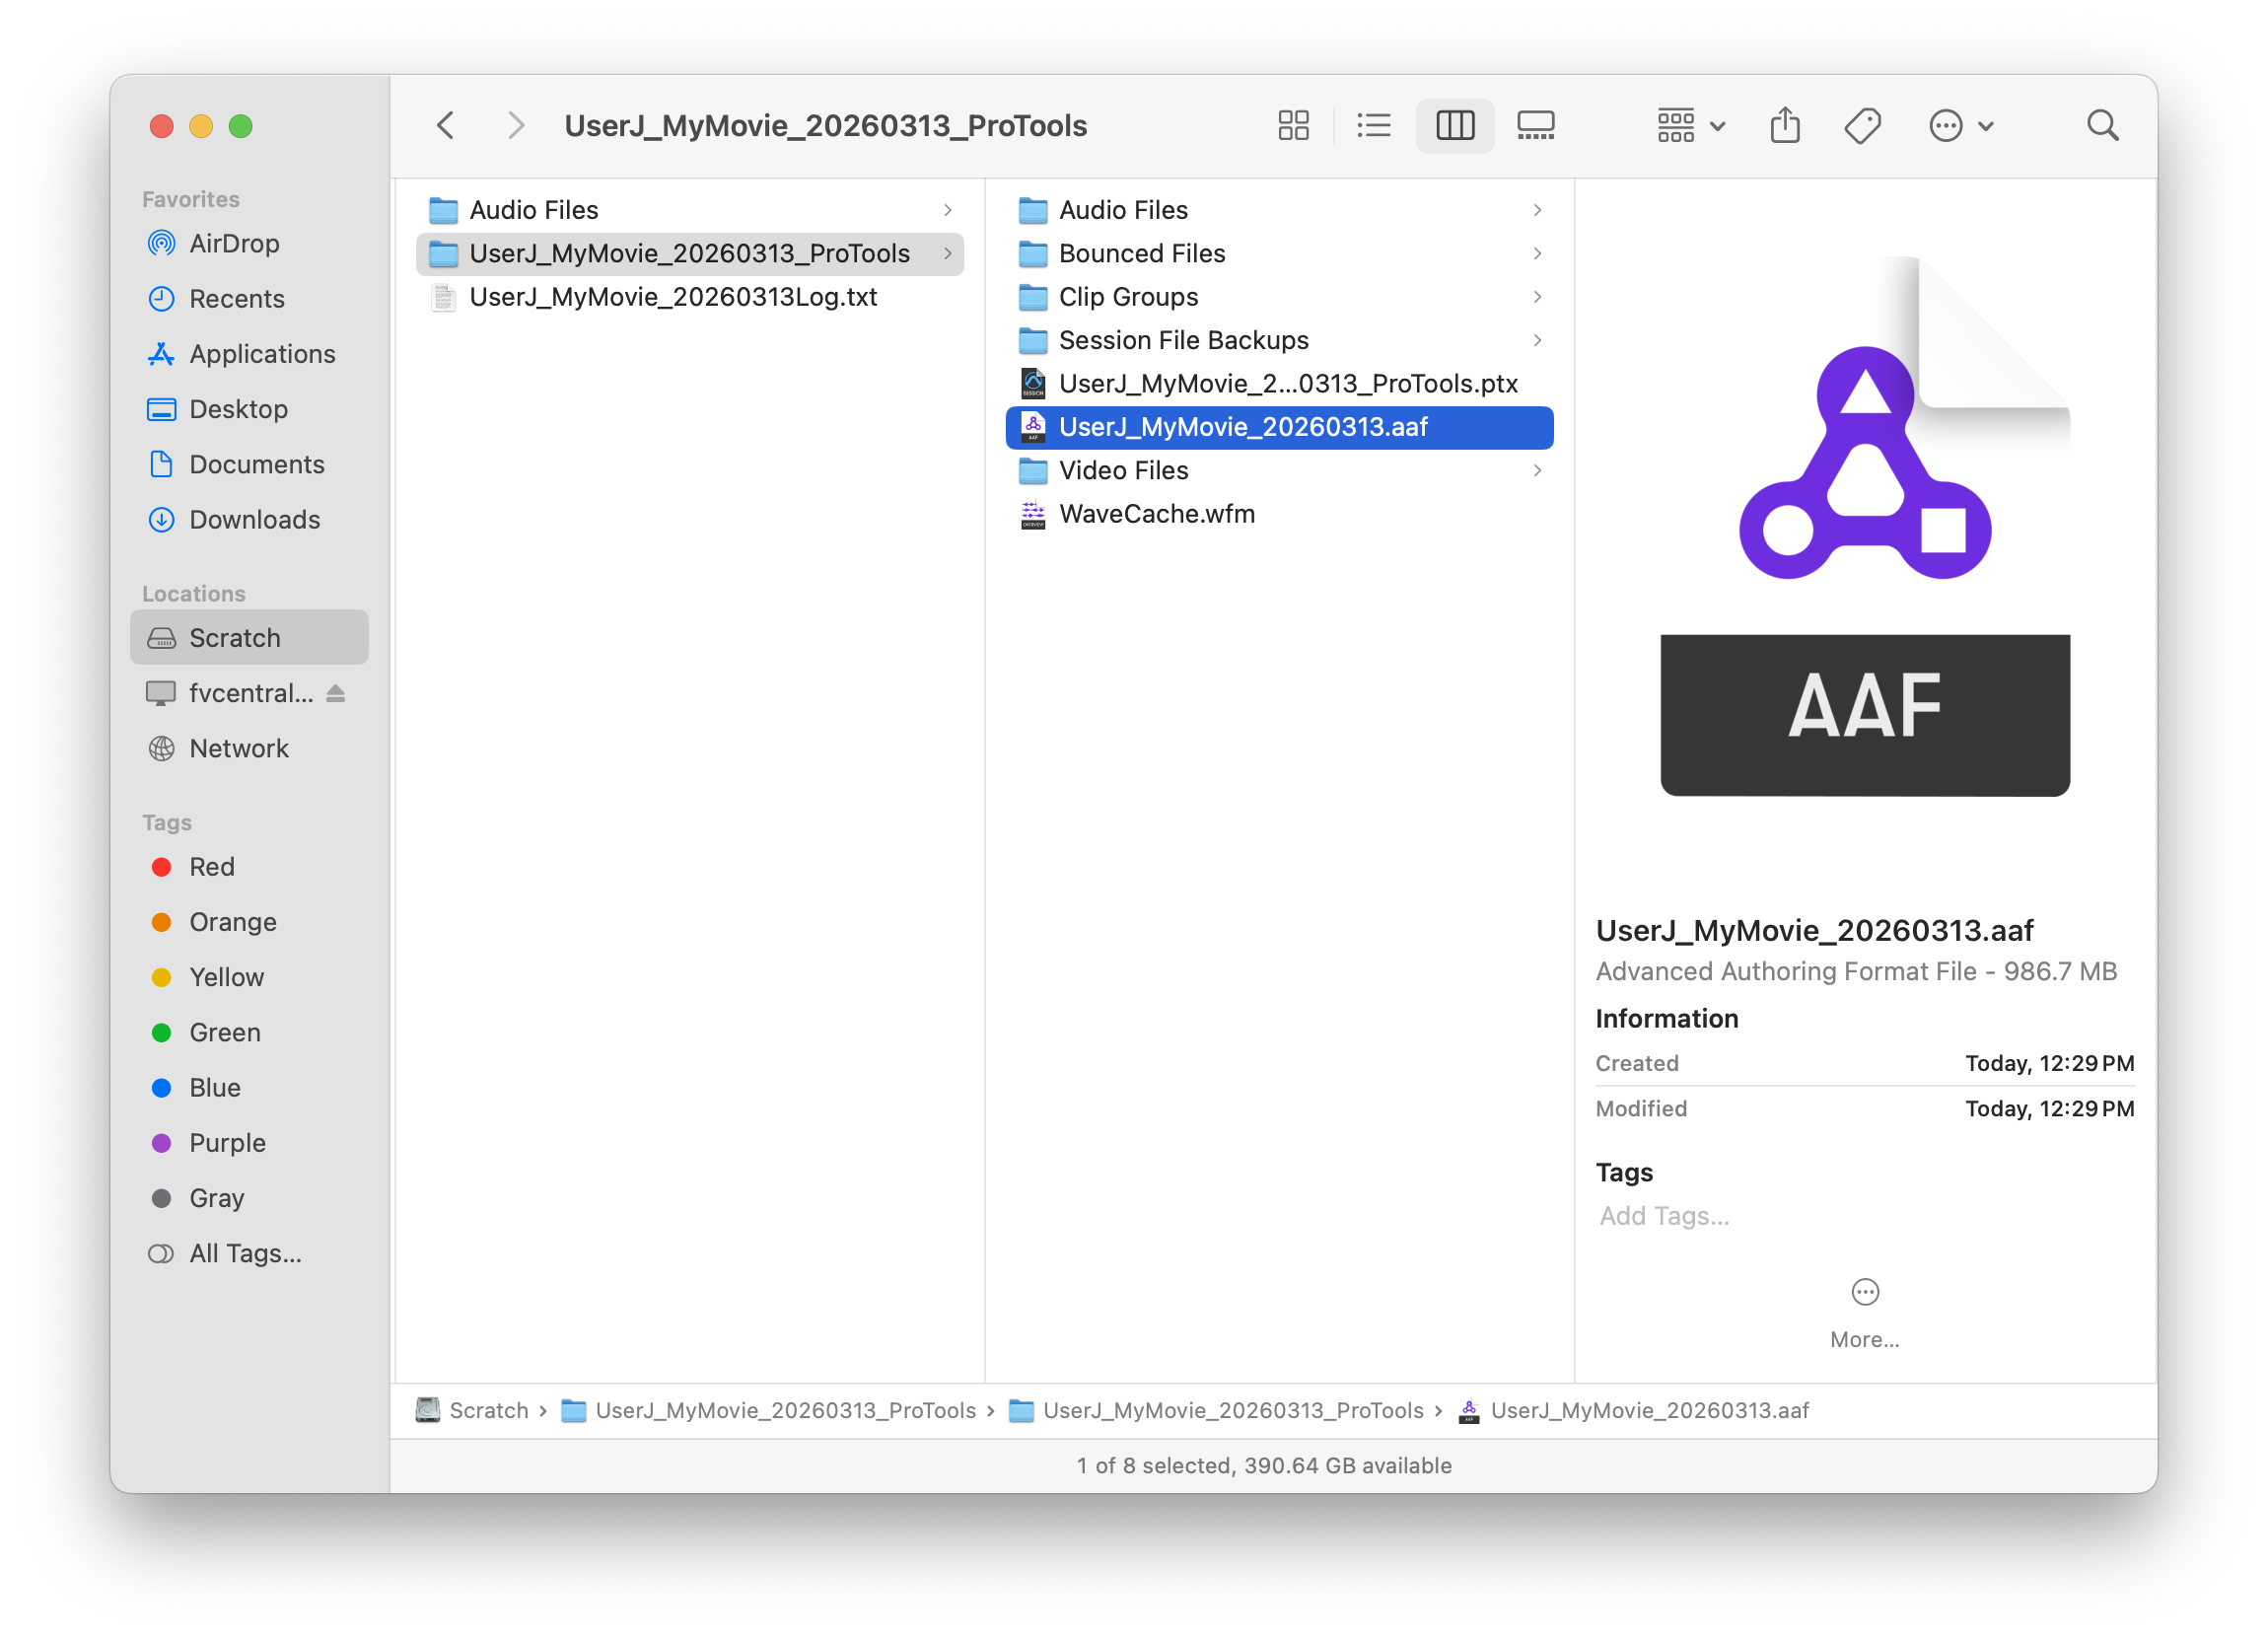
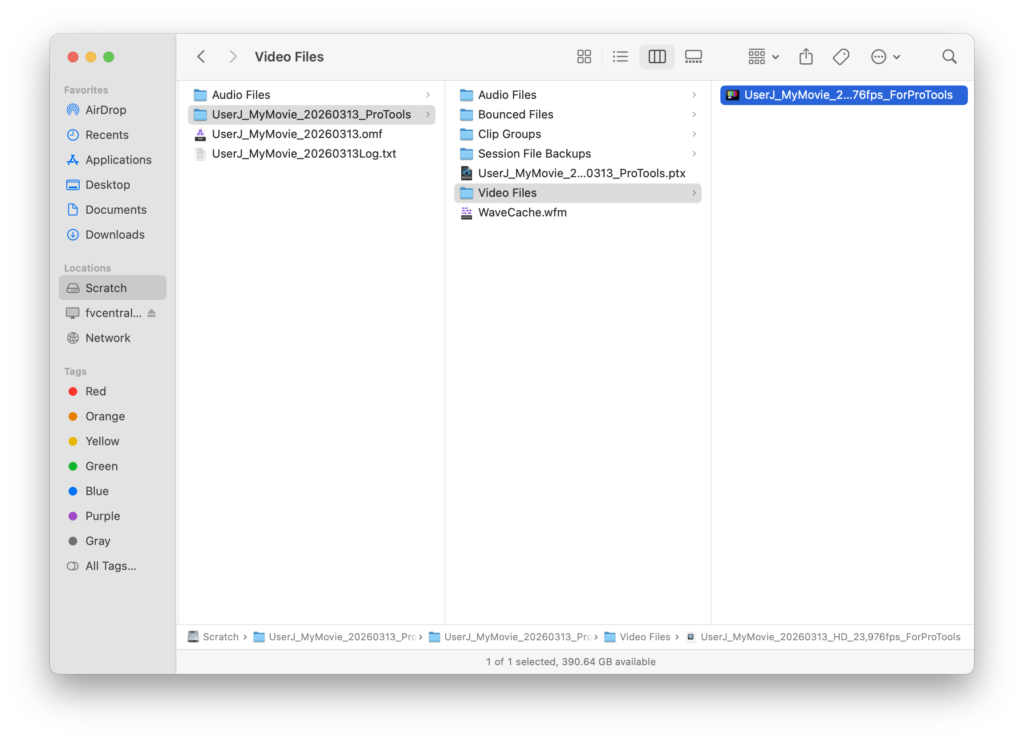
3. Before you import your AAF file, copy it and the accompanying video file from the location you specified during the export into your newly created Pro Tools Session Folder. This ensures that all the media for your Pro Tools Session is always in the same location.
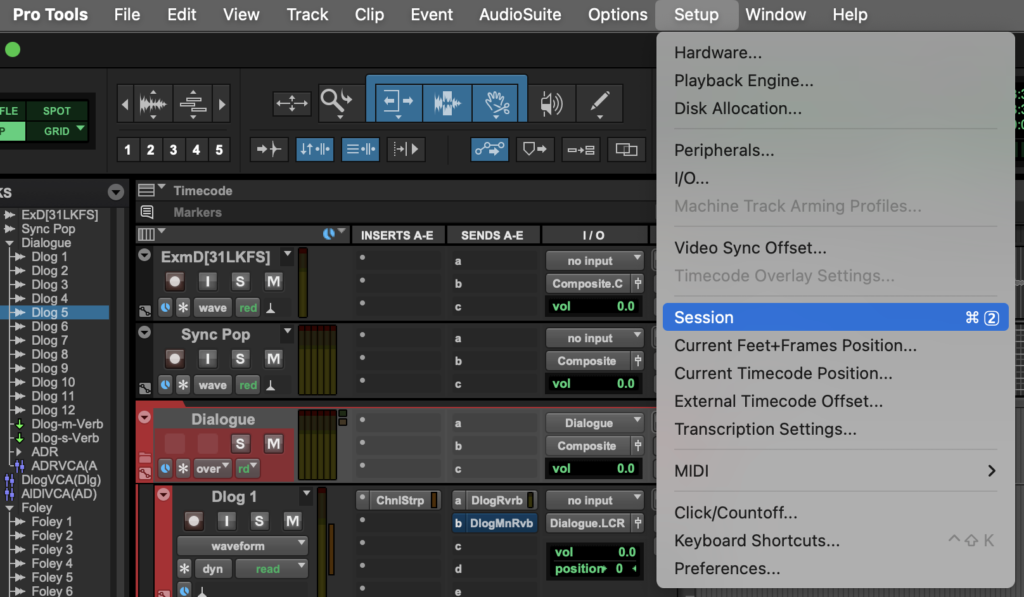
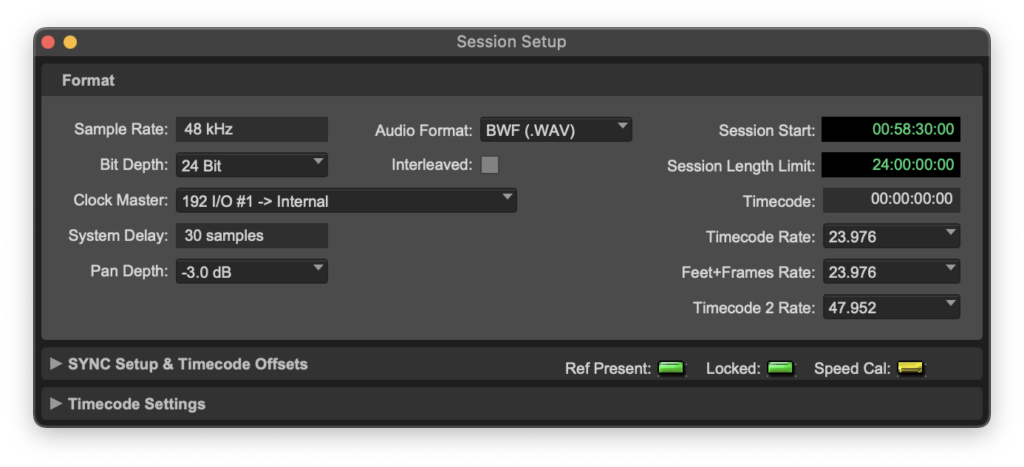
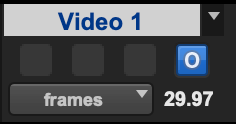
4. Now go to Setup > Session and check that the Session Start reads 00:58:30:00 and the Timecode Rate matches your project frame rate. Then close the Session Setup window.
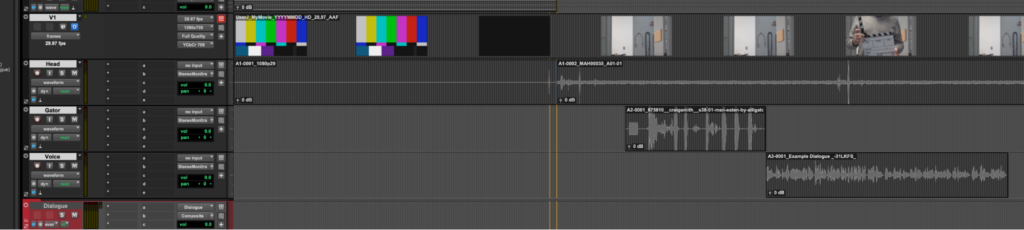
5. Click on the name of the Sync Pop track to select it. This way, the imported tracks from your AAF file will appear directly between Sync Pop and Dlog 1.
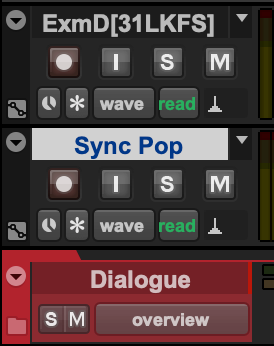
Imported tracks appear directly below whatever track you have selected prior to import. If you need to move a track, click on its name and drag it to the desired location.
6. Now to import your copied AAF file. Go to File > Import > Session Data. Select the AAF file from your Pro Tools Session Folder. Click Open. You may get a message saying that the source start time is earlier than the current session start time. This is not a problem as long as your Resolve timeline uses the standard leader beginning at 00:58:30:00.

7. The Import Session Data window will open. Review Source Properties. Then Set Timecode Mapping Options to Maintain absolute timecode values, unless it is grayed out, in which case, select Maintain relative timecode values. Note that maintaining relative values will only work properly if you are using 1:30-long head leader. Set Audio Media Options to Force to target session format.
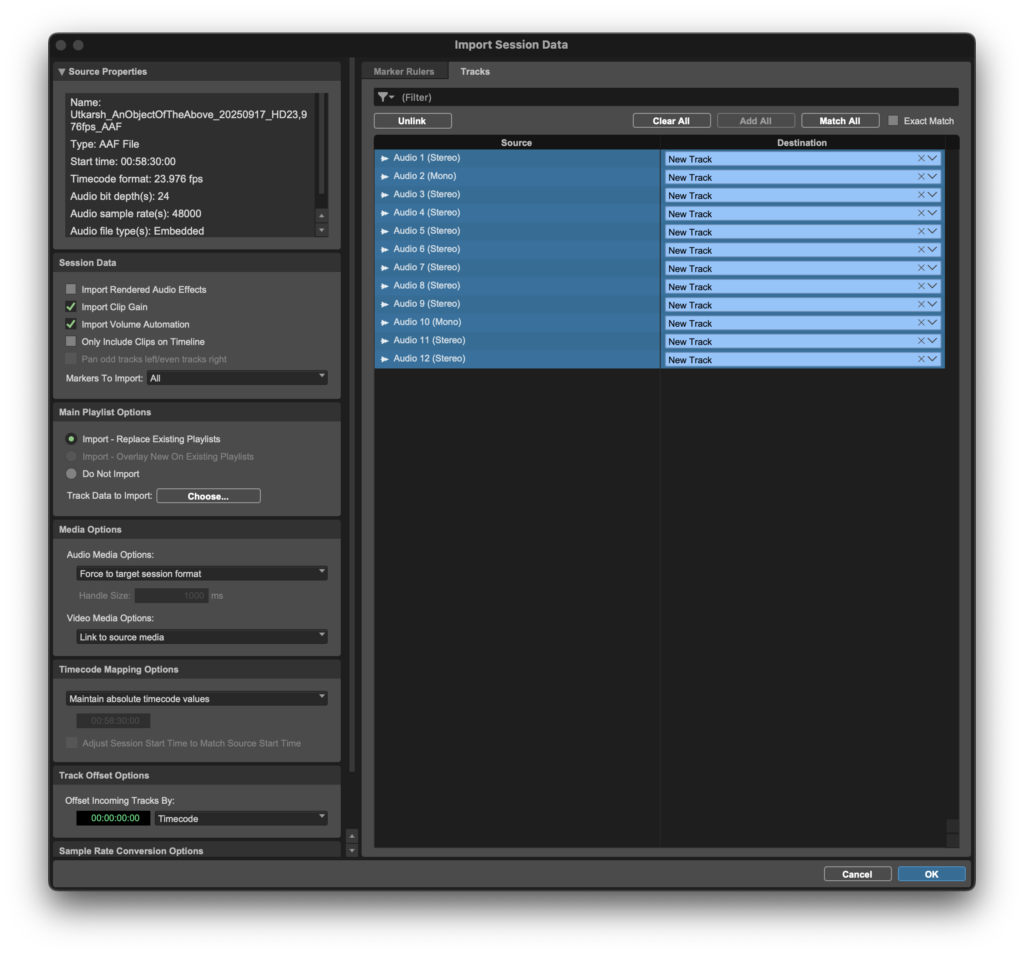
- If your AAF contains a video track, click on said Video track under Source to deselect it – the Destination will change to (none). Under Session Data, check Import Clip Gain and Import Volume Automation. Leave Import Rendered Audio Effects unchecked. Click Ok.
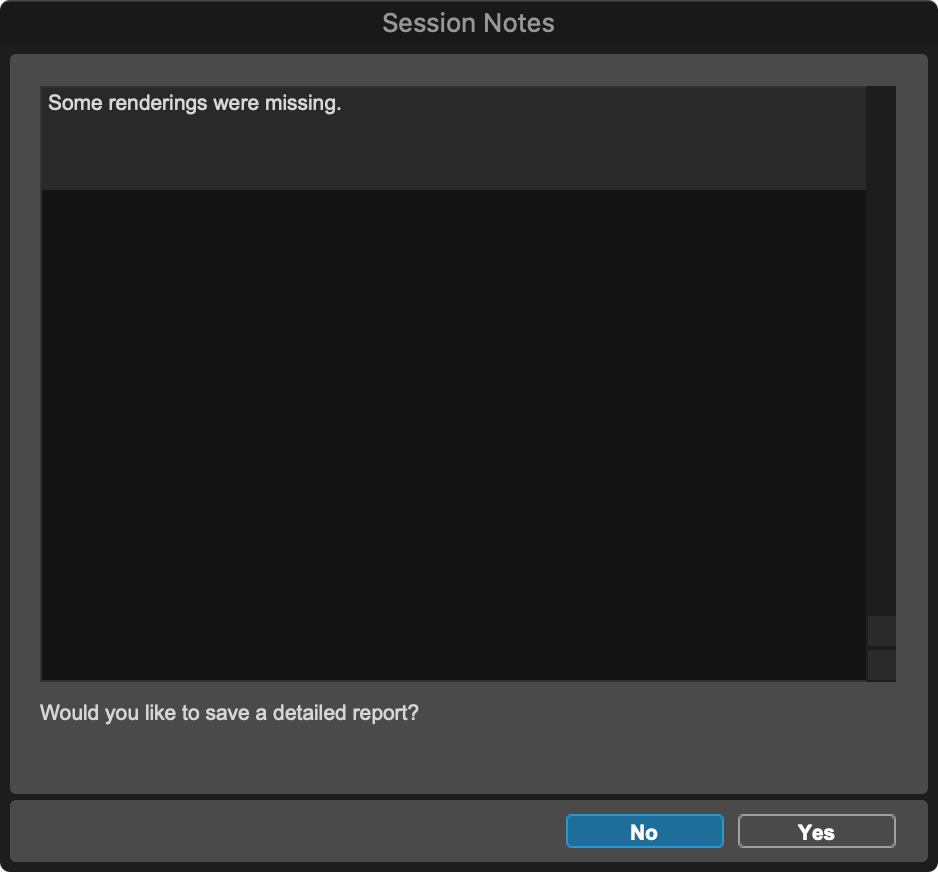
- A Session Notes window may open saying “Some effects were ignored” This is fine; audio effects have already been rendered into new clips. Do not save a detailed report; click No.
10. Your Pro Tools Session Edit window will now display your imported tracks and clips. Pro Tools will link the clips to the media in the AAF and then draw their waveforms. This may take several minutes to complete, depending on the size of the project.
Importing Video into Pro Tools
- In the Finder, locate the video reference file that you exported from Premiere Pro. Copy it into the Video Files folder in your Pro Tools session folder.
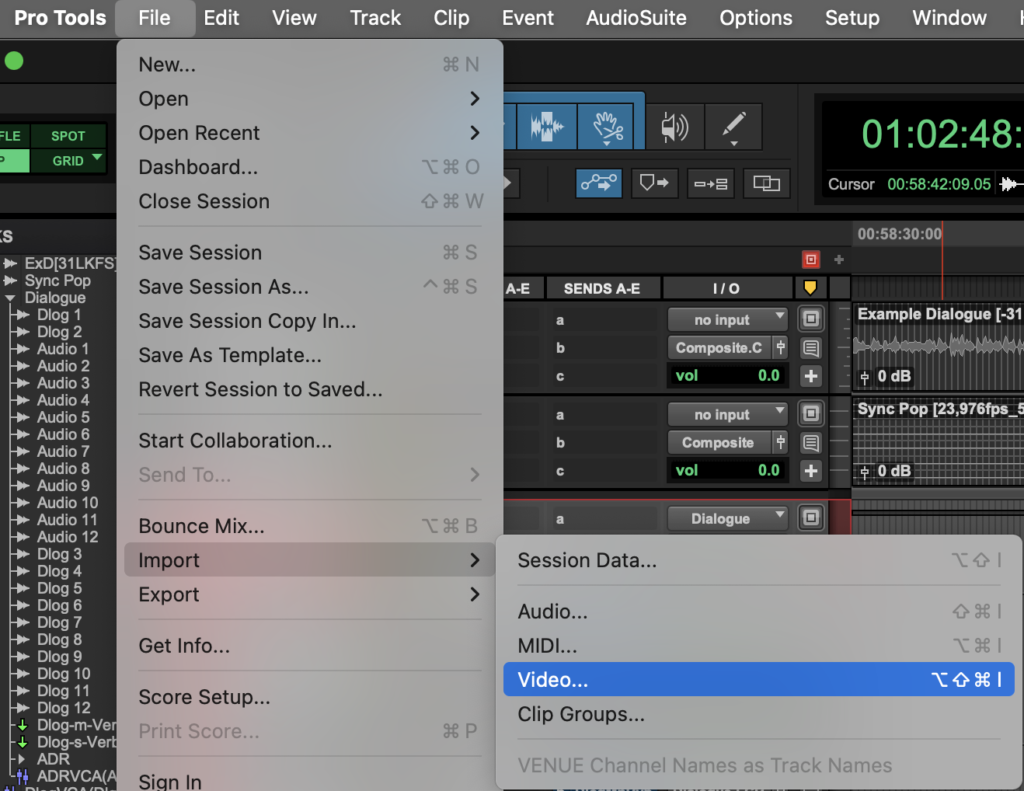
- In Pro Tools, go to File > Import > Video and select the video reference file that you just copied into the Video Files folder in your Pro Tools session folder. Click Open.
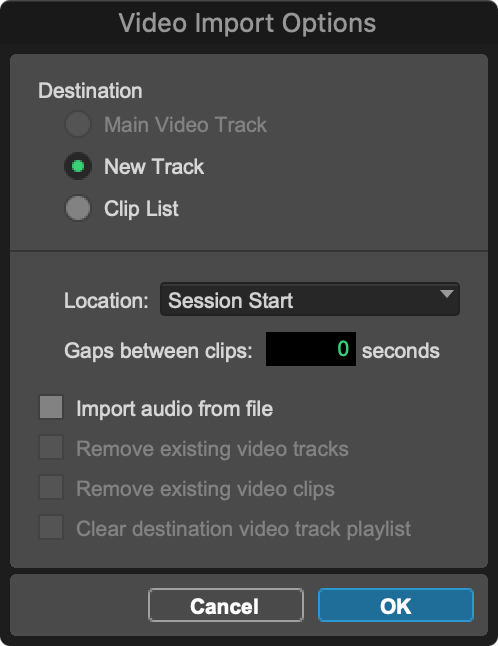
- The Video Import Option window will open. Ensure the Destination is set to New Track. Location is set to Session Start, Import audio from file is unchecked. Click Ok.
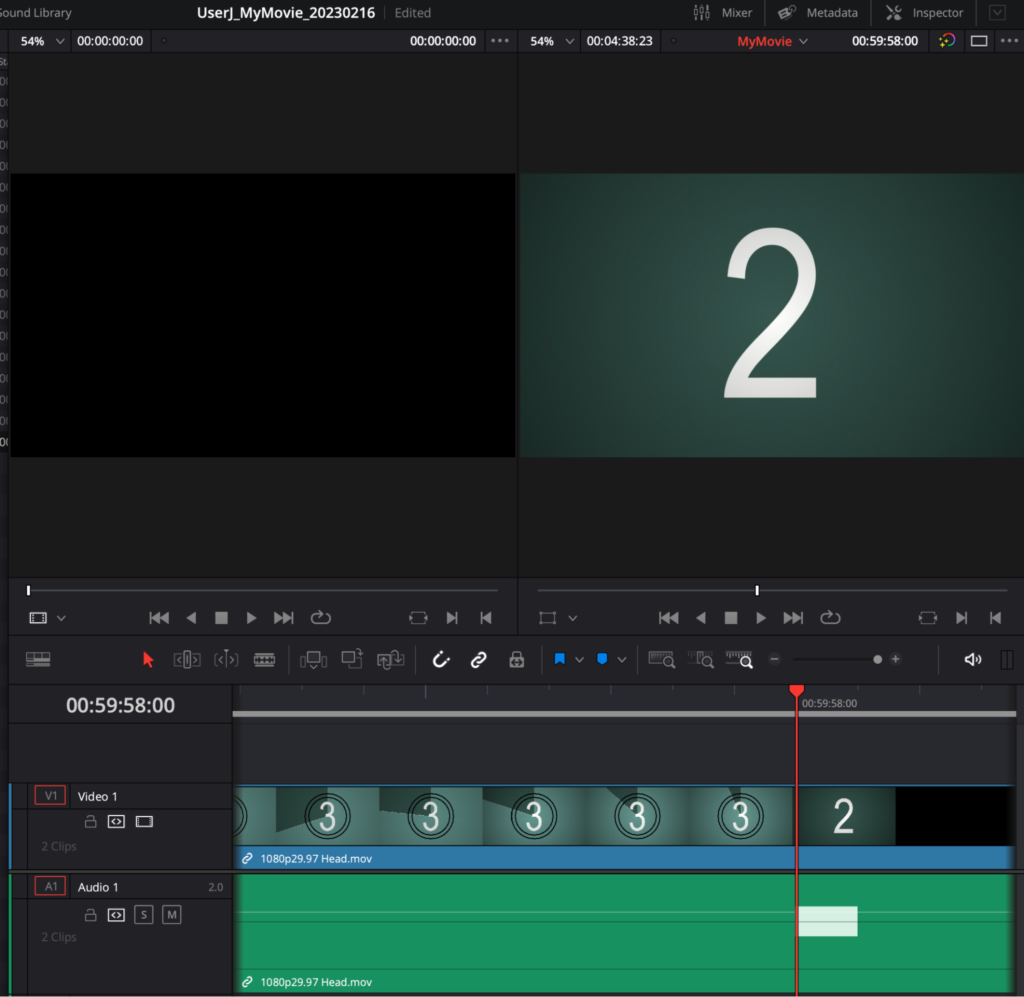
- Your video will appear in the Pro Tools Session Timeline. If the frame rate on the video track is red, your video and session timecode rate do not match and may not sync correctly. Check your session timecode by going to Setup > Session. When the video frame rate and session timecode rate match, the video frame rate will turn white.
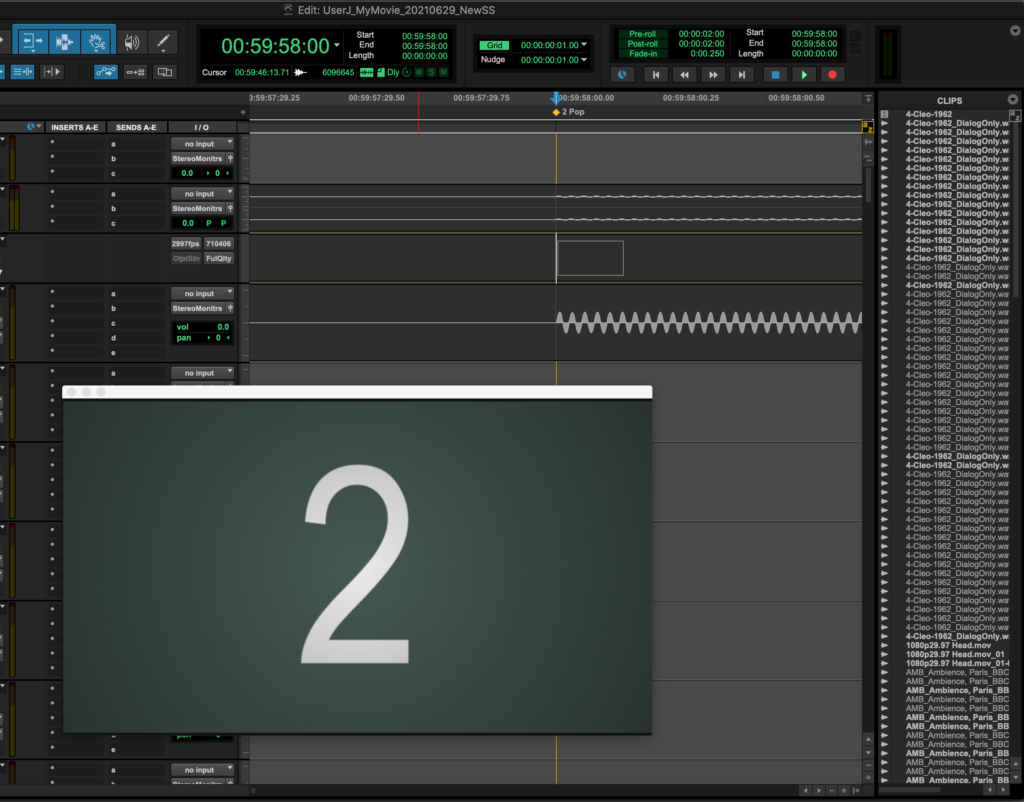
- To ensure sync, you must check that the 2 frame of your video leader lines up exactly with the 2 pop from your AAF. Click on the Main Counter and type in 00595800. Press Enter.
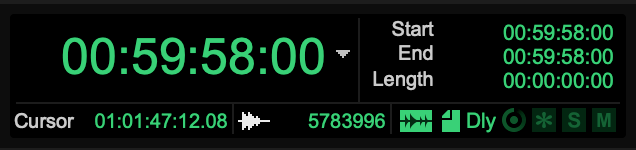
You can also get the 2 pop by simply clicking on the yellow diamond 2 Pop marker.
- Zoom into the waveform of the leader. If the 2 frame and the sync pop from the leader align, you’re in business.