
Search Knowledge Base by Keyword
Using the Classroom A/V Racks
The video above will walk you through how to operate the classroom A/V racks used for teaching in E58, E59, E61, E65 and BB3J.
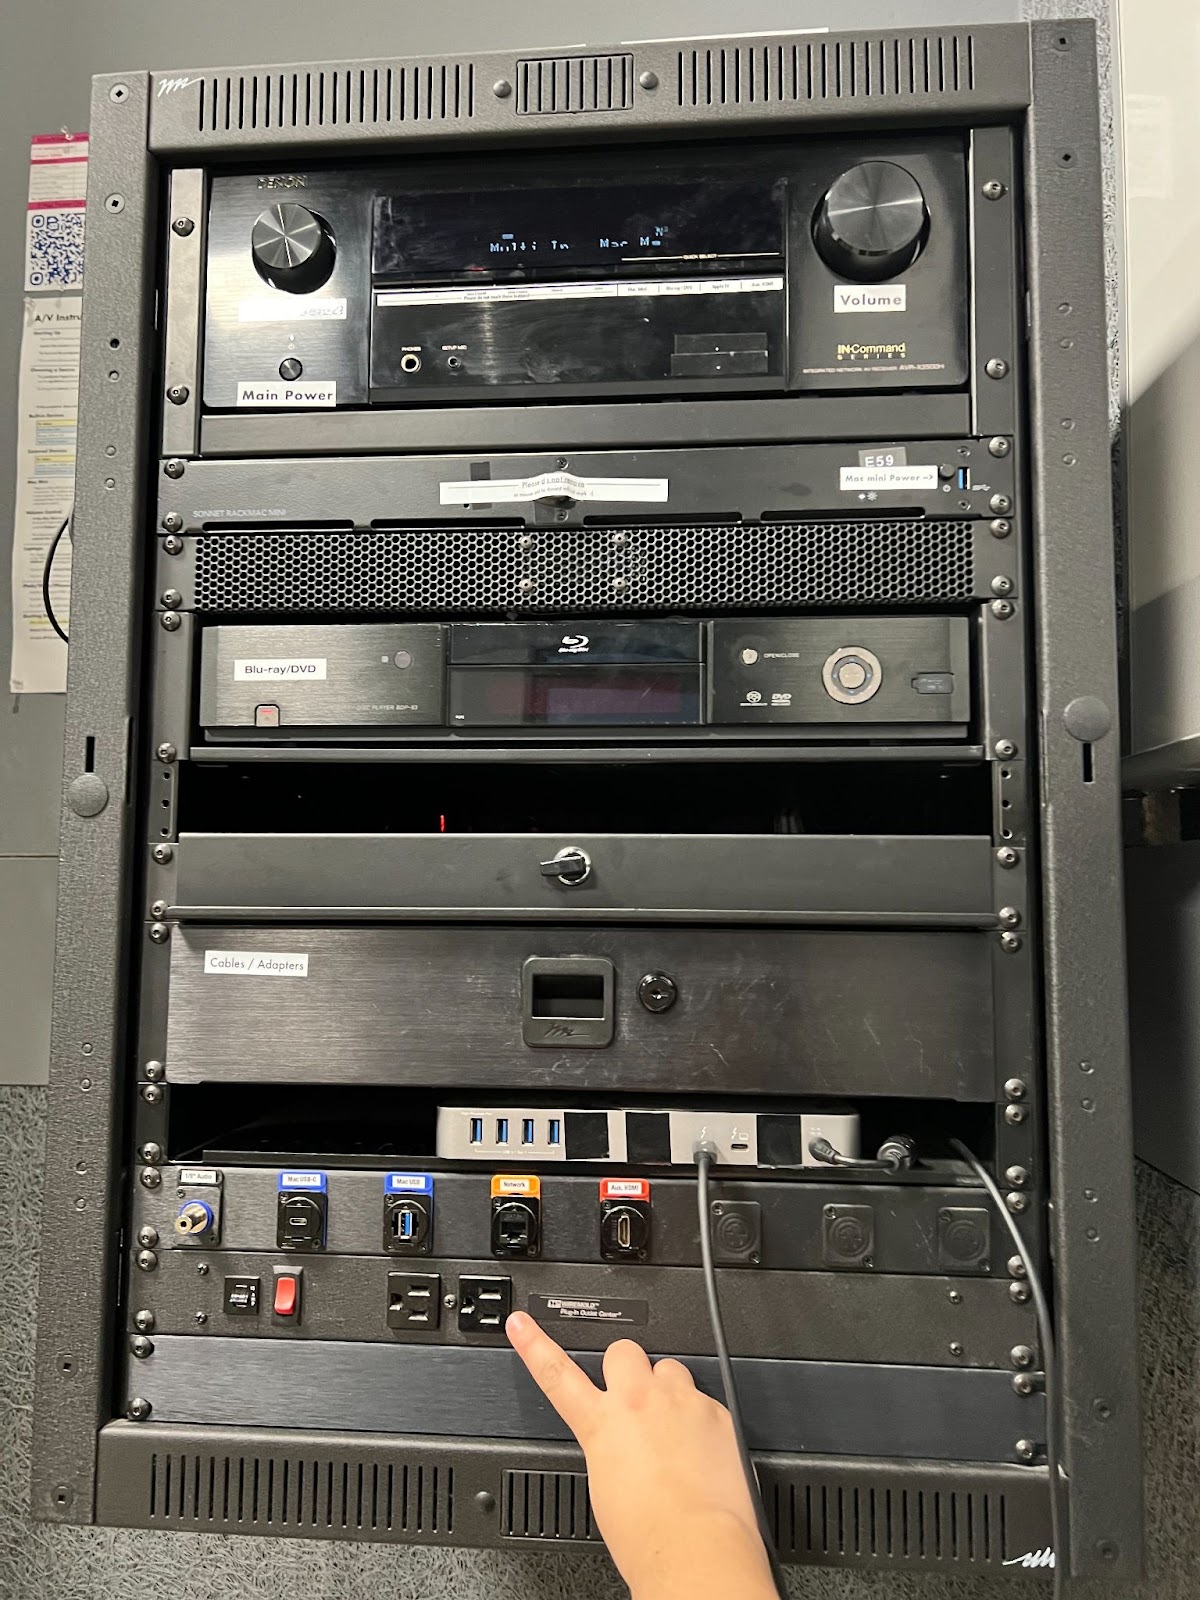
The main components of the classroom racks are: a Denon receiver, an Oppo Blu-ray player, an Apple TV, and a Mac mini that allows you to use a computer without having to bring a laptop.
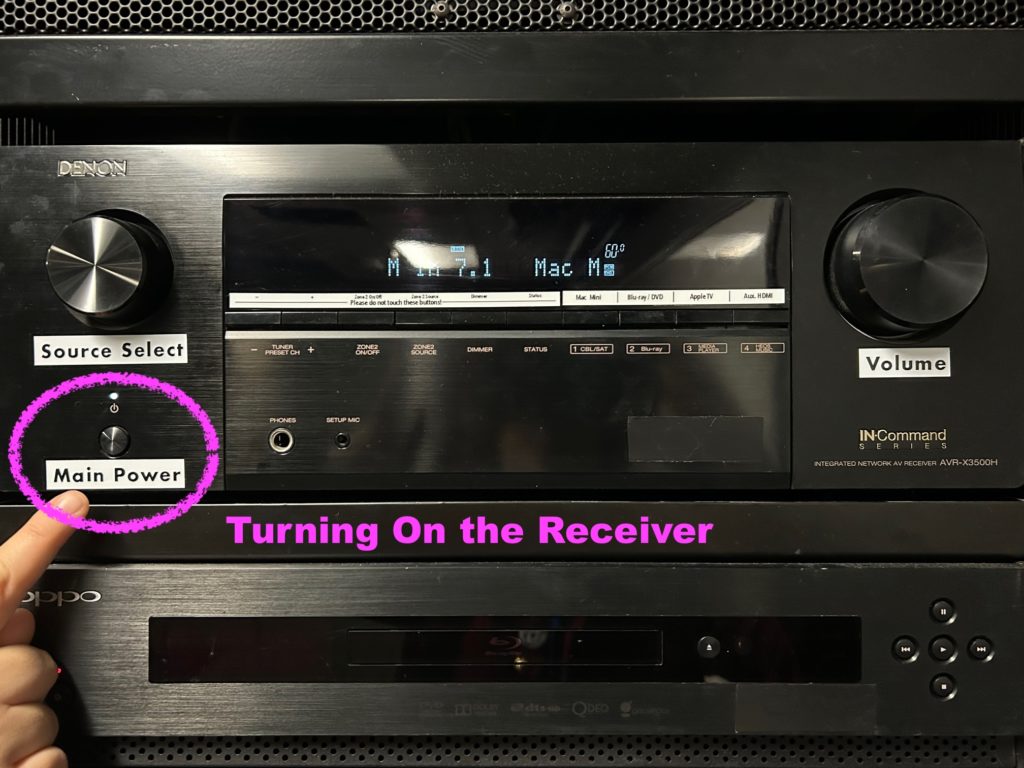
Turning on the Receiver
The Denon receiver is used to select your source which then pushes out the audio and video signals to the projector and speakers for display in the classroom. Turn it on by pressing the small circular button on the left side.
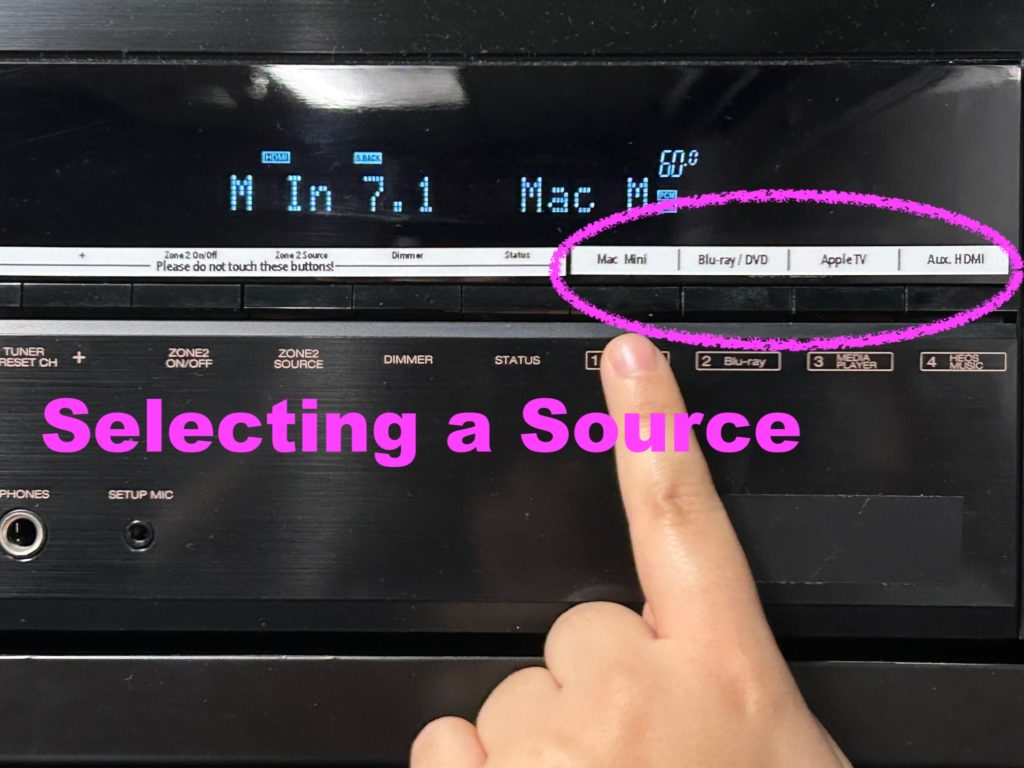
To determine what comes through the projector (i.e., your source), select from one of the quick select buttons:
a. Mac mini
b. Blu-ray/DVD
c. Aux. HDMI (a laptop connection)
d. Apple TV
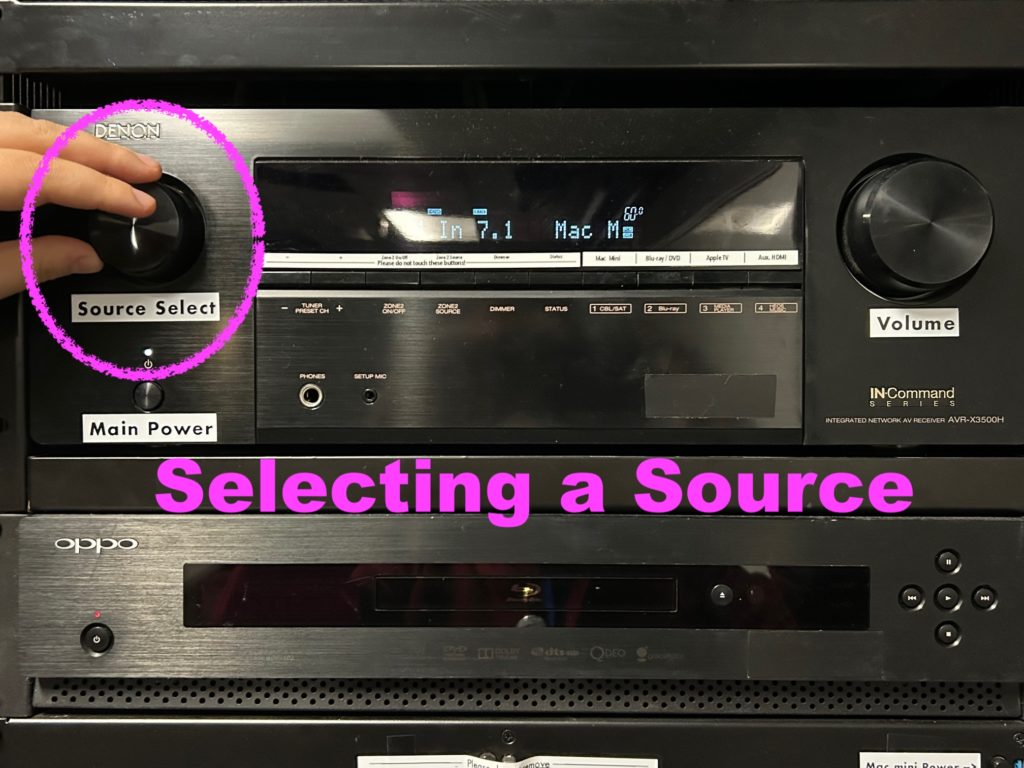
You may also select your source by turning the “Source” dial on the left.
Additional Inputs:
There is an Auxiliary audio port on the front of all the racks which allows you to connect a mini stereo plug from your phone, iPad or laptop.
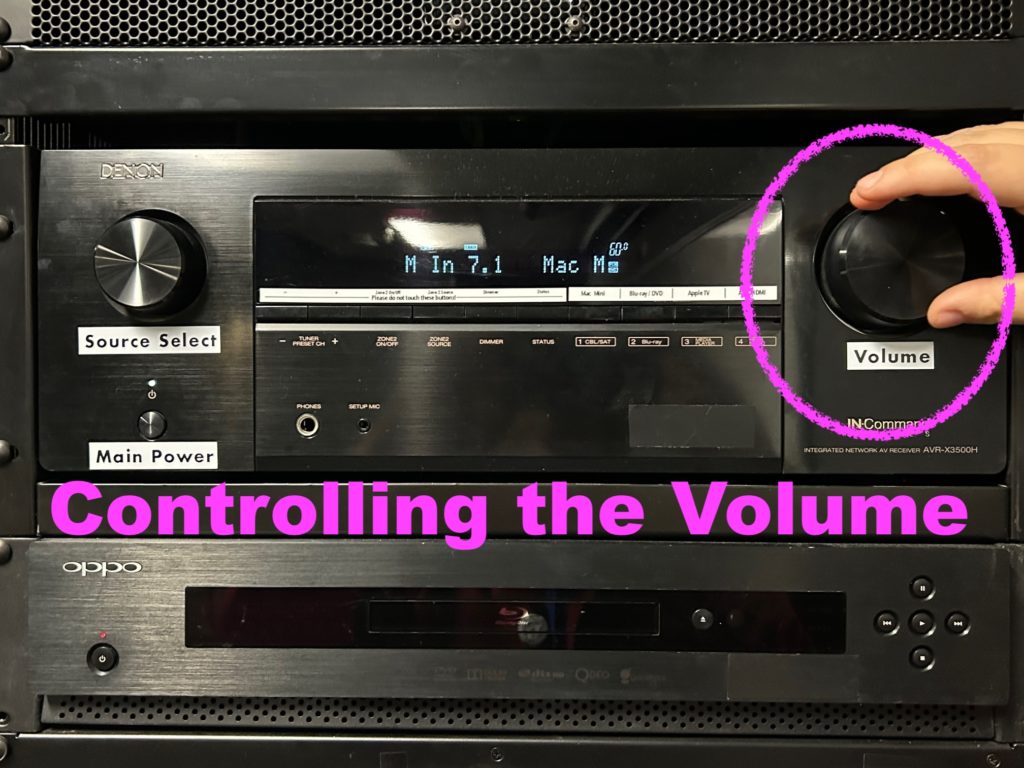
Controlling the Volume
The volume dial on the right adjusts your audio level. Start with the main volume level being somewhere between 20 and 40 so as not to blow out the speakers before you play audio through them. When the dial is at zero, nothing can be heard.
Turning Off the Receiver
1. To turn off the receiver, press the power button on the bottom left corner and leave it.
2. You will notice a label that says “Please do not touch these four buttons!” These are control zones: the Main Zone should be on, and Zone Two to be off – the screen above will tell you whether the Main Zone or Zone Two is on or off.
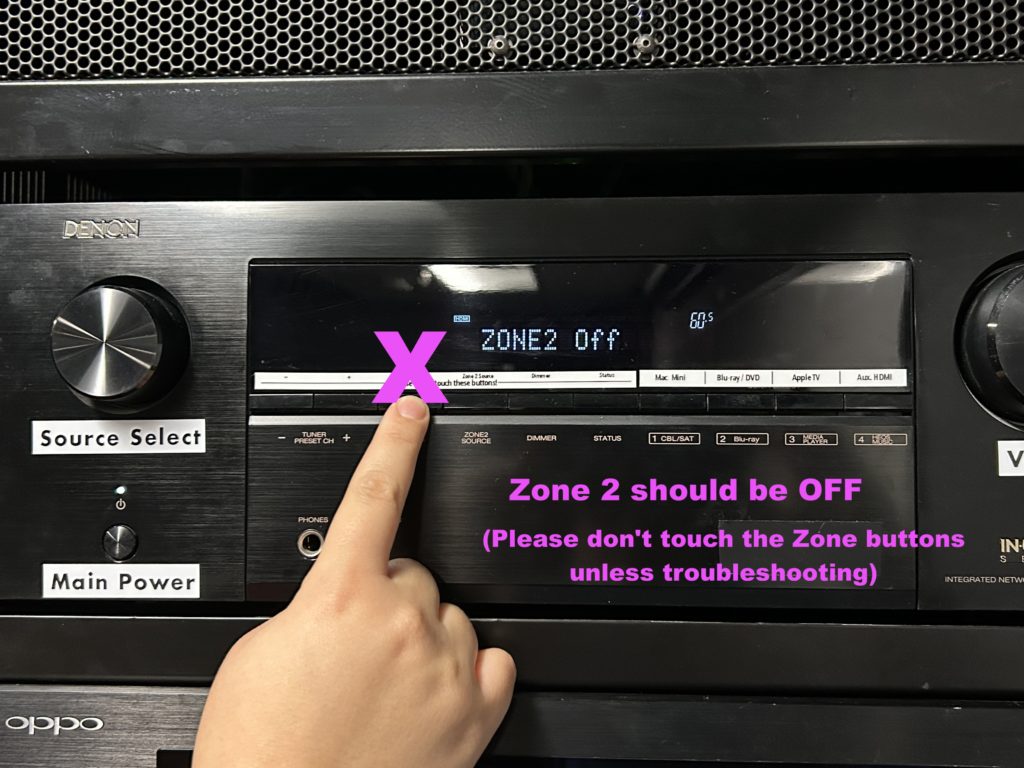
These Zone Control buttons should not be touched, but if you’re not able to get a signal out of the receiver, check to make sure that Zone Two is off.
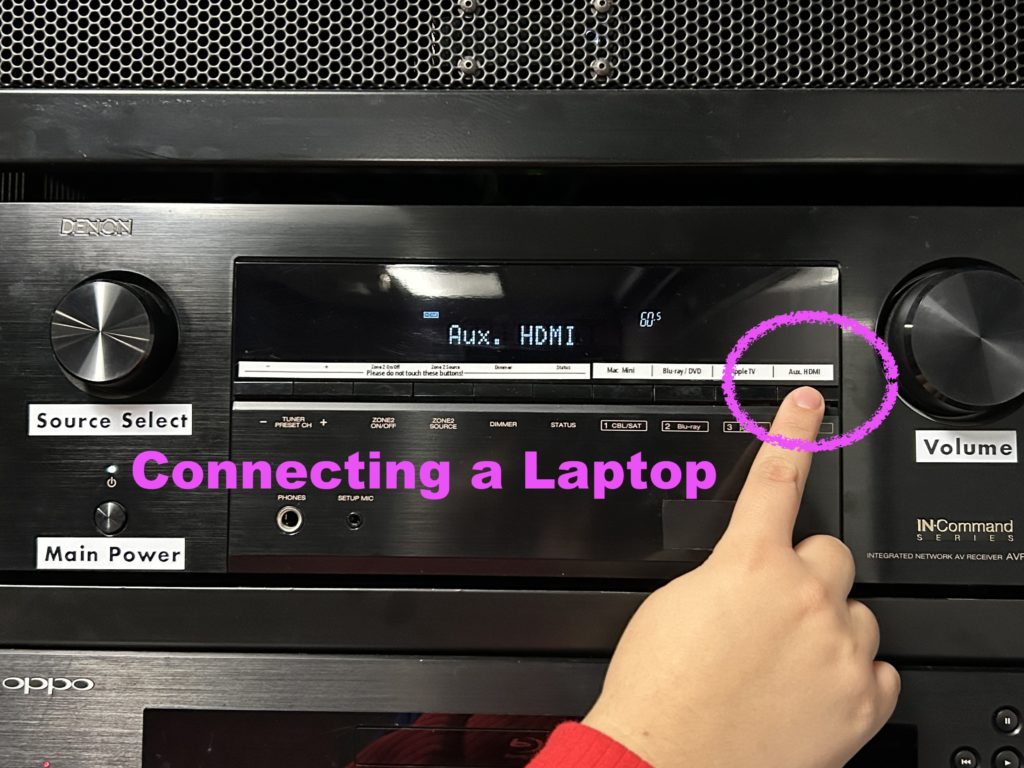
Connecting a Laptop
1. Using the quick select source buttons, select “Aux. HDMI.”
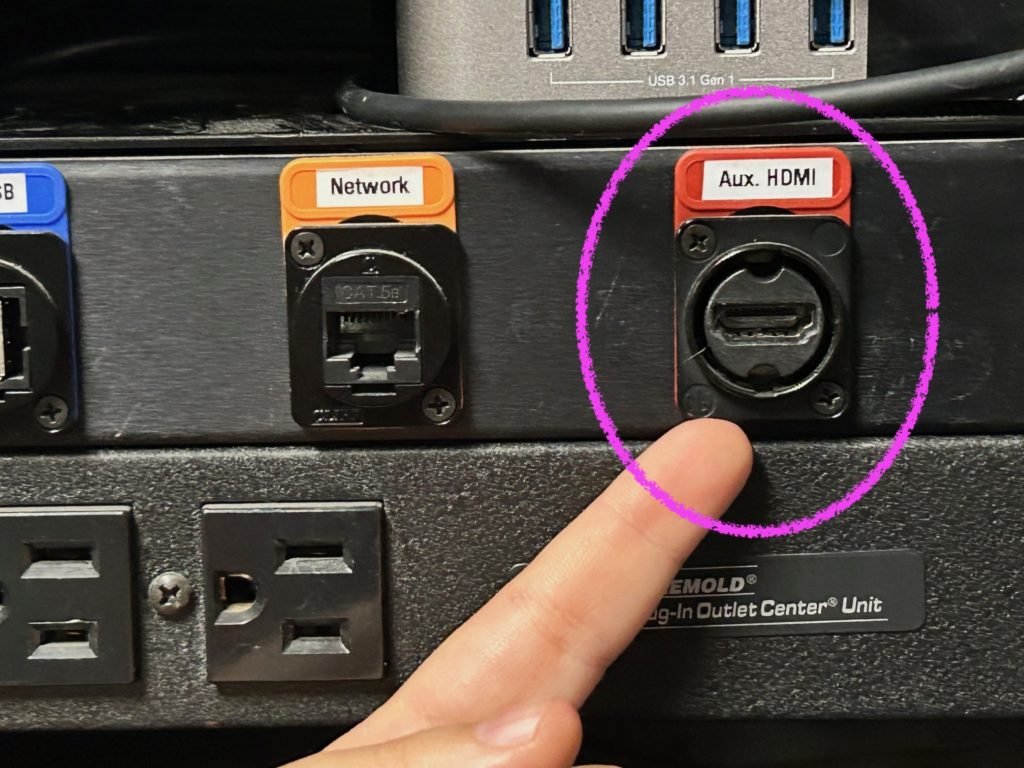
2. Find the HDMI cable located either in the rack drawer or hanging on the side of the unit.
3. Plug one side of the HDMI cable into the “HDMI In” port. Plug the other side of the cable either straight into your laptop, or do so via the appropriate adapter (located in one of the shelves at the bottom of the unit).
Most laptops today do not have an HDMI port, so you will likely need to use the white USB-C adapter provided in the rack drawer.
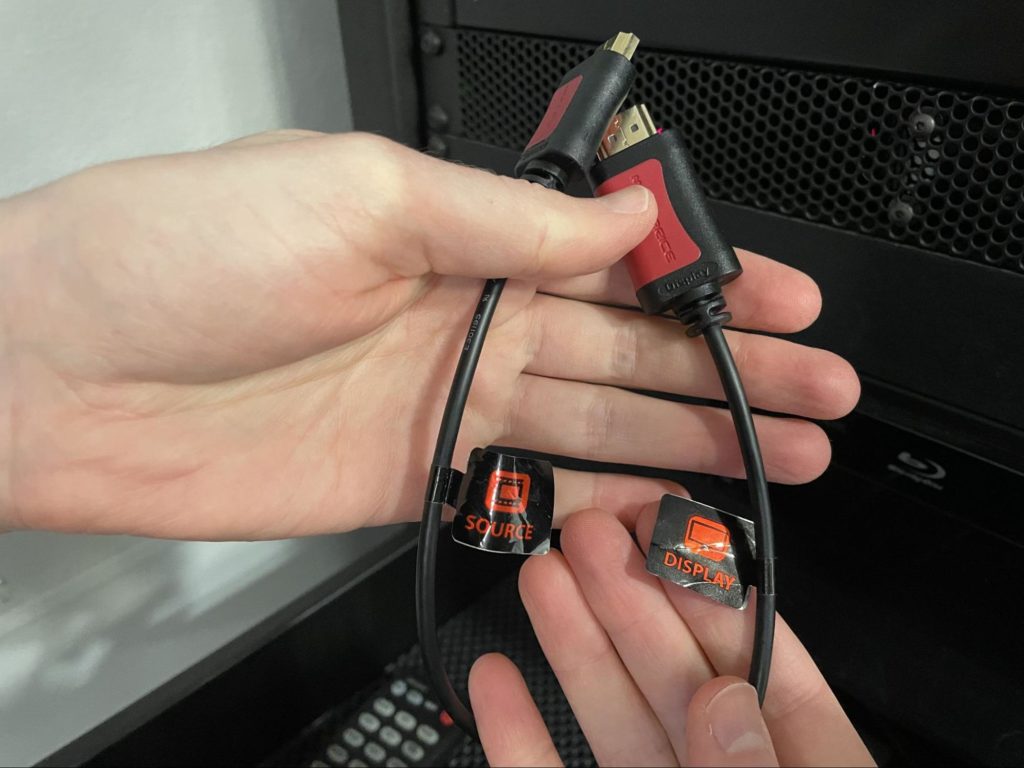
4. Many long HDMI cables are directional, meaning that it matters which side of the cable plugs in where: One side of the cable will say “Source” and the other side will say “Display/ TV”. The “Source” end connects your computer, and the “Display/TV” end connects to the receiver (which then connects to the Projector).
Additional Outlets and Accessories
1. You can use these power outlets to plug in and charge your laptop.
2. And the drawers below can be used to set your laptop on.
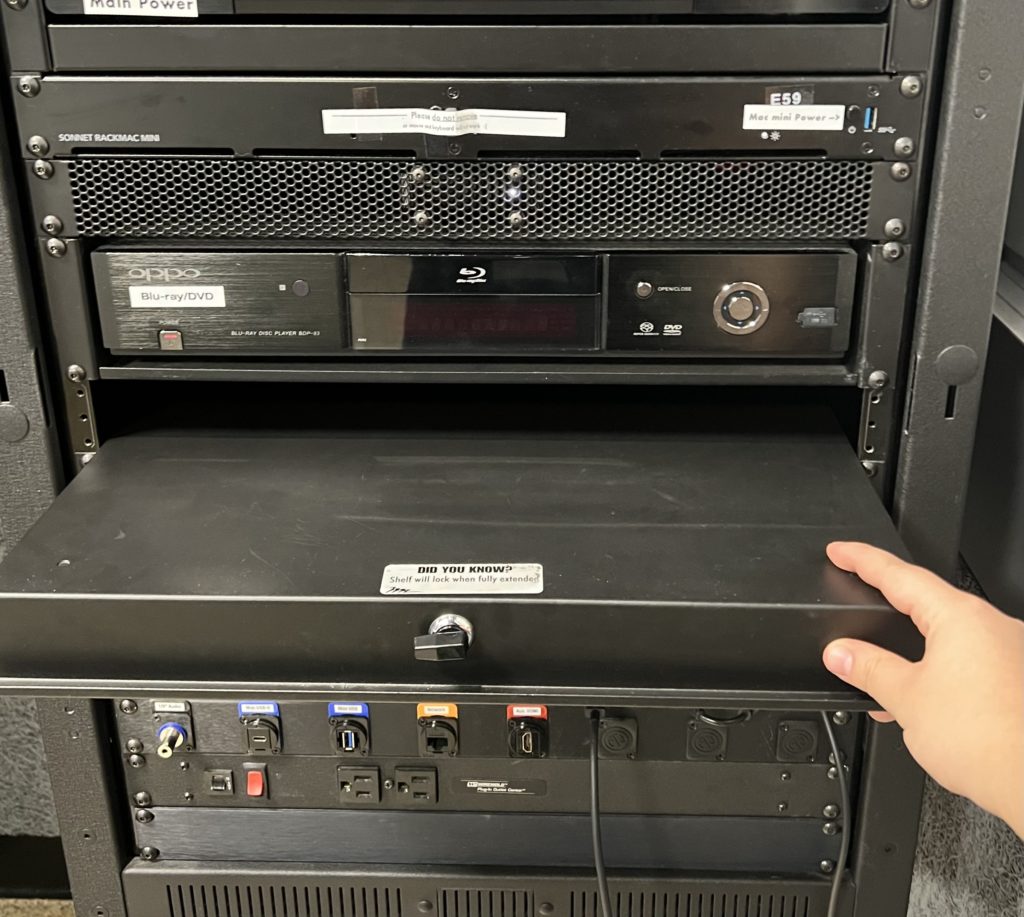
3. Inside the drawer you can also find a wireless keyboard and wireless mouse for the Mac mini. Each device has an On and Off button: if the light at the top right corner of the keyboard is off, the device is off and needs to be turned on (or charged).
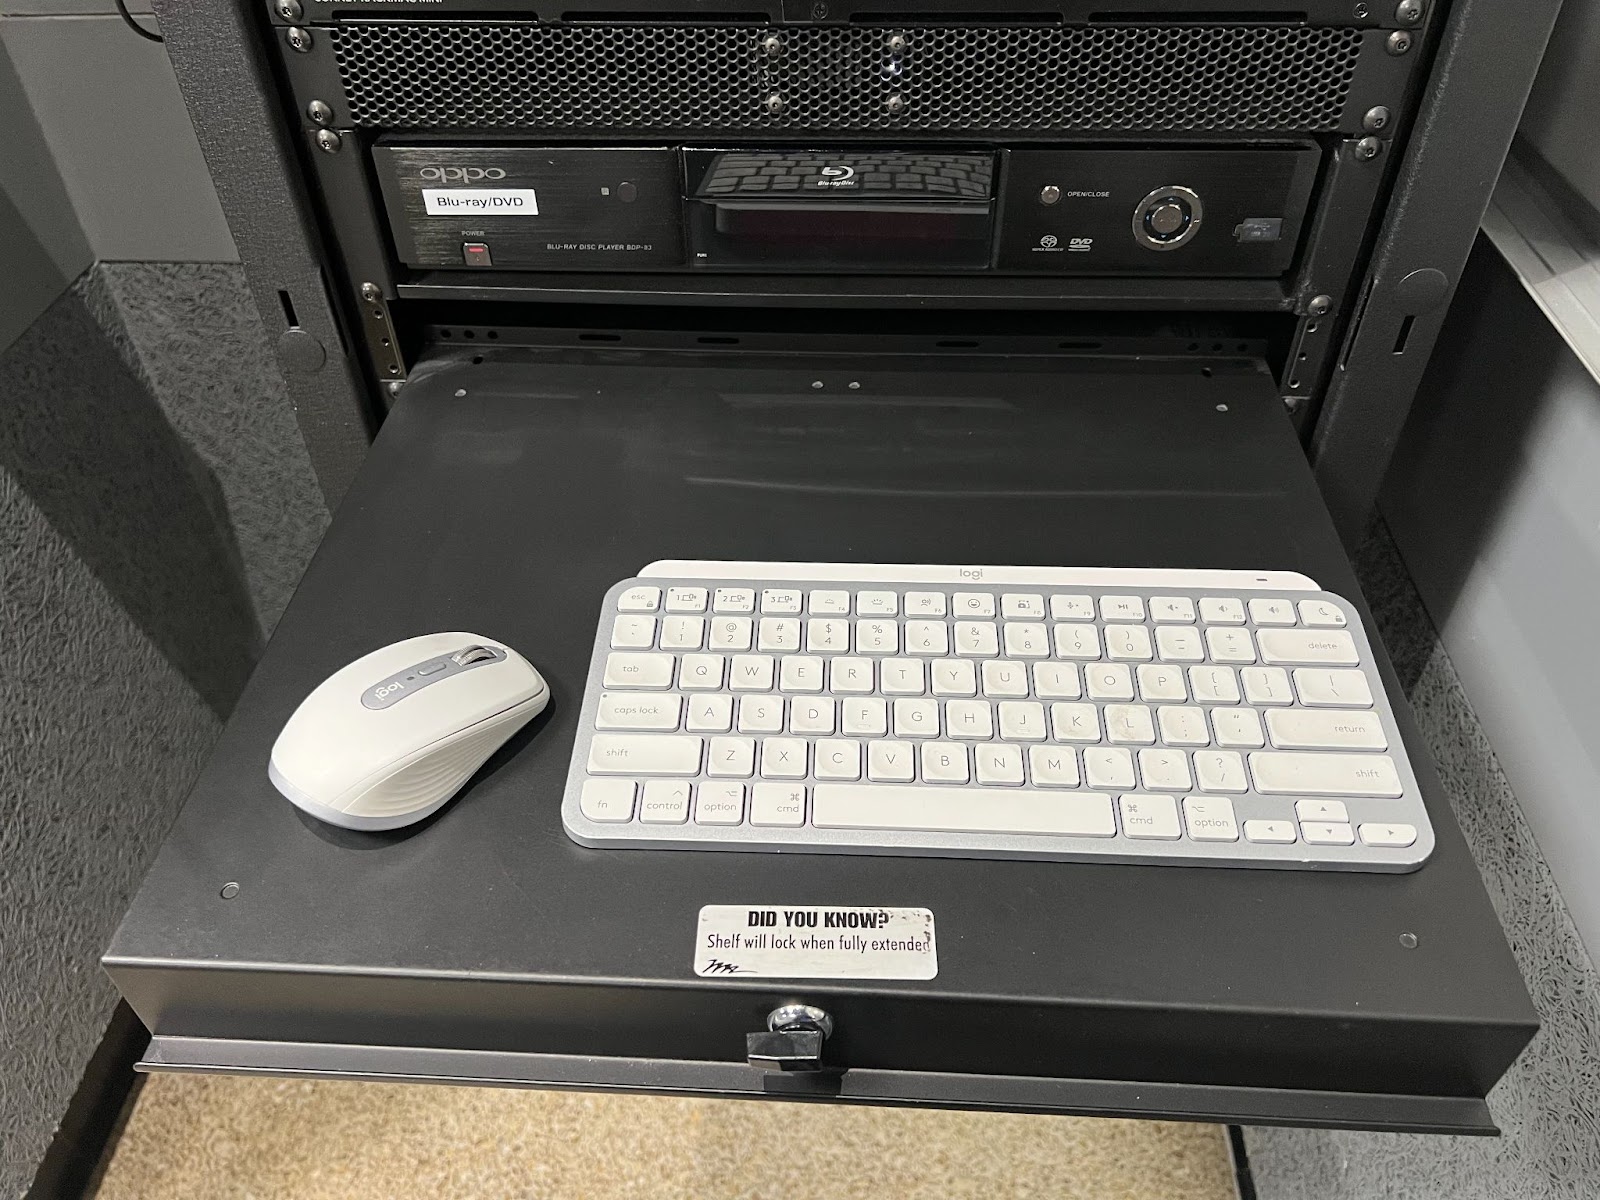
When you are finished using the keyboard and/or mouse, please plug them in to charge inside the drawer.
Inside the drawer you can also find remotes for the system:
- Blu-ray remote
- Projector remote
- Receiver remote
Turning on the Projector
- To turn on the system, press the Power Button on the Projector remote once.
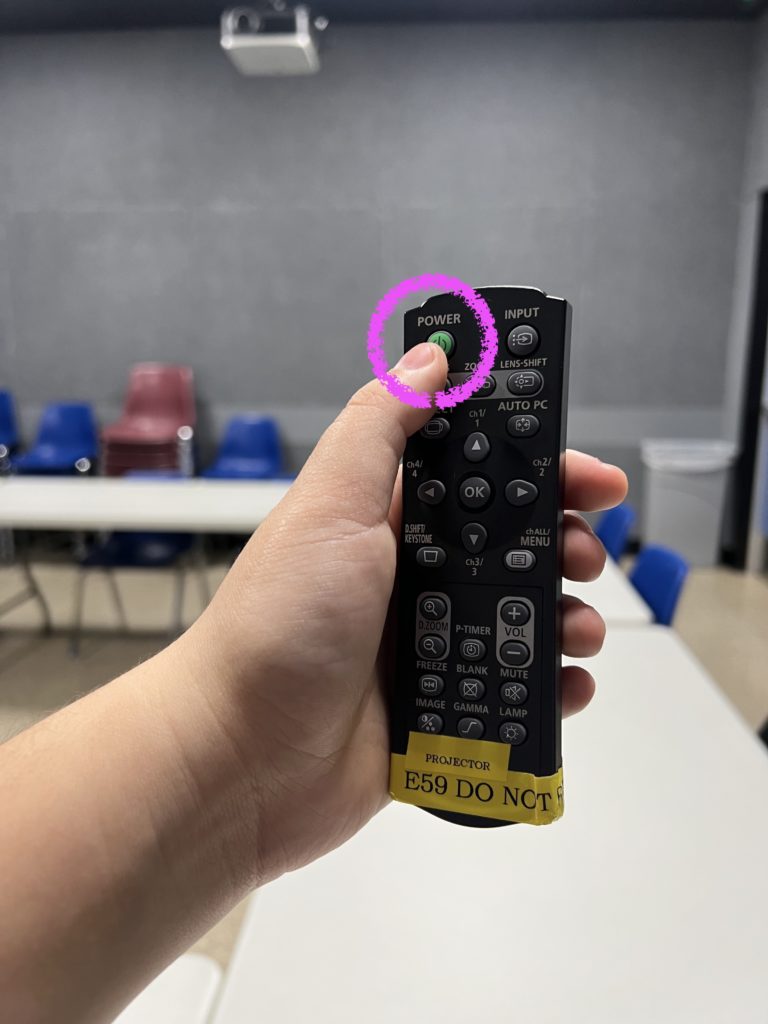
2. The projector lamp should turn on within 15 seconds.
3. If projector detects an input from the receiver, the receiver signal will show up on the projector screen.
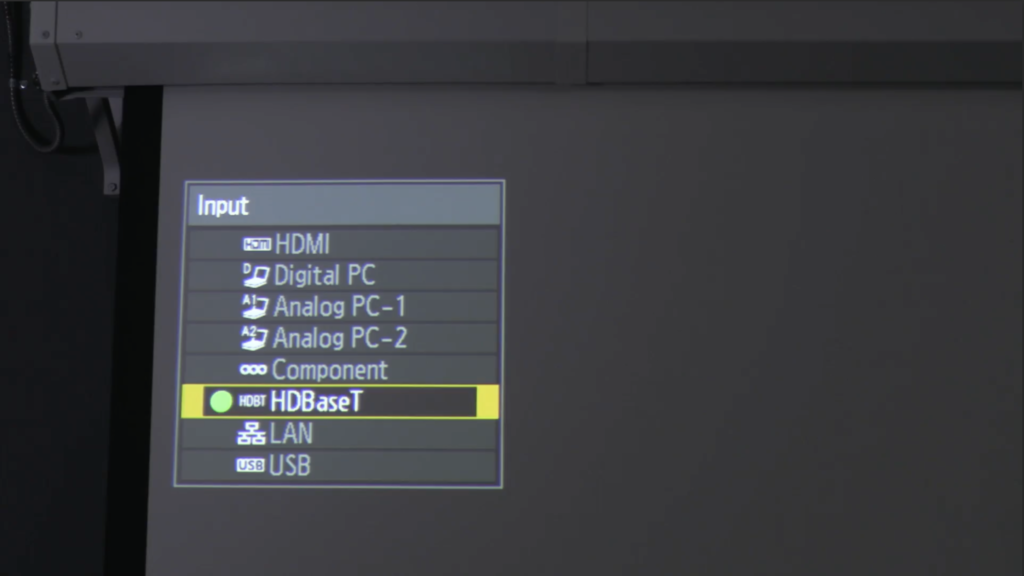
The Input should be on HDBaseT. HDBaseT is the only signal in these rooms.
4. If the Receiver is set to Mac Mini, an Apple login screen will appear. You can log in with your Film/Video credentials using the wireless keyboard and mouse. You can then use the Mac Mini like any lab computer to play audio and video files.

Apple TV
As an alternative to using an HDMI cable, you can connect an Apple laptop to the AV rack in the computer labs using the Apple TV.
- Using the quick select source buttons on the Denon Receiver, select “Apple TV”.
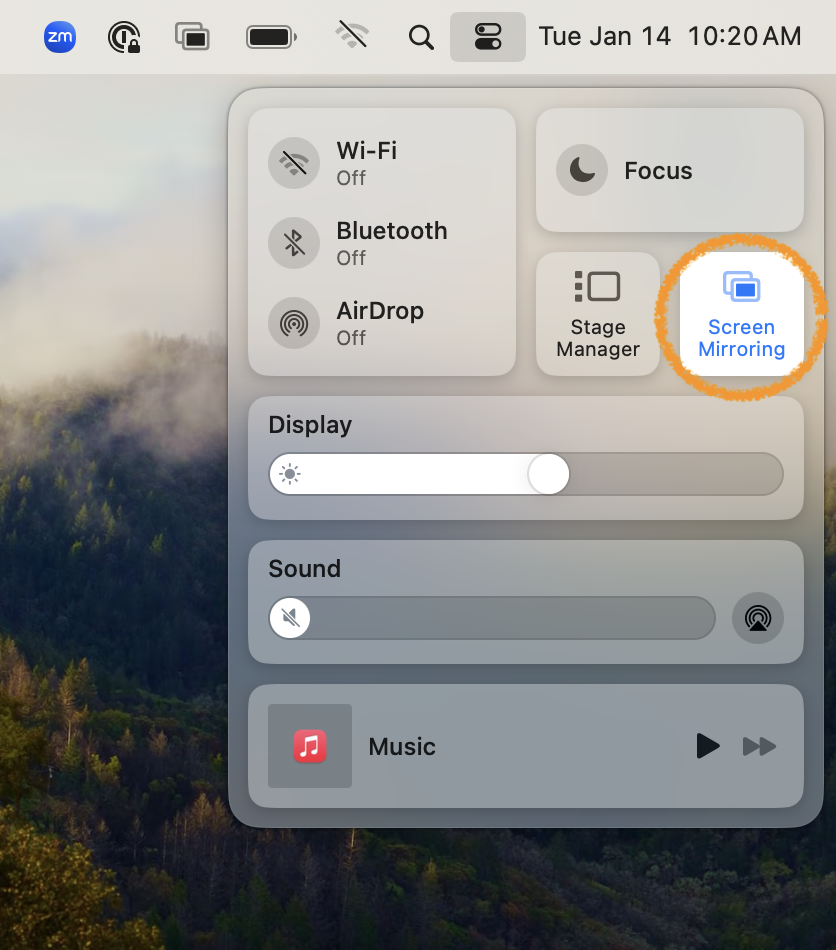
- On your personal device, click on the sliders on the top bar menu to the left of the calendar date.

- On the quick menu that pops up, click on Screen Mirroring.
- You will see options for various Apple TV’s that you can connect to based on proximity. Click on the Apple TV with the same name as the room you are in.
- If Apple TV is selected as the source on the AV Rack, a four-digit code should momentarily pop up on the display.
- Type this four-digit code onto your laptop when prompted and you should be connected.
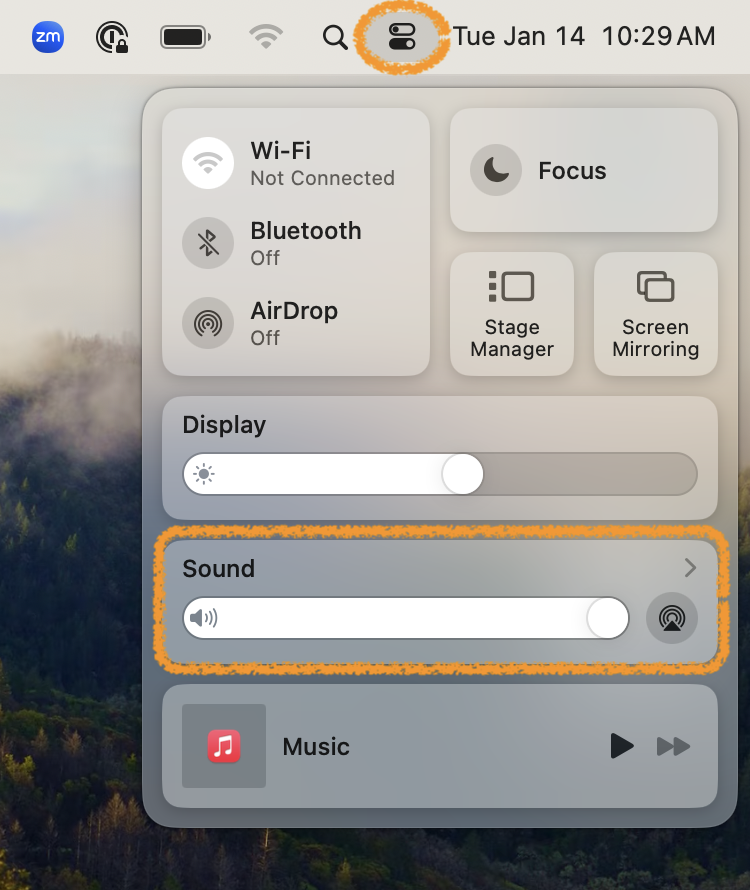
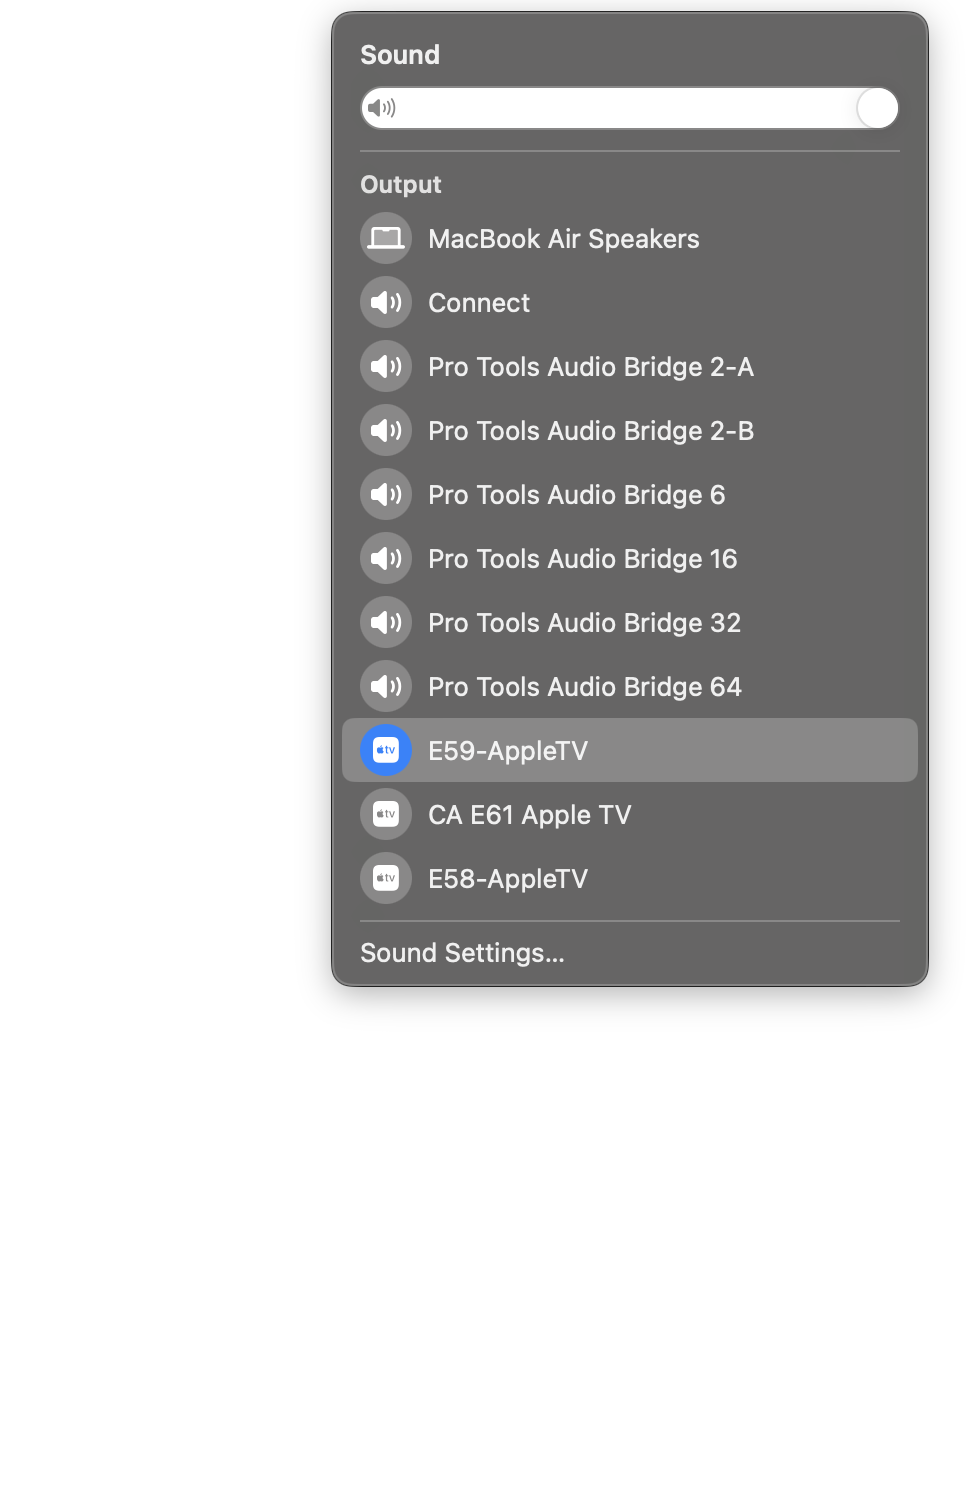
If you do not hear any audio, please make sure that your sound source is also the Apple TV. To check, click the sliders on the top bar menu like before, and click on sound.
Troubleshooting Techniques
Laptop playback issues: If you have playback issues when connecting a laptop to the rack via HDMI, restart your laptop while the HDMI cable is still connected.
Flickering black login screen: If the Mac mini login screen periodically flashes to black, please restart the computer by pushing the Mac mini power button located on the front of the rack.
Audio coming from projector: To make sure audio is routed correctly to the classroom speakers, make sure that the Denon receiver is turned ON.