
Installing Minor macOS Updates
macOS requires periodic updates to keep your computer safe, as well as to maintain security compliance requirements.
These instructions will walk you through installing minor macOS updates on your Mac computer. The whole process takes around 30 – 45 minutes.
WARNING: Installing updates requires restarting the computer, so be sure to save any open projects and close all running programs before continuing. Also, be sure to make a backup of your important files before installing any macOS updates!
For macOS 12 Monterey and Earlier
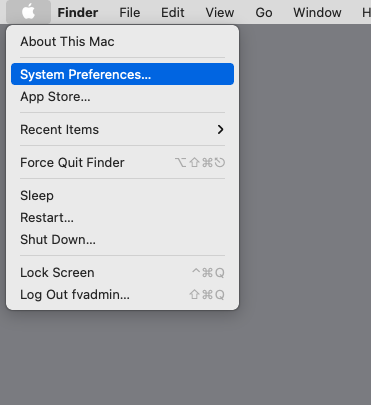
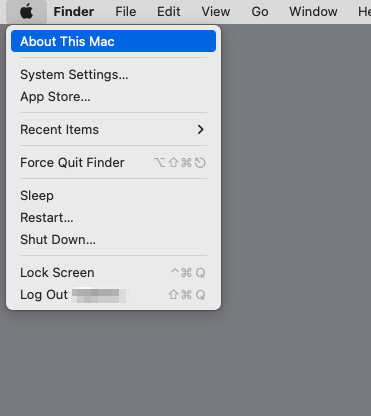
To begin, click on the Apple logo in the upper left and select System Preferences.
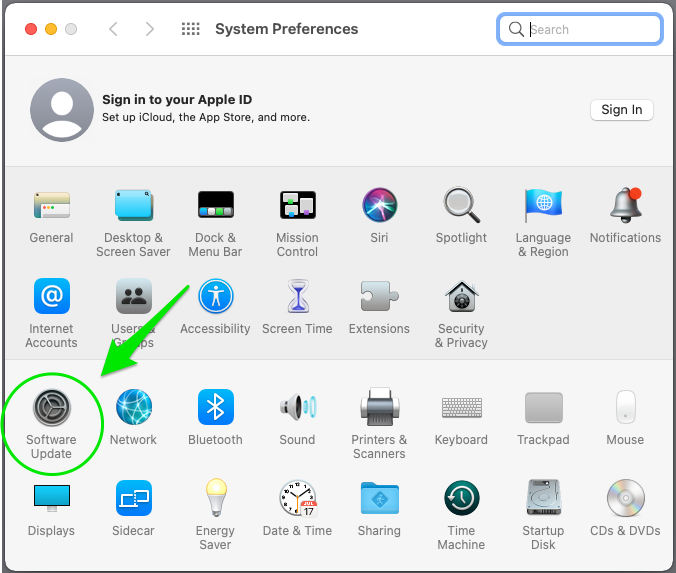
Click on the icon for Software Updates.
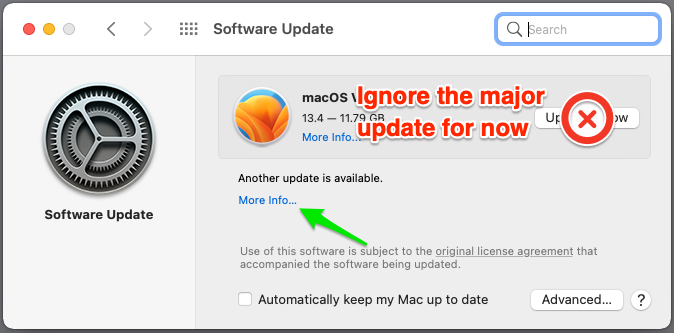
After it checks for updates, it will likely show you a new version of macOS that’s available, such as macOS Ventura. Ignore that for now, and instead click on the link that says More Info.
It should list a later version of your current installation of macOS. Go ahead and click Install Now.
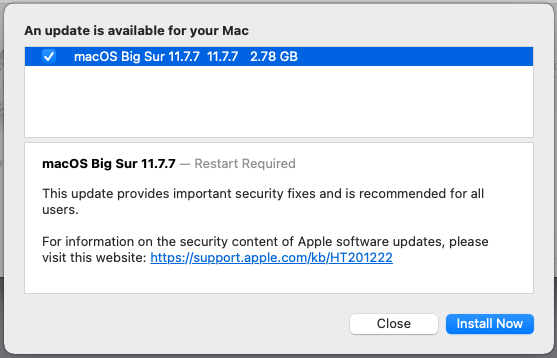
If any other updates show as available, uncheck them for now and only install the macOS update.
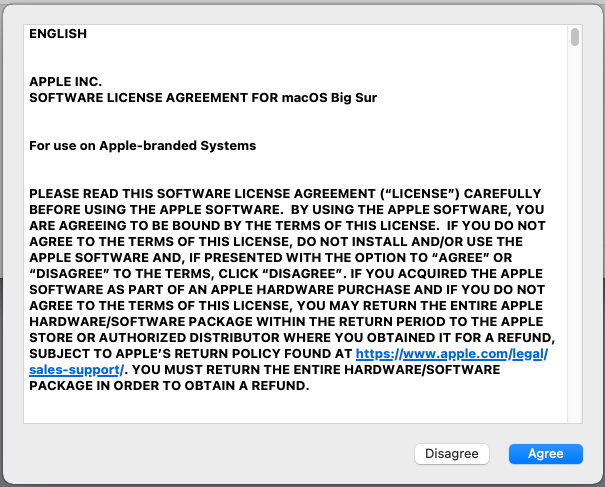
You’ll likely get an updated software license agreement to review. Click Agree once you’re ready.
That’s it! The update will begin downloading and installing, and at some point the computer will restart itself. Once the installation is complete, you’ll be brought back to your desktop.
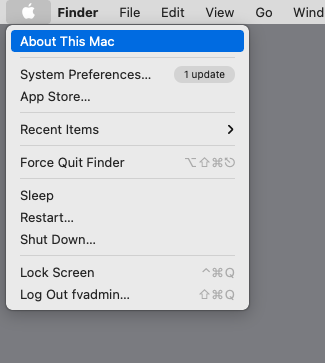
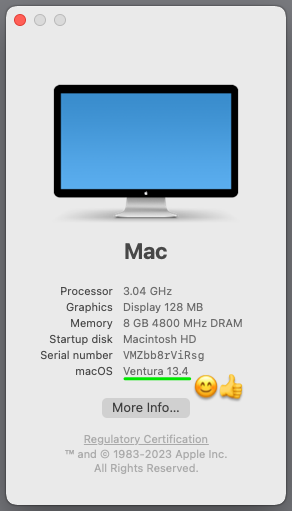
If you’d like to confirm the update was successful, click the Apple logo in the upper left again and choose About This Mac.
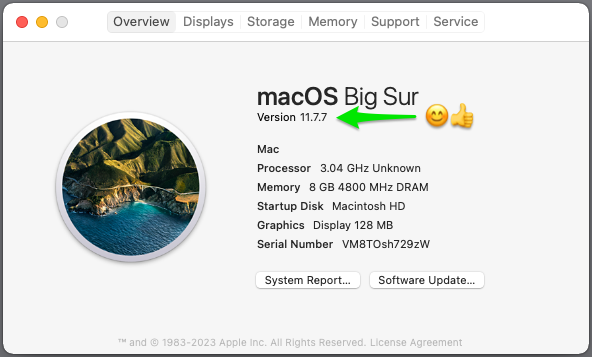
You’ll be able to confirm that the version of macOS that’s installed is the current version.
If you have any questions or run into any problems, please reach out to 2popsupport@calarts.edu for assistance.
For macOS 13 Ventura and Later
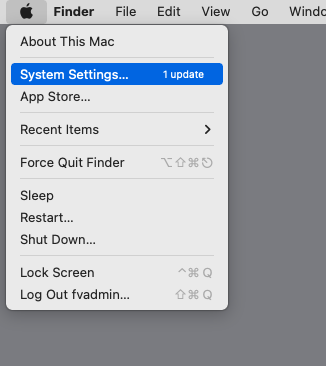
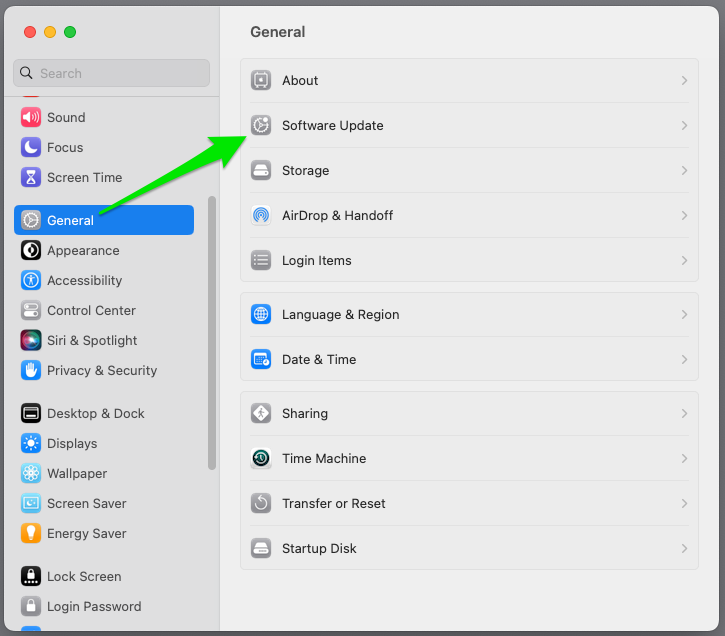
To begin, click on the Apple logo in the upper left and select System Settings.
If it already sees that there’s an update available, it will go straight to the Software Update category. Otherwise, click General, and then choose the Software Update category.
Once you see the software update available, click the More Info link.
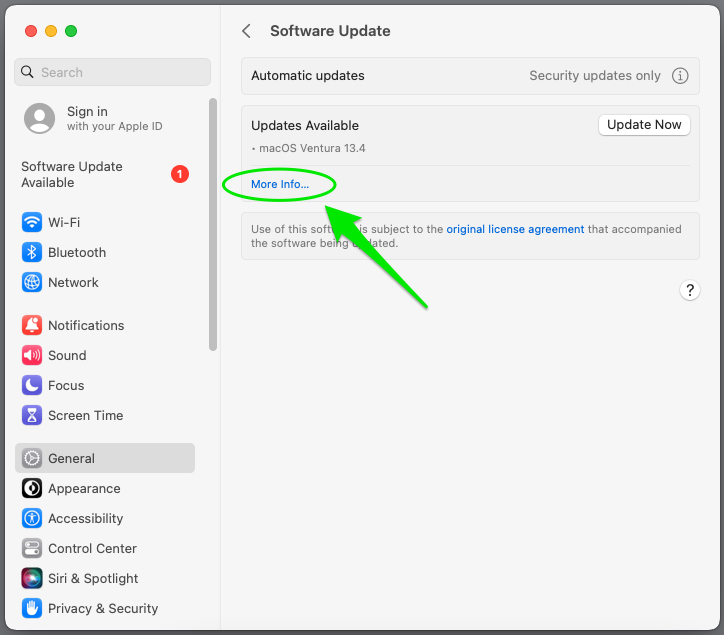
It should list a later version of your current installation of macOS. Go ahead and click Install Now.
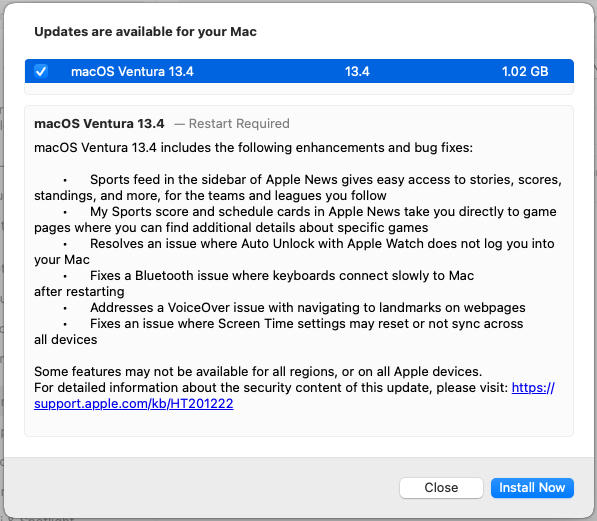
If any other updates show as available, uncheck them for now and only install the macOS update.
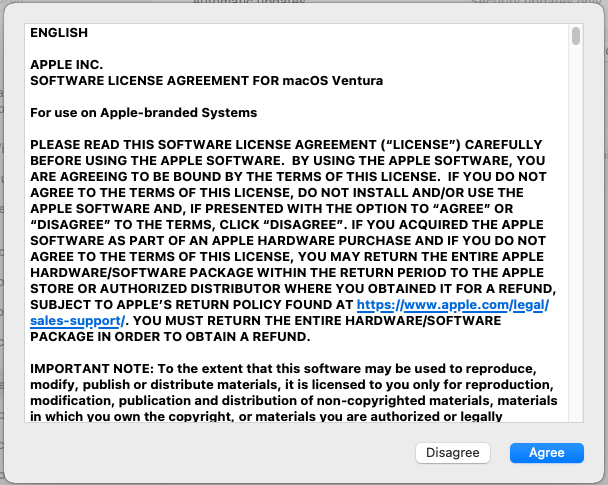
You’ll likely get an updated software license agreement to review. Click Agree once you’re ready.
That’s it! The update will begin downloading and installing, and at some point the computer will restart itself. The whole process takes around 30 – 45 minutes. Once the installation is complete, you’ll be brought back to your desktop.
If you’d like to confirm the update was successful, click the Apple logo in the upper left again and choose About This Mac.
You’ll be able to confirm that the version of macOS that’s installed is the current version.
If you have any questions or run into any problems, please reach out to 2popsupport@calarts.edu for assistance.
Update Notifications
In addition to seeing the usual macOS update notifications that appear in the upper-right corner of your screen…
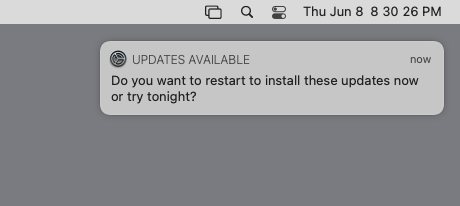
… you may also see a window that pop-up and prompts you to update. It will look something like this:
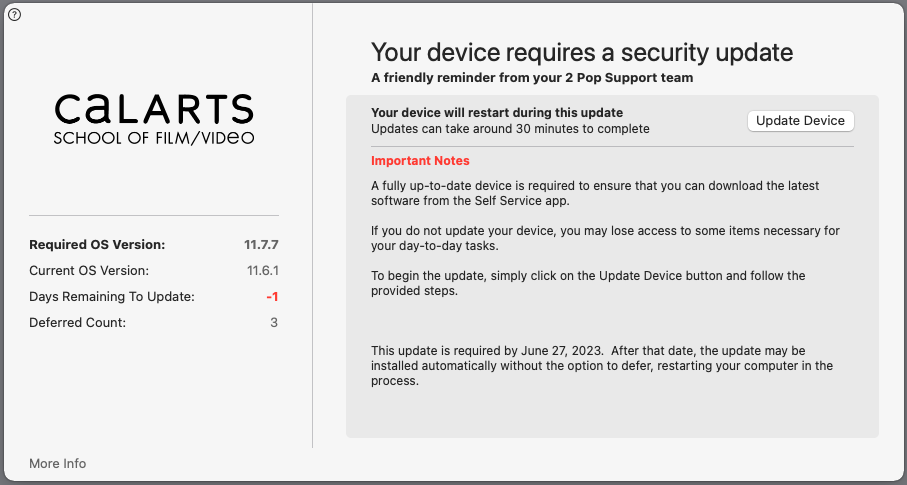
This is to notify you that there is a required software update that needs to be installed right away.
You’ll be able to defer the update for two days before it gets automatically installed, restarting the computer in the process and potentially closing any unsaved work you may have open.
It is STRONGLY recommended that you install the macOS updates as soon as you see either of these notification windows. These updates often contain security updates and fixes that will help keep you protected and your device in compliance with CalArts data security requirements.
If you have any questions or concerns, please reach out to 2popsupport@calarts.edu.