
Exporting a ProRes 422 HQ .mov from Premiere Pro for Bijou Festival
First, be sure you have set In (press I on keyboard) and Out (press O on keyboard) points in your timeline. These define where your film begins and ends.
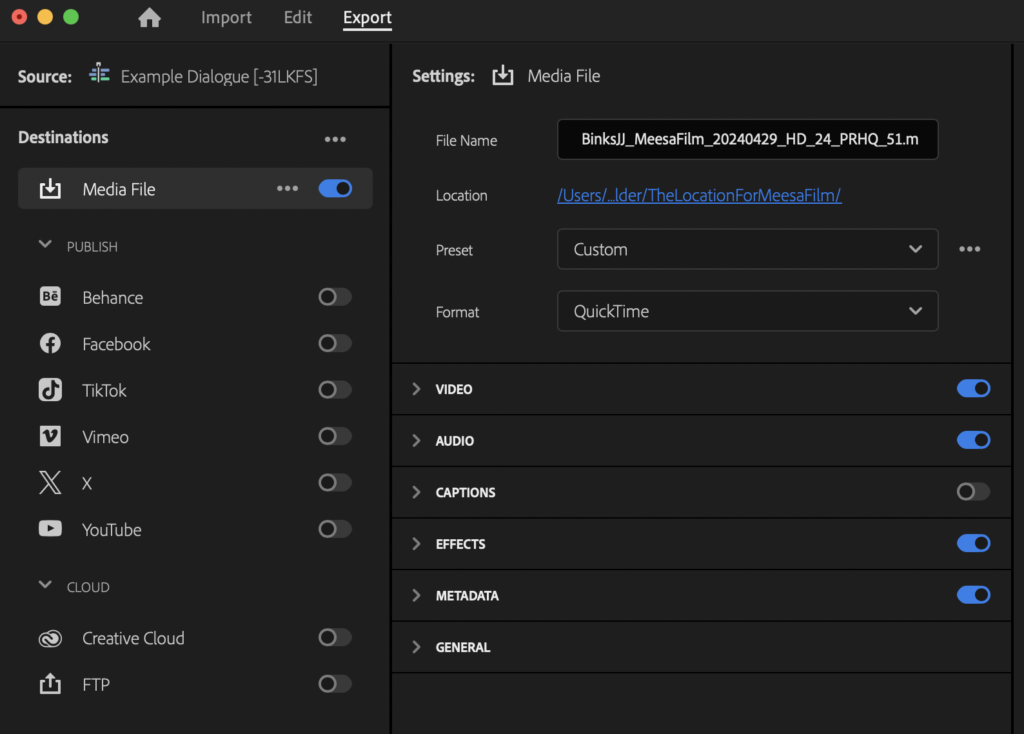
Choose Export > Media… from Premiere’s File menu.
Be sure Media File is selected.
Under Settings, click next to File Name to name your movie.
Name your file based on the standard naming convention, in the case of Bijou Festival, be sure to follow the extra naming guidelines as found in the submission instructions.
| Example: BinksJJ_MeesaFilm_20240429_HD_24_PRHQ_51 |
Click on the file path next to Location and choose a folder on a local drive that has at least 3 GB of free space available for each minute of your finished film. (For example, if your film is 2 minutes long, make sure you have at least 6 GB of space.) The actual file may be smaller, depending on content.
Choose QuickTime for Format.
Next, open the Video tab by clicking on the arrow >. Select Apple ProRes 422 HQ for the Video Codec.
Uncheck the checkboxes next to Frame Size, Frame Rate, Field Order and Aspect. Make sure they are set to the settings you would like, and settings that fit within the Bijou Festival Submission Instruction Specifications.
In this example, our film’s settings are as follows:
- Frame Size: Full HD (1920 x 1080)
- Frame Rate: 24
- Field Order: Progressive
- Aspect: Square Pixels (1.0)

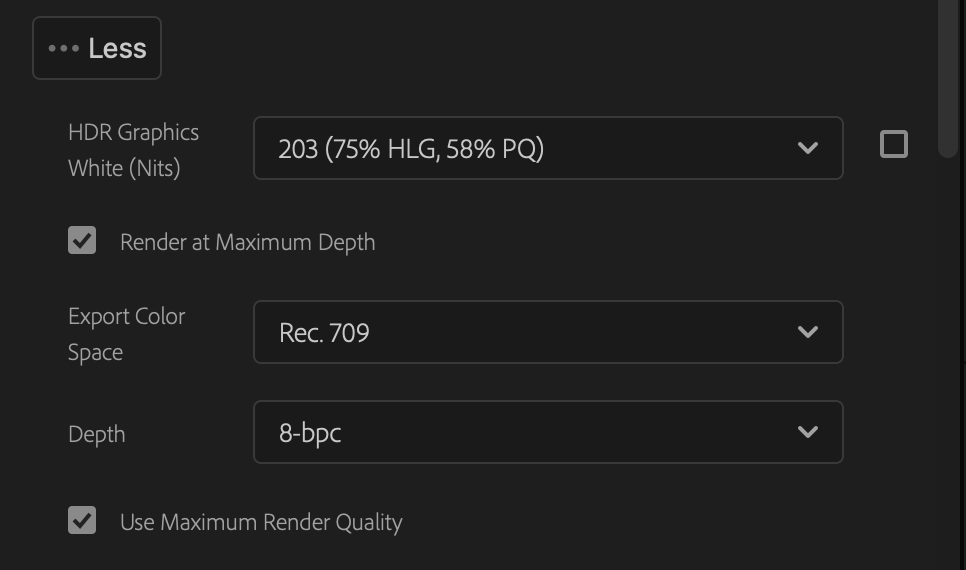
Click on …More and check the rest of the settings (you may want different settings if you are working in different color spaces). Our example is as follows:
- HDR Graphics White (unchecked)
- Render at Maximum Depth (checked)
- Export Color Space: Rec. 709
- Depth 8-bpc
- Use Maximum Render Quality (checked)
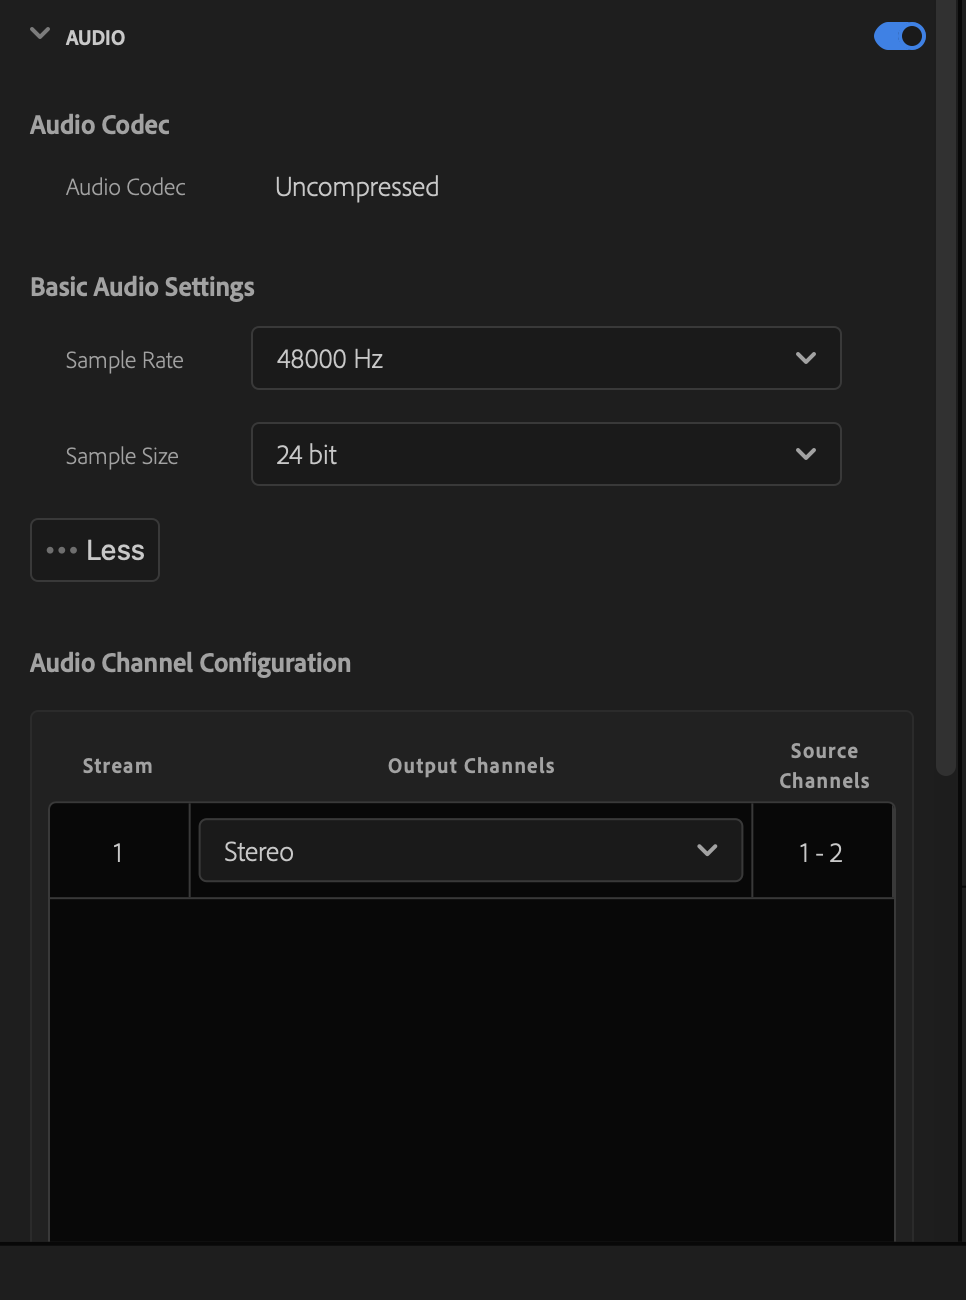
Open the Audio tab, and make sure the settings are as follows:
- Audio Codec: Uncompressed
- Sample Rate: 48000 Hz
- Sample Size: 24 bit
- Audio Channel Configuration: Stereo
Below the video preview, set Range to Source In/Out. The number at the right of the timeline tells you how long your final movie will be. A summary of your settings will be shown.
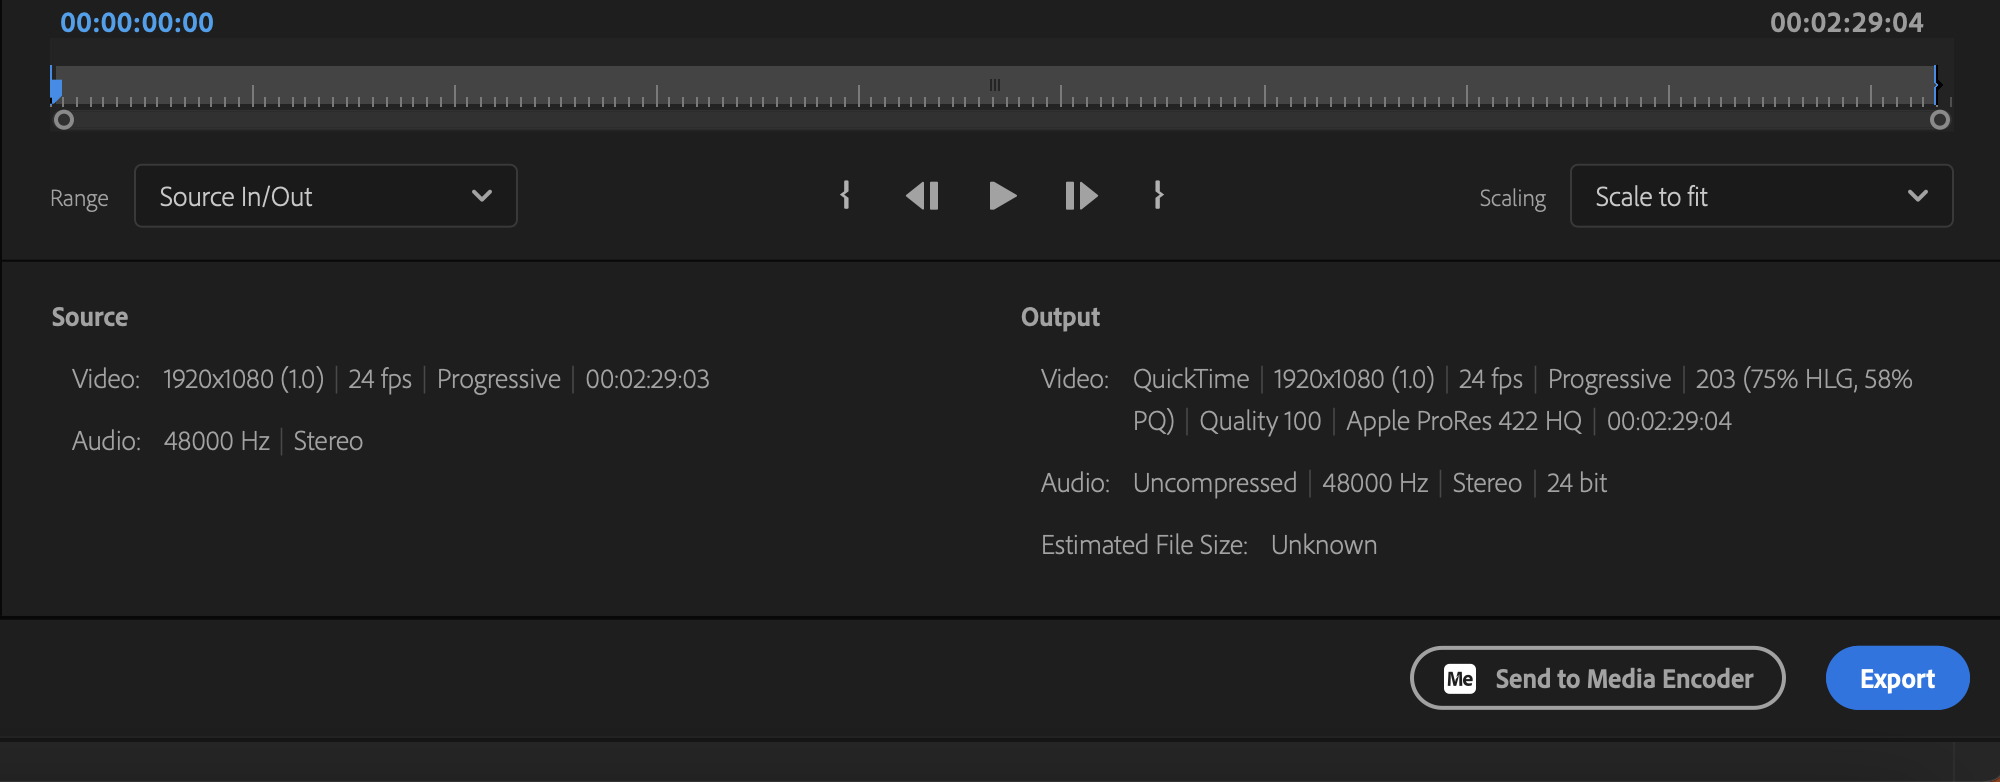
When you’ve confirmed your settings are correct, click Export to render your movie. (Or click Send to Media Encoder, if you want to render it there instead. The end results will be the same.)
Watch the file you export in multiple different media playback applications (Quicktime, IINA, Blackmagic Media Express, VLC) to ensure it looks and sounds correct.