F104 Quickstart Guide: Operating and Recording
This guide goes over how to use all of the equipment as well as record using the recording booth. To record, you’ll need to bring in your own microphone, mic clip, and at least one pair of headphones.
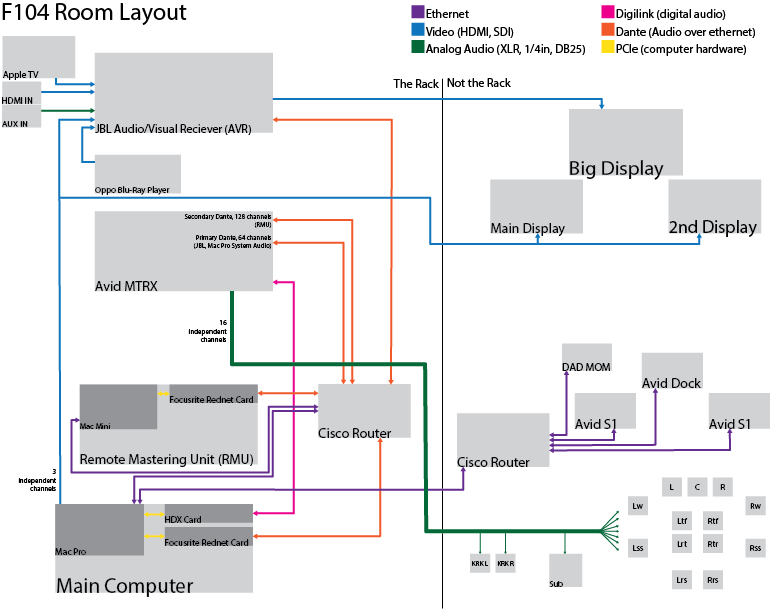
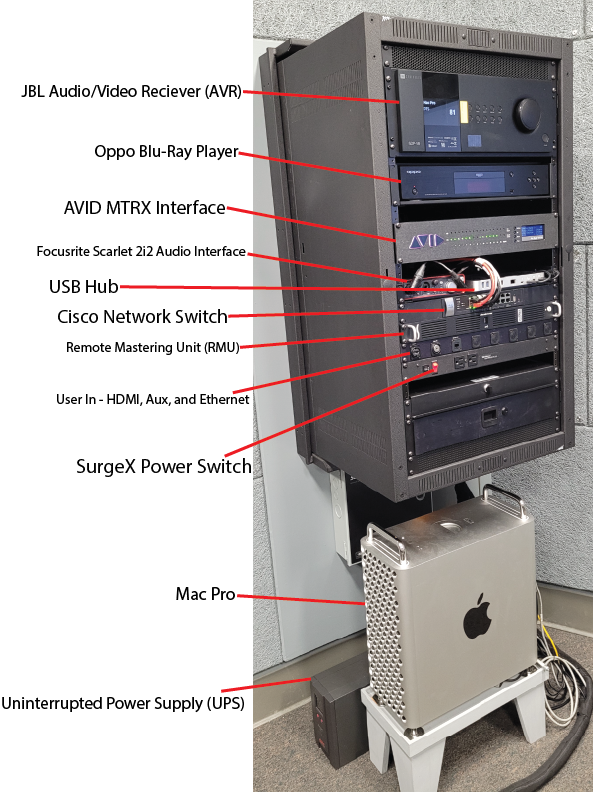
Introduction to the F104 Rack
Startup
- Typically, the computer and all accompanying equipment should already be on when you enter the space. If you do not see the F/V login screen on the computer, first turn on the Uninterrupted Power Supply (UPS). This should automatically power on the JBL receiver, Blu-Ray Player, AVID MTRX and Cisco router.
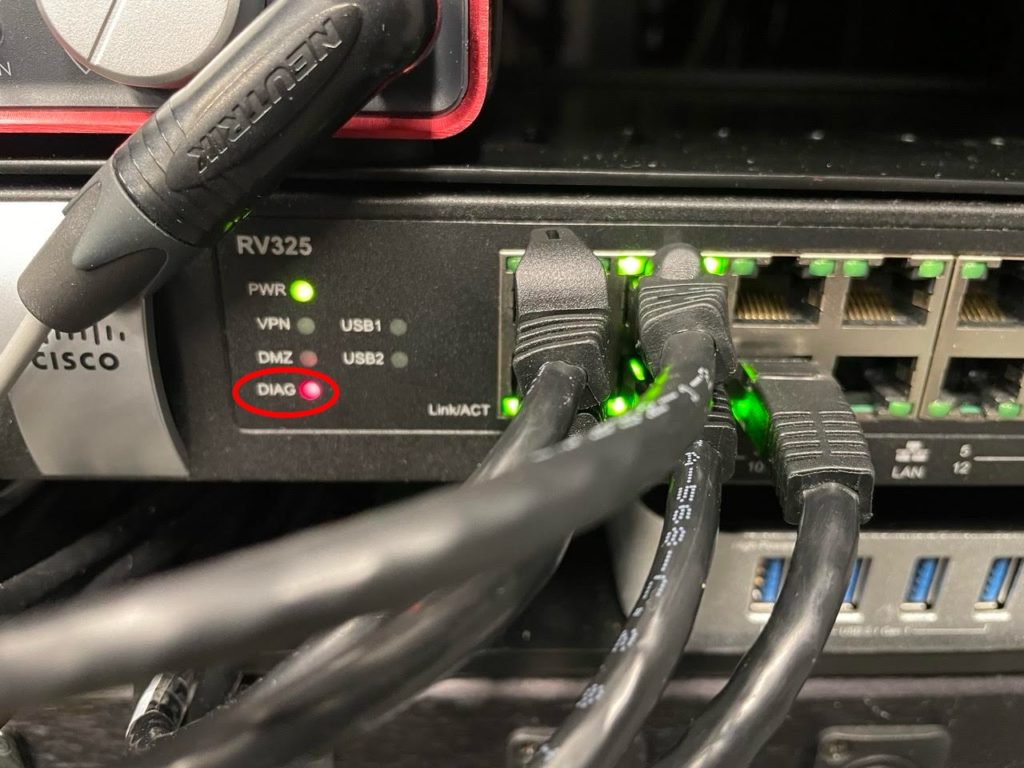
- Wait for the Cisco network switch to complete its diagnostic cycle: “DIAG” will light up solid red and “PWR” will flash green. This process takes about a minute; the playback system relies on network connections to function properly.
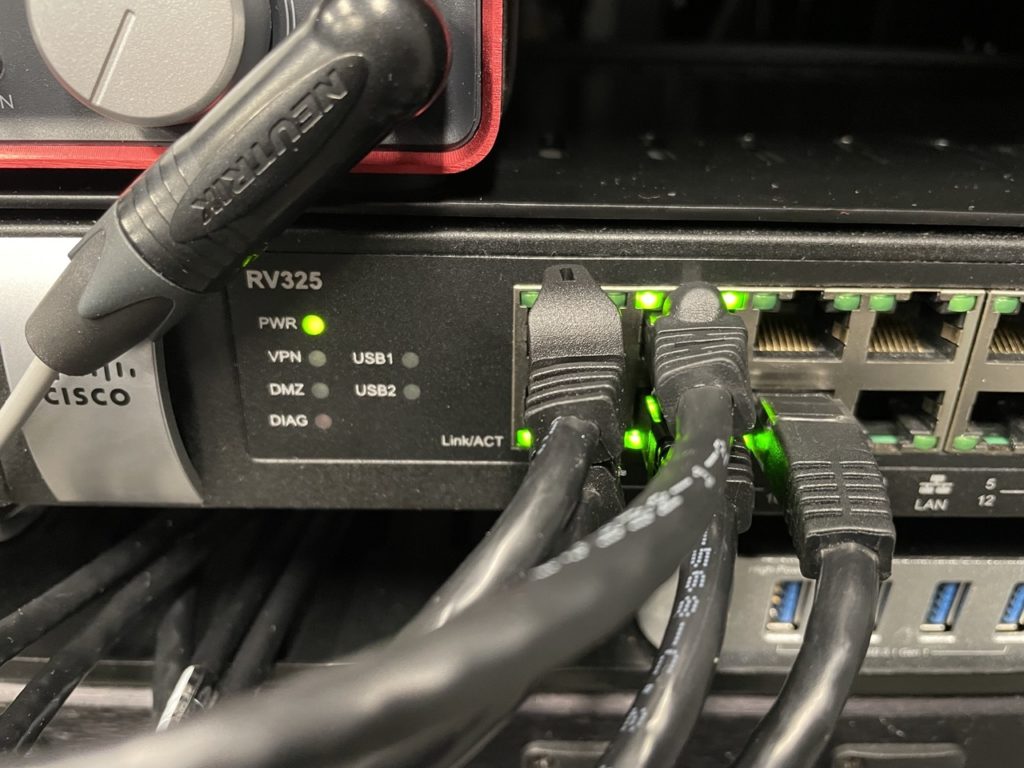
3. Once the red “DIAG” indicator goes away and “PWR” is solid green, power on the Mac Pro by pressing the power button on the top of the computer.
4. Once the Mac Pro has Booted up to the login screen, press the SurgeX power switch down. This will turn on the Genelec and KRK speakers.
4. Set the JBL AVR to the display source you want to use. Cycle through the available sources using the + and – buttons directly to the right of the unit’s display.
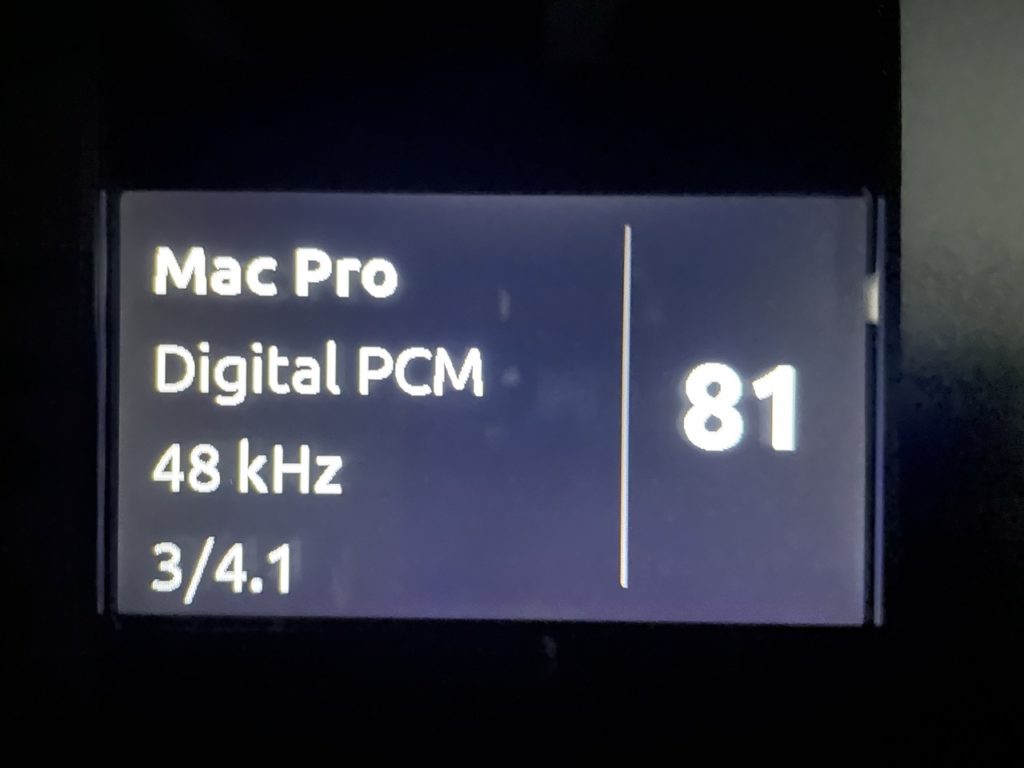
Don’t adjust volume using the large knob on the receiver, it should always be set to 81. Please do not attempt to change any other settings. Only use the DAD MOM monitor controller on the desk to control output volume.
The JBL AVR is for setting which video source to view on the large NEC wall monitor. The DAD MOM (“Monitor Operating Module”) is for setting playback volume and switching between audio sources to hear out of the speakers.
Controlling Audio: DADman Control Software and DAD MOM Monitor Controller
When you log into the Mac Pro, the monitor controller application DADman will auto-launch. Allow it a moment to load up the default settings. These include a DADman [F104].dms file and a DADman [F104].dmprof, as is shown at the top of the window (each filename may also contain a revision date). When these settings have loaded, the software interface will look like a mixer. You may hide or minimize the application window. Do not quit the DADman software until you are ready to log out.
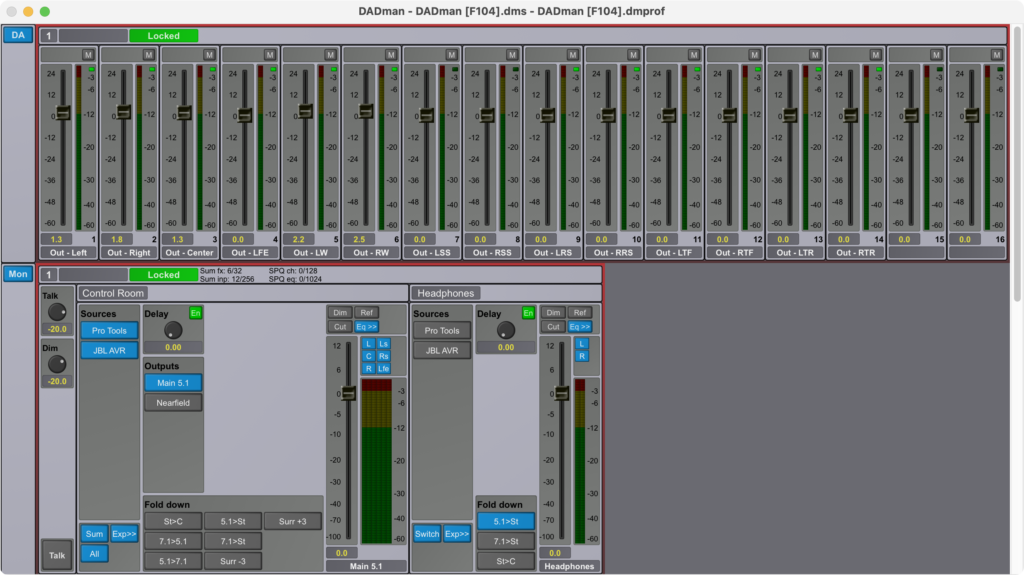
Two main audio sources are enabled by default: HDX 9.1.4 and Mac Dante 9.1.4. Any audio from Pro Tools (F104 – Pro Tools & HDX) will play through the HDX source; any system audio played via the Mac Pro (F104 – Mac Dante), such as Finder, Chrome, Premiere, etc. will play through the Mac Dante source. To hear audio coming from the JBL, you would need to additionally enable the source called JBL AVR 9.1.4. All other devices (Blu-ray, Apple TV 4K, HDMI In, etc) will play through the JBL AVR source, as long as they are selected on the JBL itself.
DAD MOM Monitor Controller
This is the DAD MOM (Monitor Operating Module), your monitor Controller. It controls the output audio level via the large gold knob, as well as what audio sources are active (Src.), and which speakers are active (Spkr.). Any function accessible on the DAD MOM is also accessible through the DADman software.
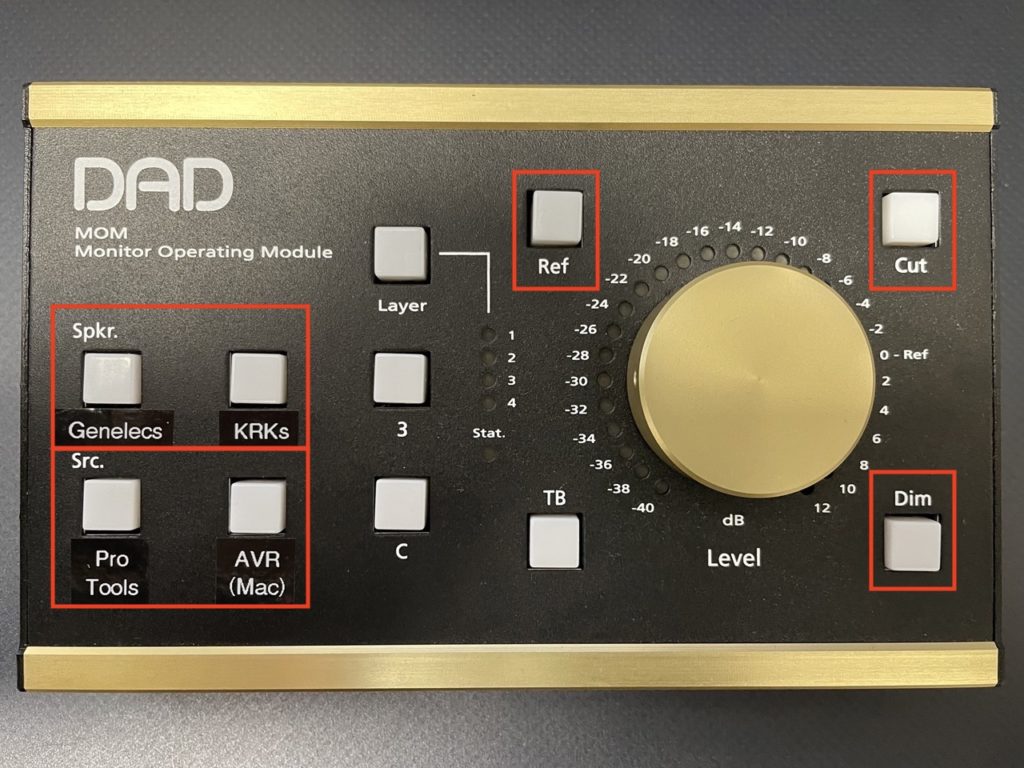
By default, the DADman software and thus the DAD MOM are set to a calibrated reference level of 78 dB SPL, or “0 – Ref” on the gold knob.
- Spkr. is where you select which set of speakers you want to listen through: the wall-mounted Genelecs (9.1.4, 5.1) or the KRKs on the desk (stereo).
- Src. is where you select which audio source you want to listen to. Pro Tools and Mac Dante are enabled by default.
- Ref will lock the output level to the calibrated reference level of 78 dB SPL. While Ref. is enabled, the large knob does nothing.
- Dim will immediately turn down the sound output level by -20dB
- Cut will mute all sound output.
Recording Booth Setup
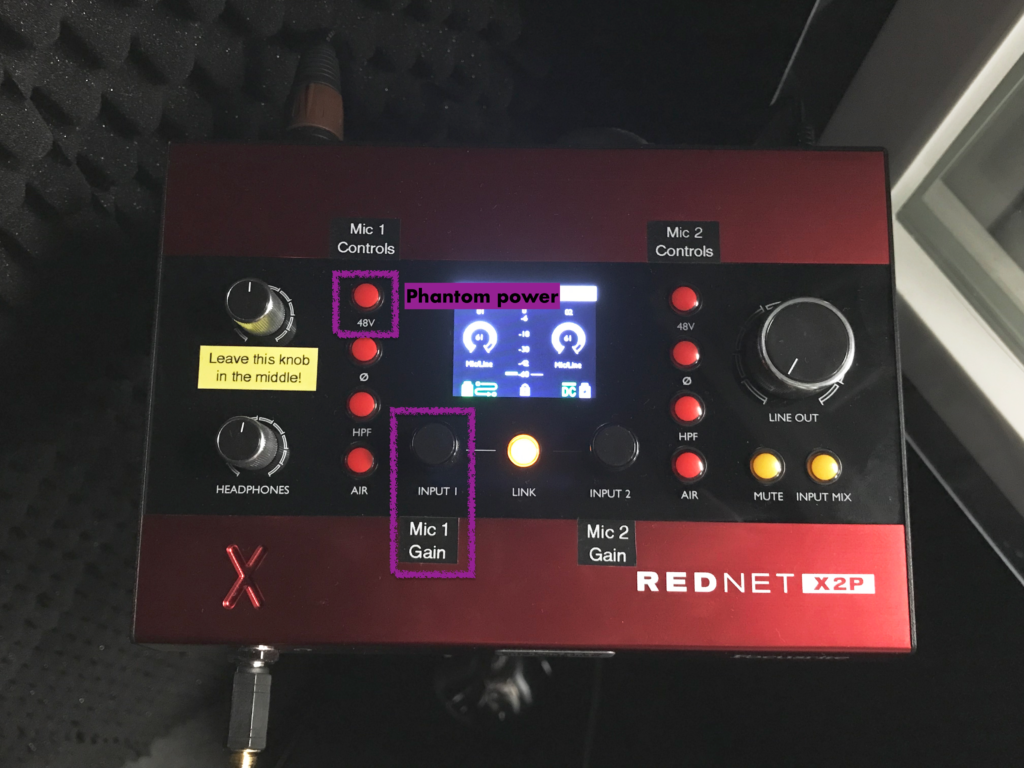
1. To set up: screw your mic clip onto the mic stand, insert your mic, and connect it to the XLR cable hanging from the mic stand. This cable is connected to the Focusrite Pro RedNet X2P audio interface located in the booth.
2. The audio interface lets the person in the booth control their mic gain and their own listening levels.
3. Headphones plug into headphone jack on the bottom left.
4. The Headphones knob adjusts the mic level in the headphones (this doesn’t affect the actual recording level).
5. The Network/Local knob adjusts the mix between audio being sent from Pro Tools and your local inputs. Leave this knob in the middle
6. If your mic needs phantom power (for example if it is a condenser mic), Press the 48V button on the audio interface.
7. To set the microphone gain, adjust the Input 1 knob. The small LCD screen in the middle of the interface will show you the levels of audio coming from your microphone.
Please note that the Focusrite Pro RedNet X2P audio interface allows for a total of 2 inputs (2 mics). If you’d like to connect a 2nd microphone, you must provide your own XLR cable and connect this cable to input 2 on the interface. Control the gain for Mic 2 using the Input 2 knob.
For each input connected to the audio interface, you can optionally turn on the following buttons, though you likely will not need them:
Ø (Phase) – Enables phase reverse
HPF: Enables 80Hz high pass filter
AIR: Activates “Air mode” which boosts higher frequencies (10 and 20 kHz respectively) to help vocals sit better within a mix.
Face the corner of the booth, not the window, when speaking into the mic for the best sound.
When not in use, keep the booth’s door open, otherwise it gets smelly in there!
Setting Up Pro Tools for Recording
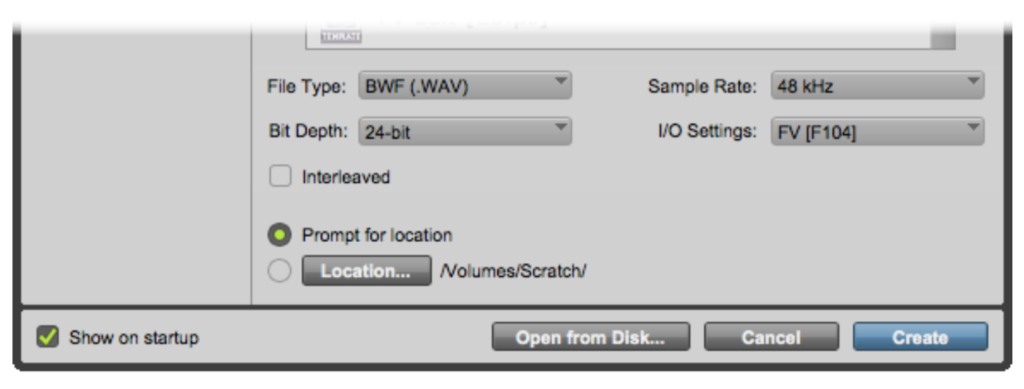
- Use these settings when creating your Pro Tools session:
- File Type: BWF (.WAV)
- Bit Depth: 24 Bit (film standard)
- Sample Rate: 48 kHz (film standard)
- I/O Settings: FV [F104 Surround]
- Select Track > New [⌘+Shift+N] to create a new track with the default settings (Mono Audio Track).
- In the track’s I/O settings, set:
- Input to Booth In 1 (Mono)
- Output to Surround Monitors.C


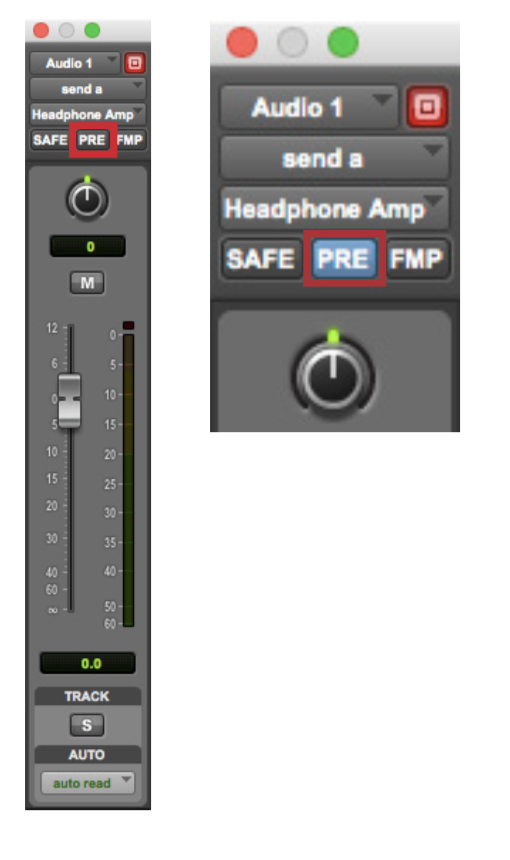
- To send a track’s audio to the booth’s headphones, create a Send to Headphone Amp (Stereo) output on the track.
- A fader will pop up for that individual send;
- Activate the PRE button to allow the booth to control their monitoring level separately;
- Turn the Send fader up to “0.” You can hold Option on the keyboard and
click on the fader knob to turn it up to 0.

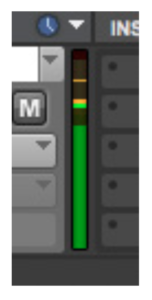
Send set to Booth Headphones (Stereo) -> Booth Headphones - Click the Record Enable and Input Monitoring buttons to hear the mic’s input.
- Adjust the mic gain using the knob on the Focusrite Pro RedNet X2P audio interface inside the booth. For a healthy record level, the peaks should fairly often jump into the amber area of the meter.
- To begin recording, press 3 on the numpad.
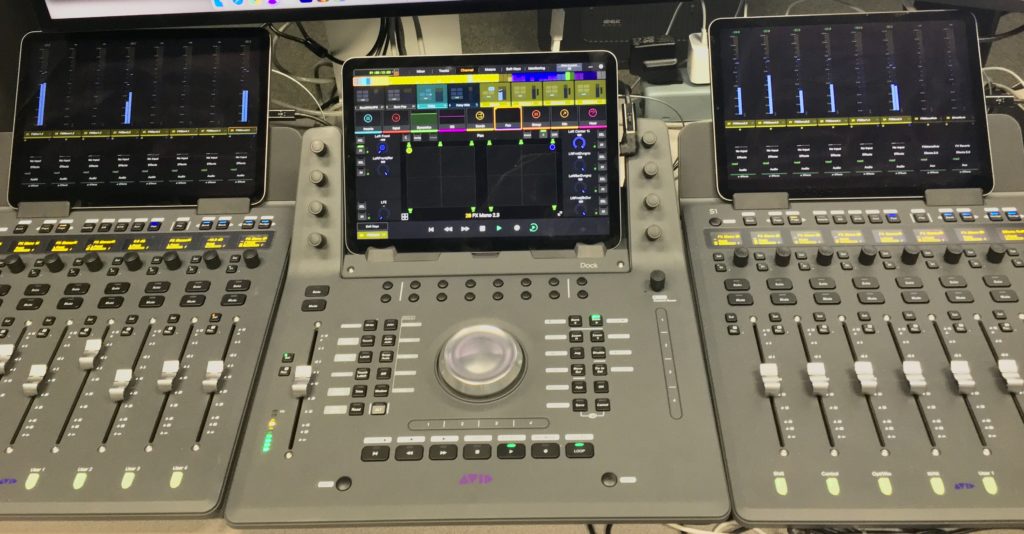
AVID Control Surfaces
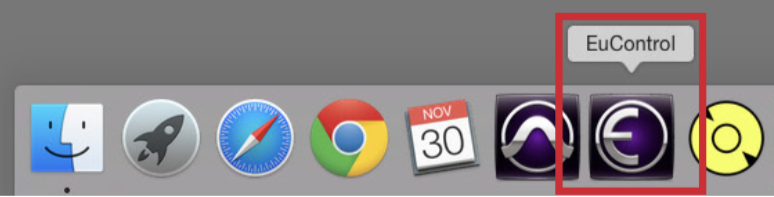
The EuControl app will autolaunch upon login. It takes a bit to load up, but you can launch Pro Tools in the meantime.
Playing Blu-rays (Oppo)
- Turn on the Blu-ray player.
- Set the JBL AVR to Blu-ray with the + and – buttons next to the display.
- The Oppo has the ability to switch Blu-ray or DVD regions. Follow the instructions on the sticker. Be sure to return it to the default settings when finished
- On the DAD MOM, make sure the source JBL AVR is enabled.
- If watching in Atmos, you may have to cycle through audio settings on the JBL Remote located in the rack drawer AFTER you select the disk from the Oppo Menu, you may not hear audio otherwise.
The Blu-ray player supports Blu-rays, DVD’s, and CD’s.
Troubleshooting
Problem Try I can’t hear anything at all! – Check if there are green lights shining from the mounted Genelec speakers. If not, you haven’t turned the SurgeX on.– Check to make sure the ‘Cut’ button on the DAD MOM is off.– Open the DADman Control Software and double check that you have the selected sources and outputs are the ones you want active I can’t hear any Pro Tools audio! – Check that [Setup > Playback Engine] is set to HDX.
– On the DAD MOM (monitor controller), make sure the input source is set to Pro Tools.
– Re-import the F104 I/O Settings by going to [Setup > IO] and selecting Import Settings, then navigate to fvcentral > Support > Pro Tools I/O Settings, and select F104I can’t hear any audio from Chrome/Spotify/System/etc. – Click the mac sound settings in the top right corner of the screen– Ensure that you have F104 – Dante Main selected as the Output, and that the audio level is at max When all else fails, submit a 2 Pop Support ticket at the top of this page, or come see us in E104 during regular FVSound Helpdesk hours.
Shutdown
- Quit all apps including DADman.
- Log out of the computer. DADman may crash during the logout process, in which case you need to force quit the application. Right-click on the application icon in the dock and choose Force Quit.
- Turn off the lights & make sure the booth door is open.
- Be sure the door is fully closed when you leave.