
Exporting a ProRes 422 HQ .mov from DaVinci Resolve

In the Edit Page of DaVinci, be sure to set In (press I on keyboard) and Out (press O on keyboard) points in your timeline. These define where your film begins and ends.

Now go to the Deliver Page!
This is where you adjust your settings for output and finishing.
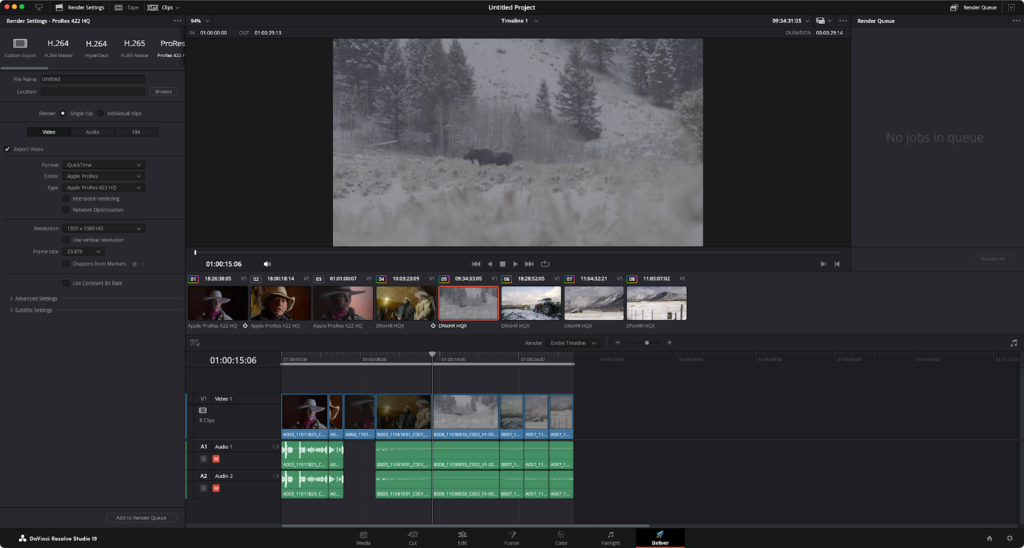
1. Output settings
You can choose the ProRes 422 HQ preset

And/or adjust your custom settings manually:
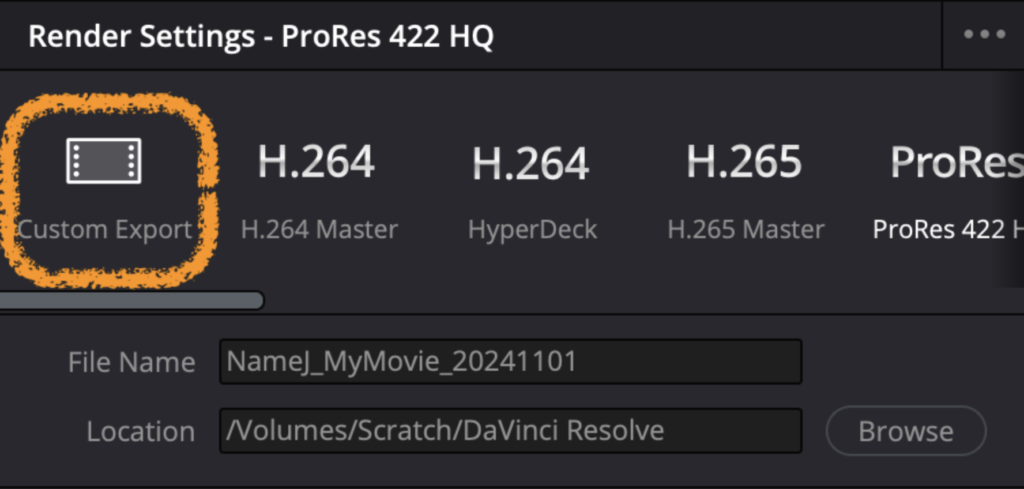
2. Name your film file
Beside File Name, name your file based on the standard naming convention: LastNameFirstName_MyMovieTitle_YYYYMMDD
| Example: BinksJJ_MeesaFilm_20240429 |
Sometimes festivals or screenings (even within the School of Film/Video), may have other requirements for naming files, always be sure to read through submission instructions to make sure you name your delivery file correctly.
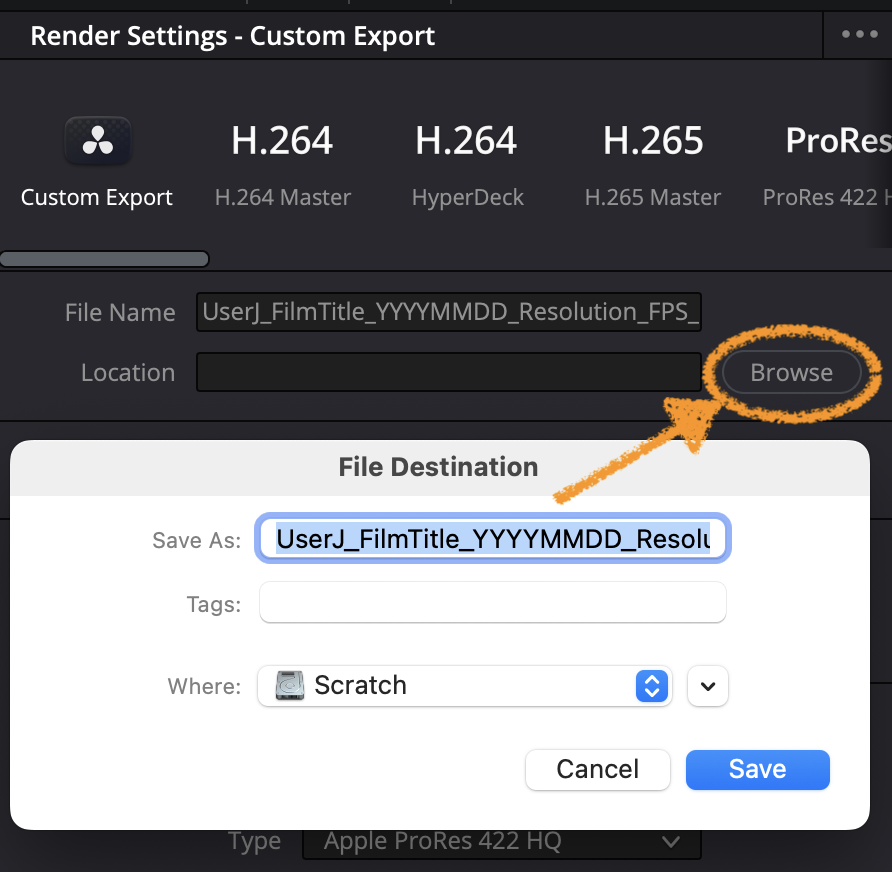
For Bijou Festival, please name your file as shown below!
LastNameFirstInitial_FilmTitle_YYYYMMDD
_Resolution_FrameRate_Codec_AudioFormat
SpielbergS_Jaws_19750620_HD_24_PRHQ_51
3. Choose a location for your export (create a new folder if you haven’t done so yet.)
Next to Location, click Browse and choose a folder on a local drive.
4. Set your Video export settings
Use the Video tab to set your Video Format, Codec, and Codec Type
- Format: QuickTime
- Codec: Apple ProRes
- Codec Type: Apple ProRes 422 HQ
Then pick your desired Resolution and Frame Rate

Double-check your Subtitle Settings if you have subtitles
- You can export your subtitles as a separate file
- Embedded into video (subtitles/captions kept in a separate file which means the subtitles can be turned off and on when played on a compatible system)
- Or burned into the video itself (subtitle contained in the video itself)
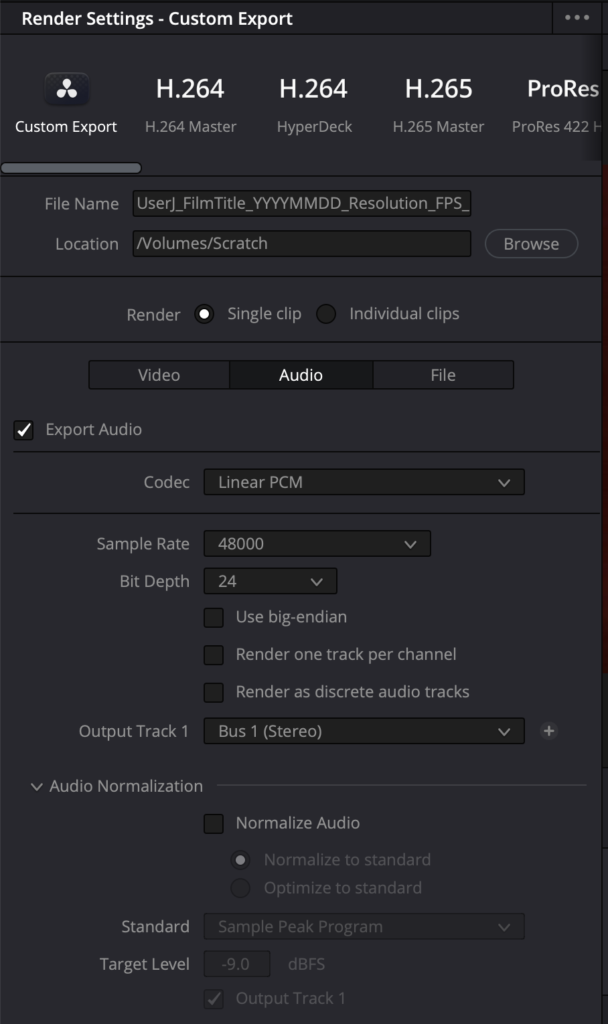
4. Set your Audio export settings
Open the Audio tab, and make sure the settings are as follows:
- Codec: Linear PCM
- Sample Rate: 48000 Hz
- Bit Depth: 24 bit
Set the Audio Output Track 1 to match your desired audio settings.
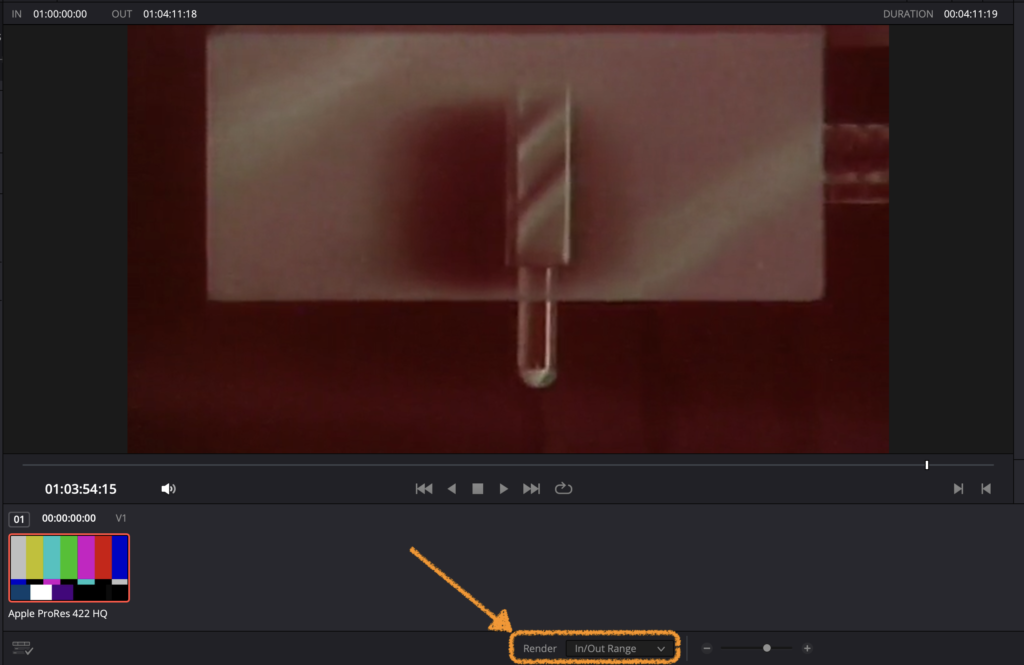
5. Set your export range
Below the video preview, set Range to In/Out Range.
If you do not set this, DaVinci will export your entire timeline.
5. Add to Render Queue
When you are done with your settings, add them to your Render Queue.

6. Add to Render Queue
Once you add an output to the Render Queue, it appears in the window on the top right of your interface. You can continue adding outputs to the list and start the render as a batch, or render individual outputs. Select the Jobs you would like to start, then hit Render All.


Watch the file you export in multiple different media playback applications (QuickTime, IINA, Blackmagic Media Express, VLC) to ensure it looks and sounds correct.