Setting Up a New Premiere Project
Setting Up a Project
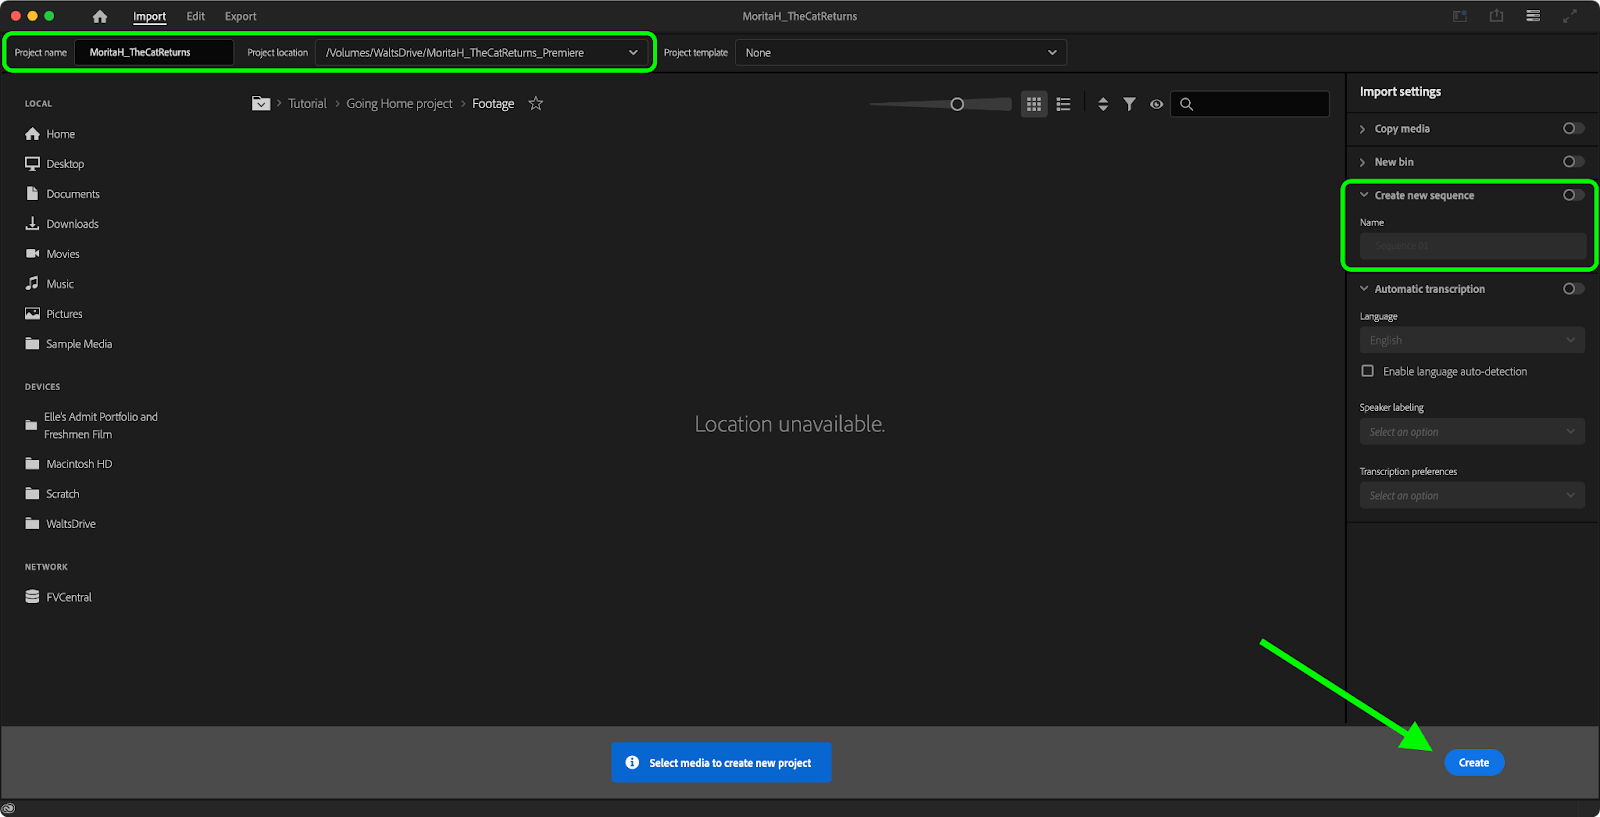
To properly set up a Premiere Pro Project with the correct settings, create a New Project.
Enter a Project Name, and select a Project Location to save your file into.
- We recommend creating a dedicated folder on your personal production hard drive for your Premiere Project, and keeping all of the media you will be importing into Premiere in that folder.
Unselect “Create New Sequence”, then Click Create. Do not upload any media to the project in this window, otherwise Premiere may auto-select the wrong settings for your project.
With the Project open, select File > Project Settings > Scratch Disk…
Be sure all Scratch Disks are set to Same as Project.
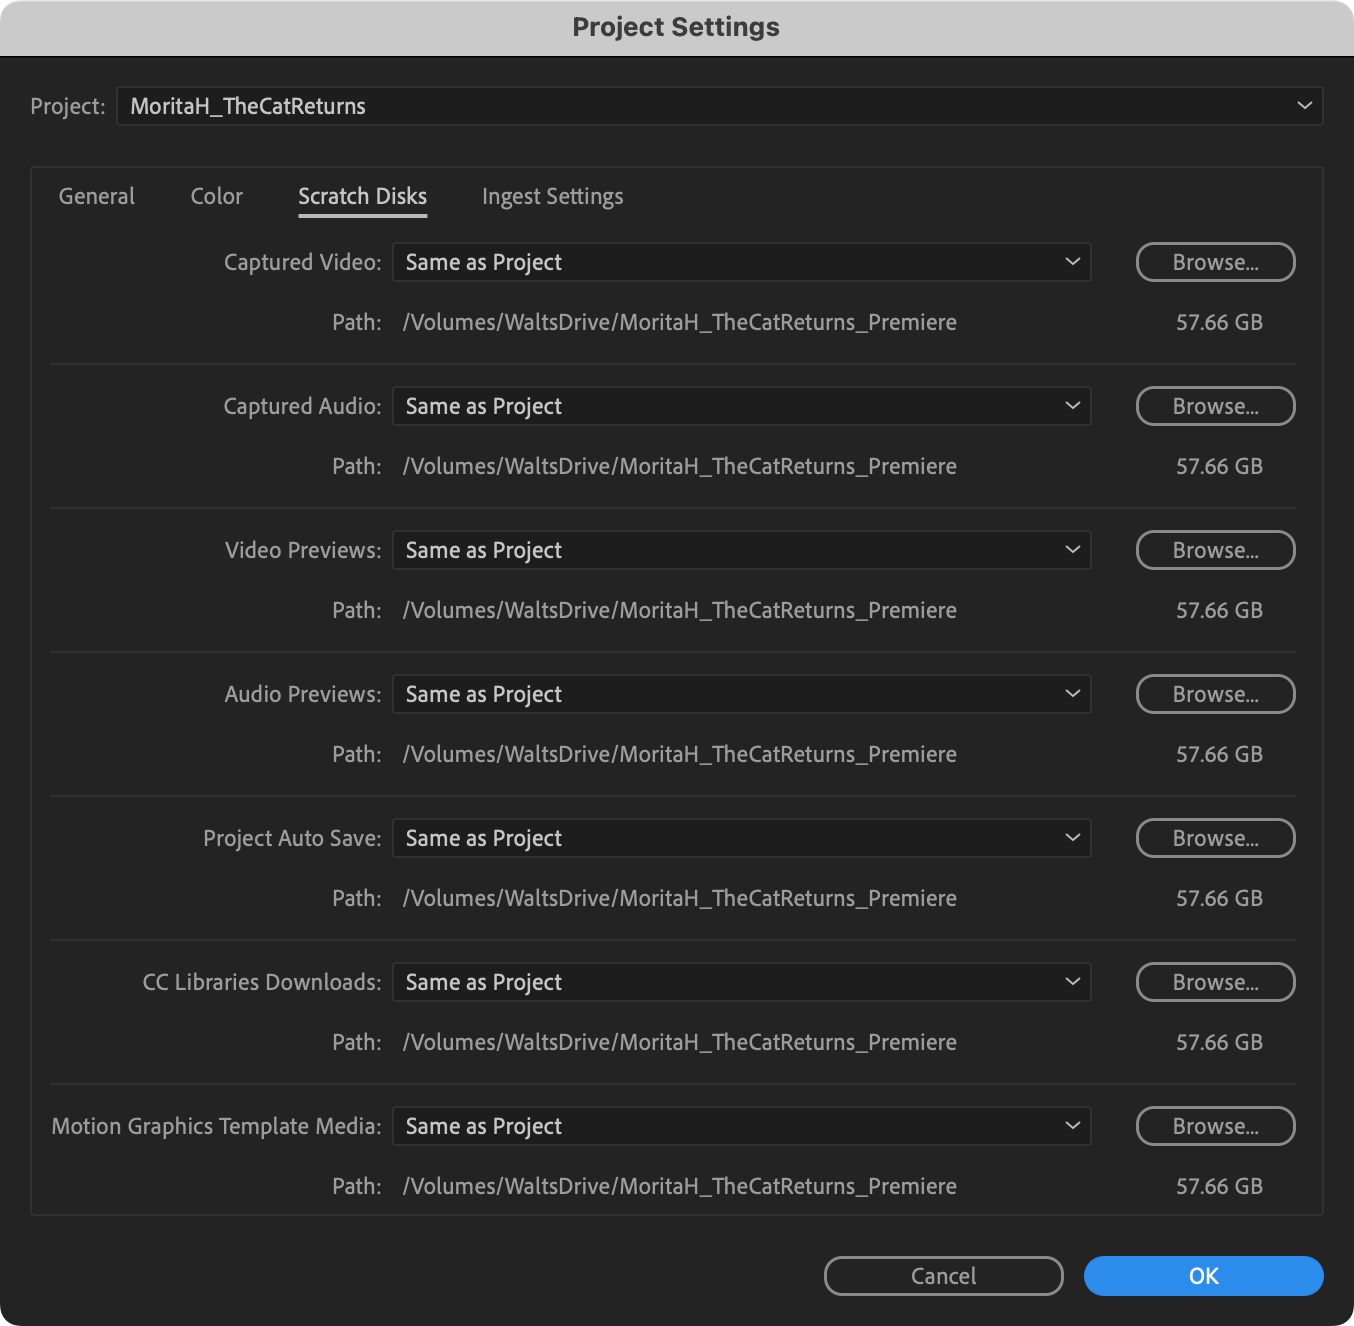
Note: Computers managed by CalArts have a partition named “Scratch”, but it’s not required to have a Scratch Disk with that actual name. The important thing is to set everything to Same as Project.
New Sequence Settings
Go to File > New > Sequence…
If you are on a computer managed by CalArts, the New Sequence window will have presets in the folder: CalArts FV ProRes HQ. Select the one named HD 1080p 24 ProRes HQ. Then add the name of the sequence in the text box at the bottom of the window.
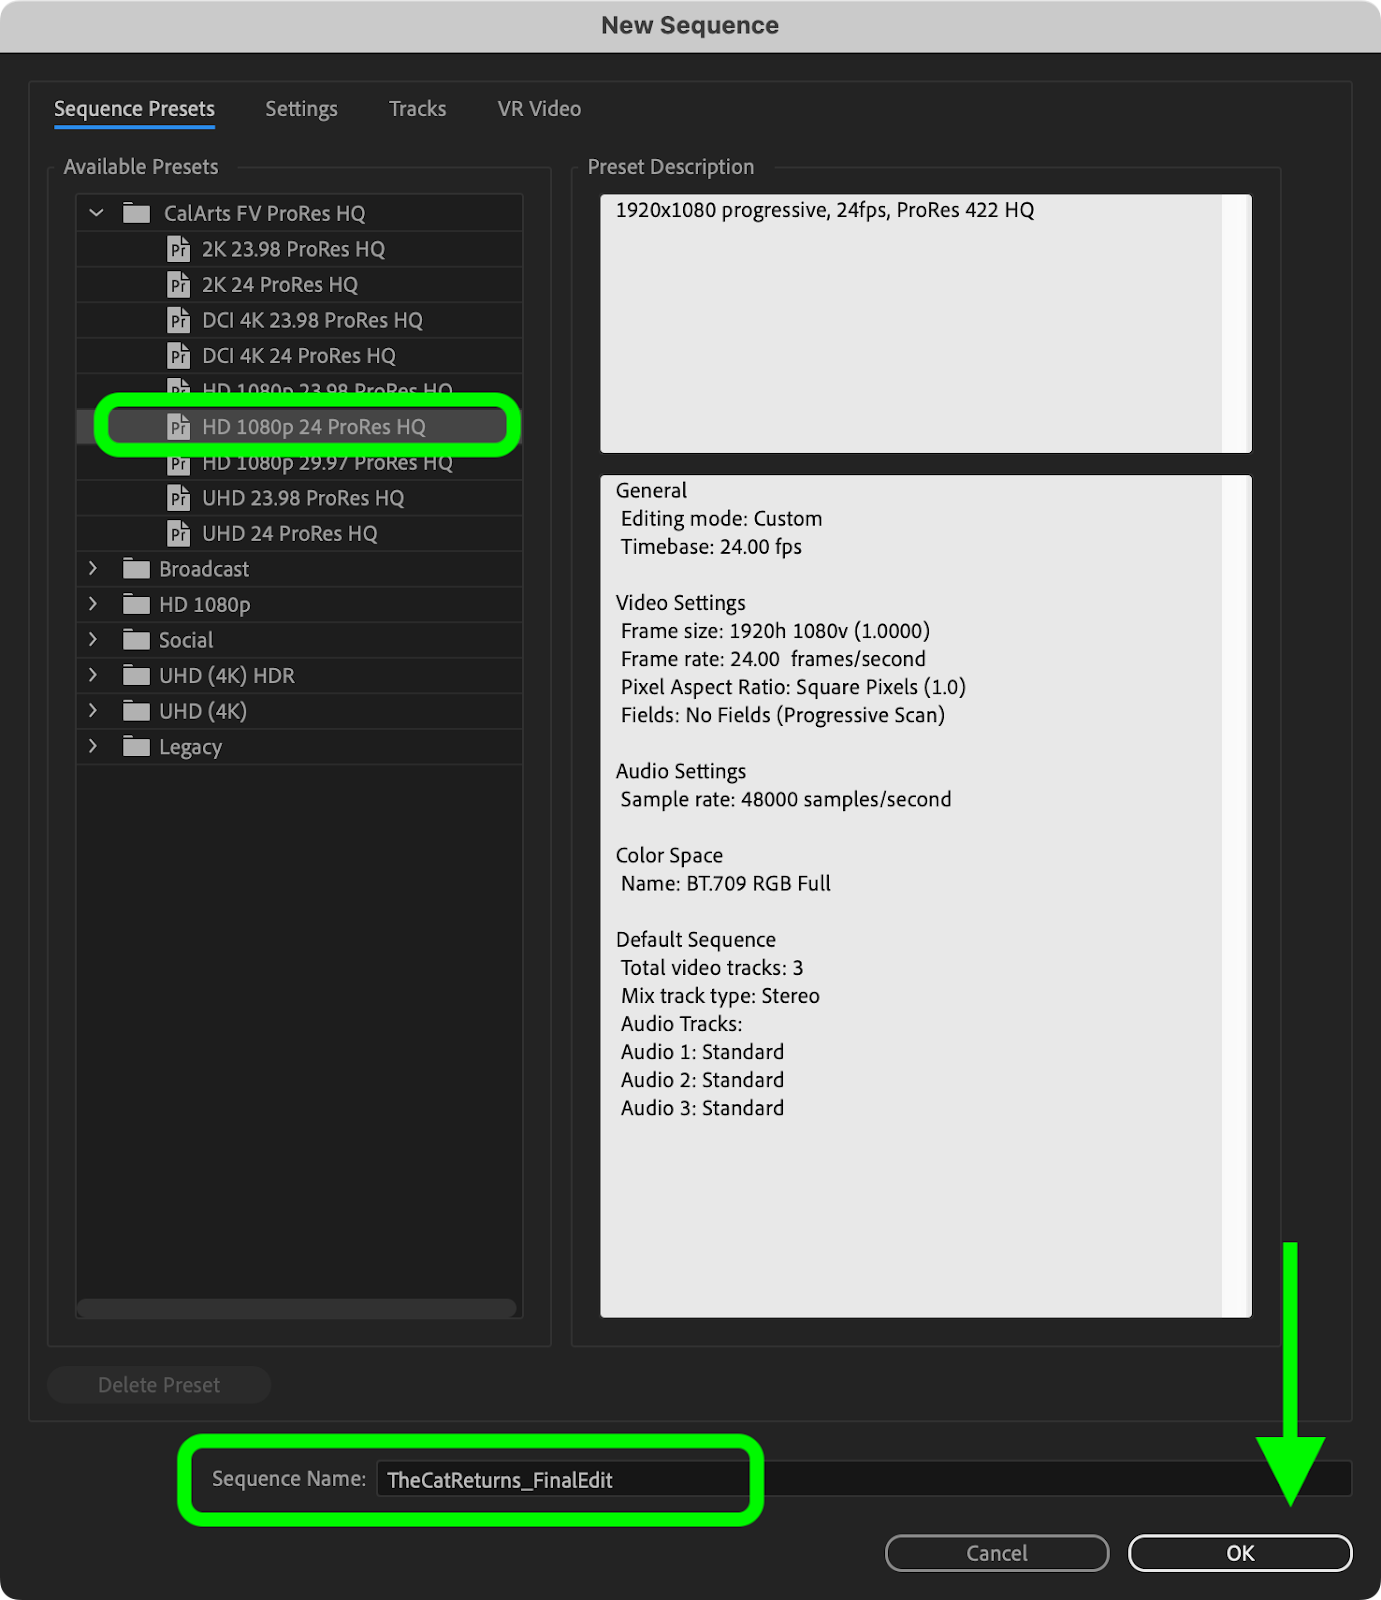
Finally, click OK to start working on your sequence.
Working on a Personal Device
If you are on your own personal computer, you can download these sequence settings from any FV computer by going to –
FVCentral > Support > Premiere Pro Settings > Sequence Settings > CalArts FV ProRes HQ
– and copying the entire folder to your personal computer at the location /Users/<name>/Documents/Adobe/Premiere/<version>/Profile-<name>/Settings/Sequence Presets
After reloading Premiere, these presets should now appear in this window.
If you would prefer to input the settings manually, click on the Settings tab.
For Editing Mode, choose Editing mode: Custom. Then make any necessary changes to match the settings shown below:
- Time Base: 24 frames/second
- Frame Size: 1920 x 1080
- Pixel Aspect Ratio: Square (1.0)
- Fields: No Fields (Progressive Scan)
- Display Format: 24 fps Timecode
- Working Color Space: Rec. 709
- Sample Rate: 48000 Hz
- Preview File Format: QuickTime
- Codec: Apple ProRes 422 HQ
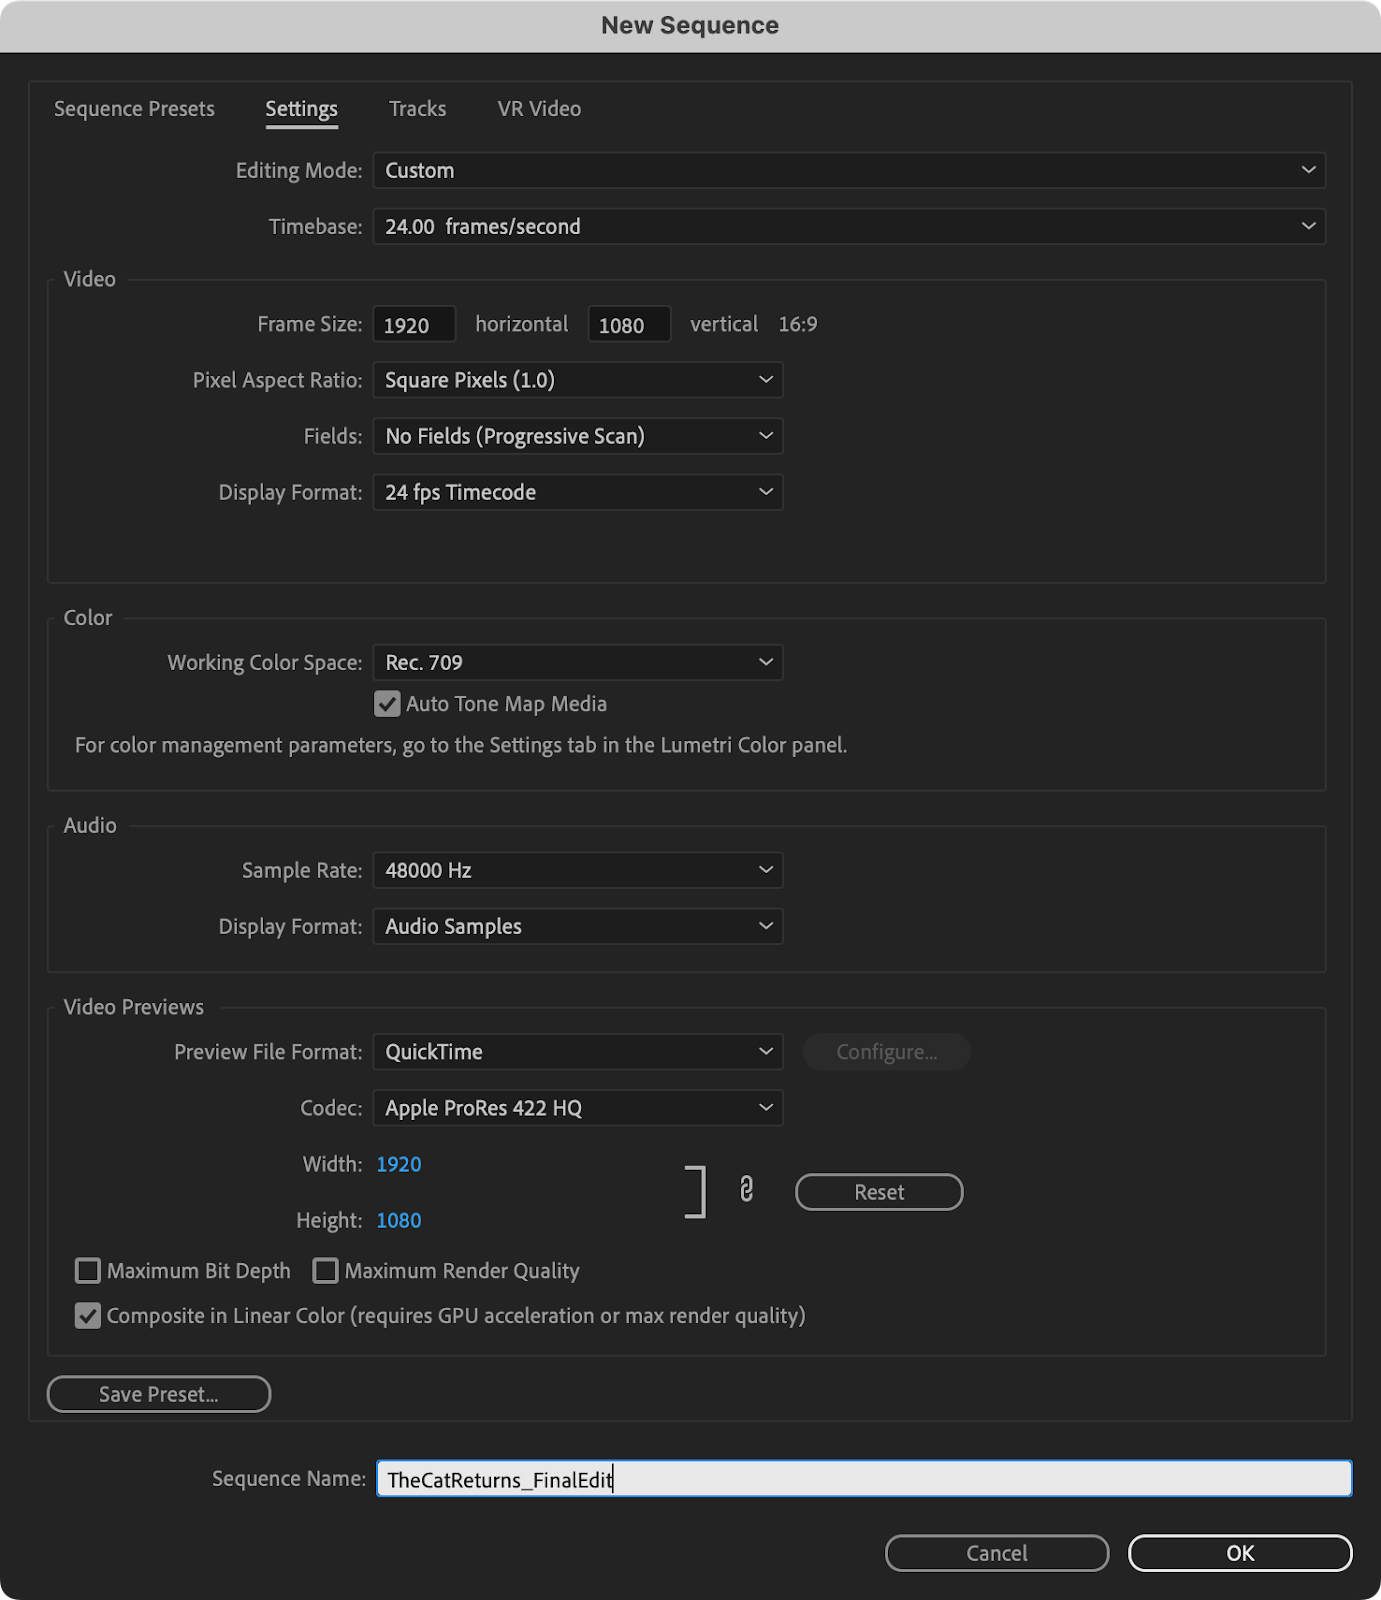
Checking Maximum Bit Depth and Maximum Render Quality will give you better previews, but take longer to render while editing. Unchecking them will not affect your final film’s quality. You can enable those settings when rendering.
At the bottom of the window, enter a Sequence Name.Under the Tracks tab, in Audio, set Mix to Stereo.
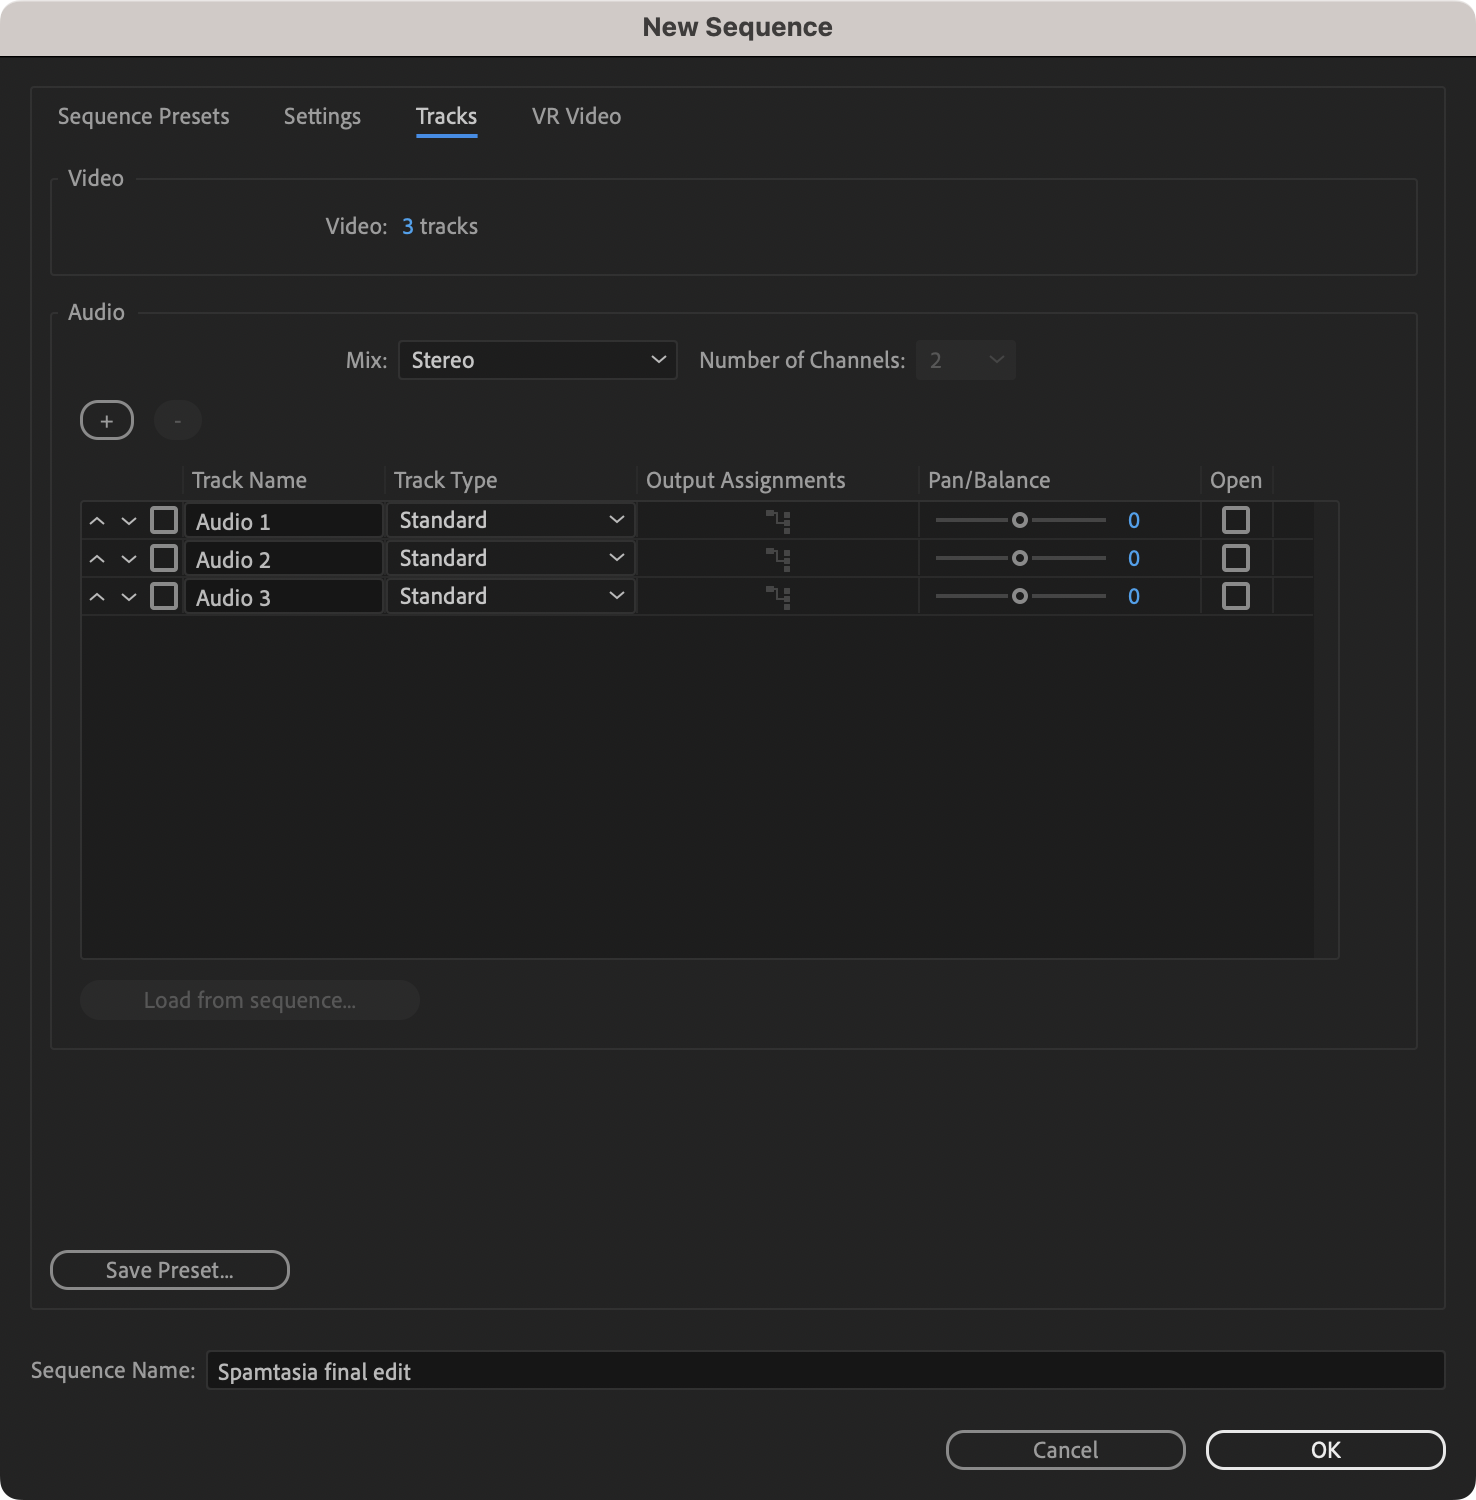
When finished, click OK to start your new project.
Importing Media
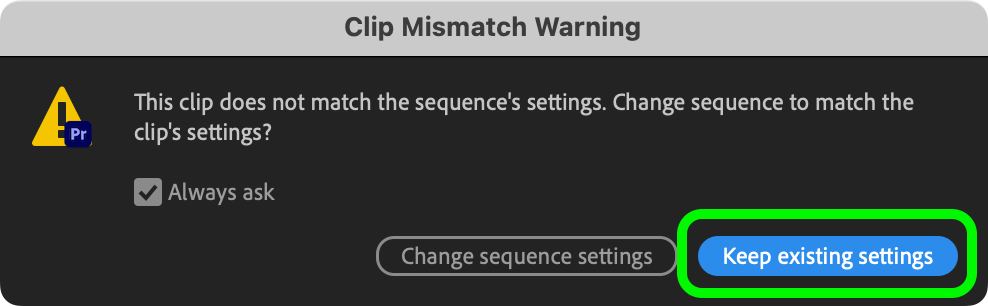
To import media into your sequence, you may either drag and drop files from your computer into the Media Bin within Premiere, or go to File > Import and select the media you wish to import. If, when you drag the media onto your editing timeline, you receive a popup from Premiere telling you the media you are importing is not the same as the sequence settings (for example, you are importing a 4K sequence from TVPaint). Always select Keep Existing Settings. This will ensure that the content of your media is contained within the correct format for delivery.