-
Animation
- Animated Films Technical Specifications
- Setting Up a New Premiere Project
- Setting Up a New After Effects Composition
- Exporting a ProRes 422 HQ .mov from Premiere Pro
- Exporting from Premiere Pro for the Internet
- HD Aspect Ratios
- About Subtitles
- The Film/Video Render Farm
- Using an iPad with Apple Sidecar
-
Computer Labs
- Your FV Computer Account
- Connecting to FVCentral
- Creating an Email Filter in Gmail
- Recommended Minimum Computer Specifications for New Students 2025-2026
- Required Personal Equipment for Students
- Software Available in School of Film/Video Computer Labs
- Using the Computer Lab A/V Racks
- Software Launching Issues on FV Lab Computers
-
Equipment
-
FV Screenings
-
FVSound
- About Your Layback
- Burning a Blu-ray in Toast Titanium or Compressor
- F104 Quickstart Guide: Operating and Recording
- Layback in DaVinci Resolve
- Loading MixPre-3 and MixPre-6 Presets
- Pro Tools FV Templates to Download
- Recording Foley at Home
- Sound Devices MixPre Quickstart
- Getting Started with Soundly
- Using Standard Leader
- Using the Sennheiser MKH 418S Stereo Mic with the MixPres
- Working with the Pro Tools FV Edit Template
- Syncing Audio and Picture in Premiere Pro
- Auto Syncing Audio and Picture in DaVinci Resolve
- Using the AMBEO Ambisonics Mic with the MixPre 6 and Pro Tools Templates
- Using Local F/V Sound Effects
- Show all articles ( 1 ) Collapse Articles
-
Post Production
-
Production and Installation
Basic Color Correction After Scanning with the Cintel
Last Updated:
< Back
Setting Up
- Go to the Color page.
- To turn on the Video Scopes, go to Workspace > Video Scope > On or (shift + cmd + w).

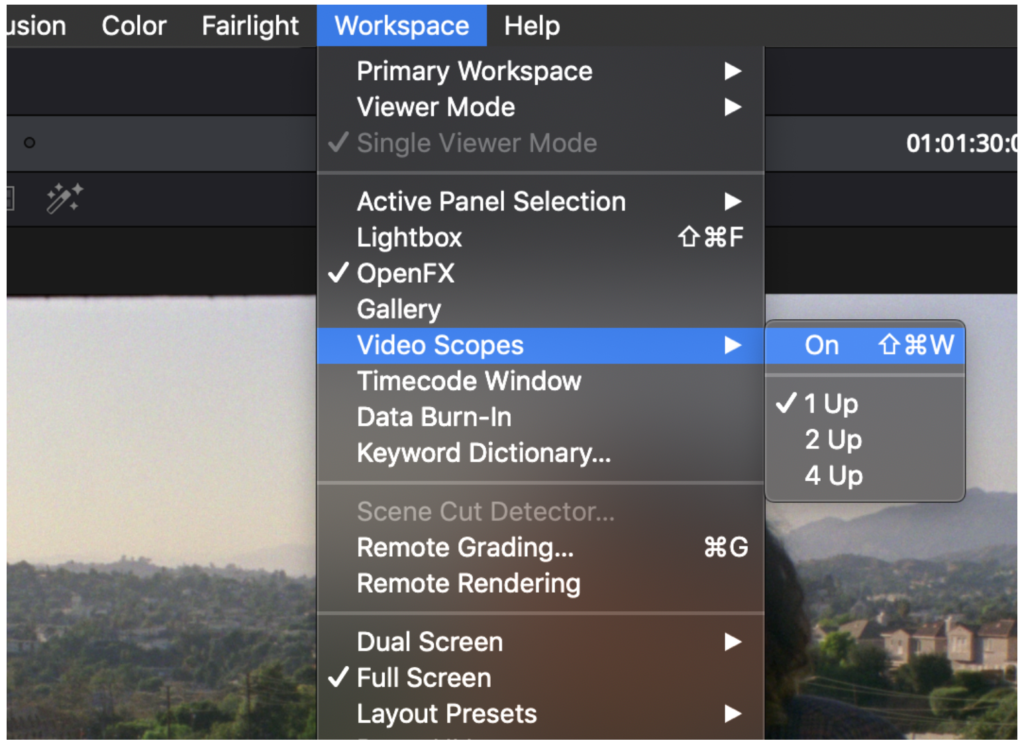
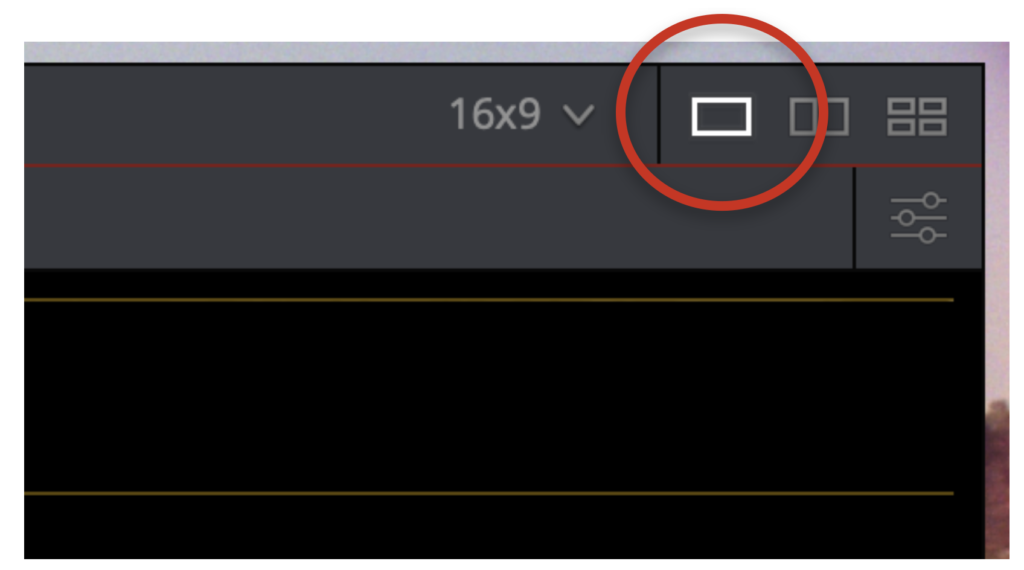
- In the Scopes window, click the button in the top right corner to view only one scope at a time.

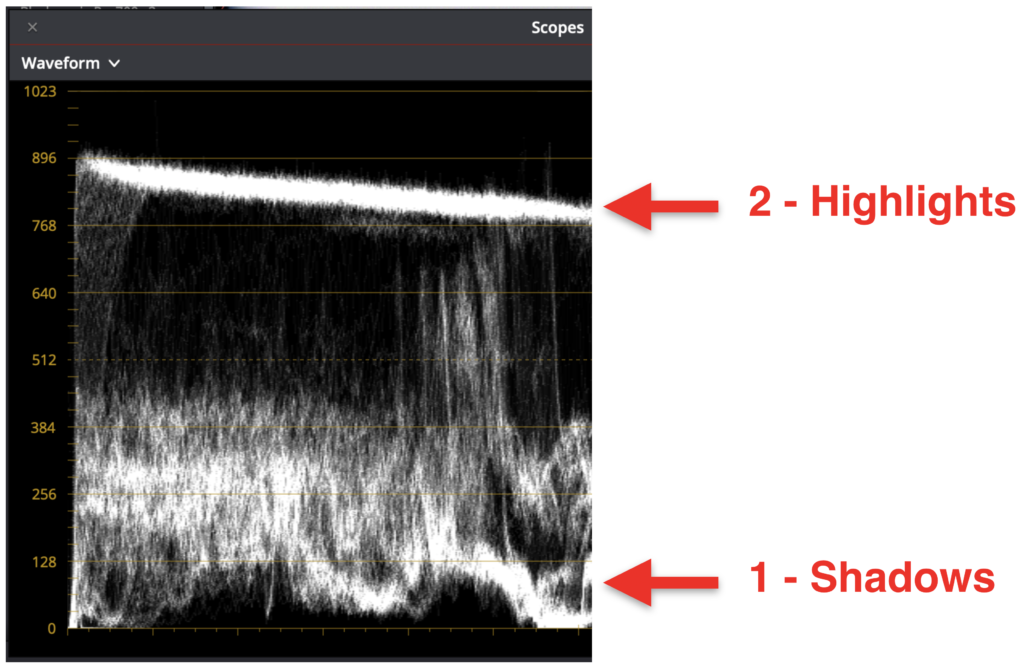
- From the drop down menu on the top left of the Scopes window, select Waveform.

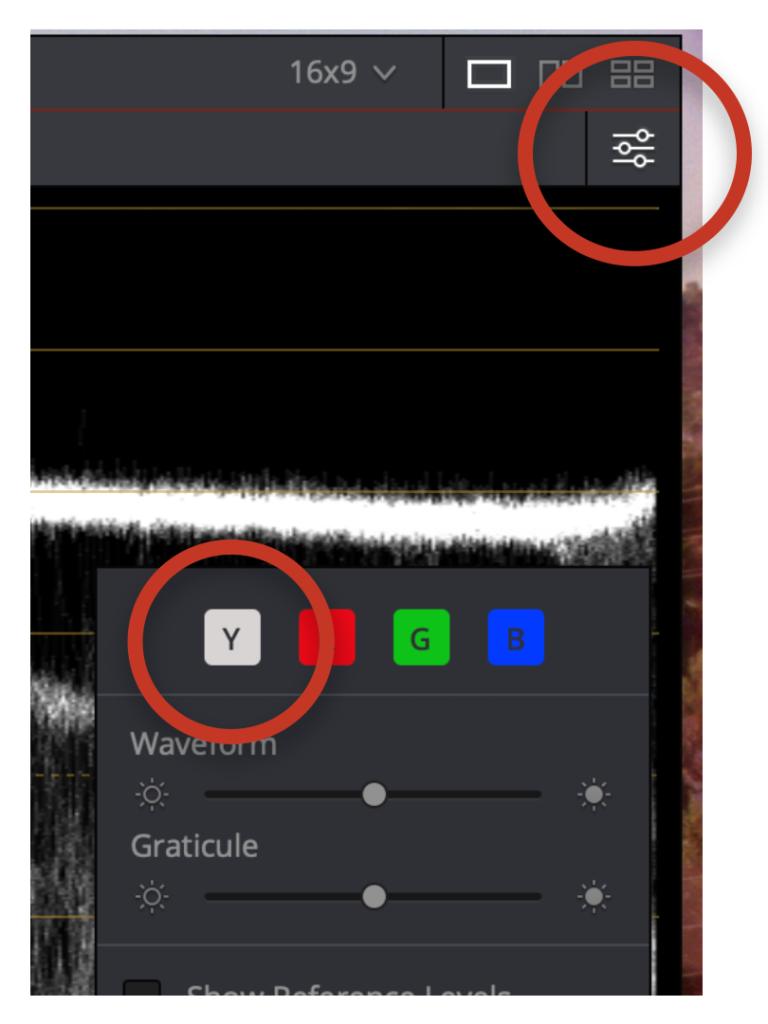
- Click the settings slider button on the top right corner of the Scopes window and click the Y button to turn on the luma view.

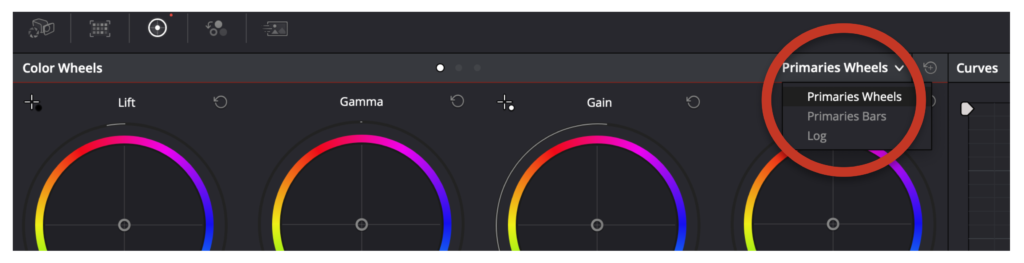
- Look at the Color Wheels section and set to Primary Wheels. This will show wheels for: Lift, Gamma, Gain, and Offset.

Color Correction
The following are guidelines for basic color correction. Make all adjustments taking into consideration the image you’re working with.
- Use the Lift wheel to set the floor of the shadows down as close as you can to 0 on the Video Scopes.
- Use the Gain wheel to bring up the highlights to as close as you can to 1023 on the Video Scopes.


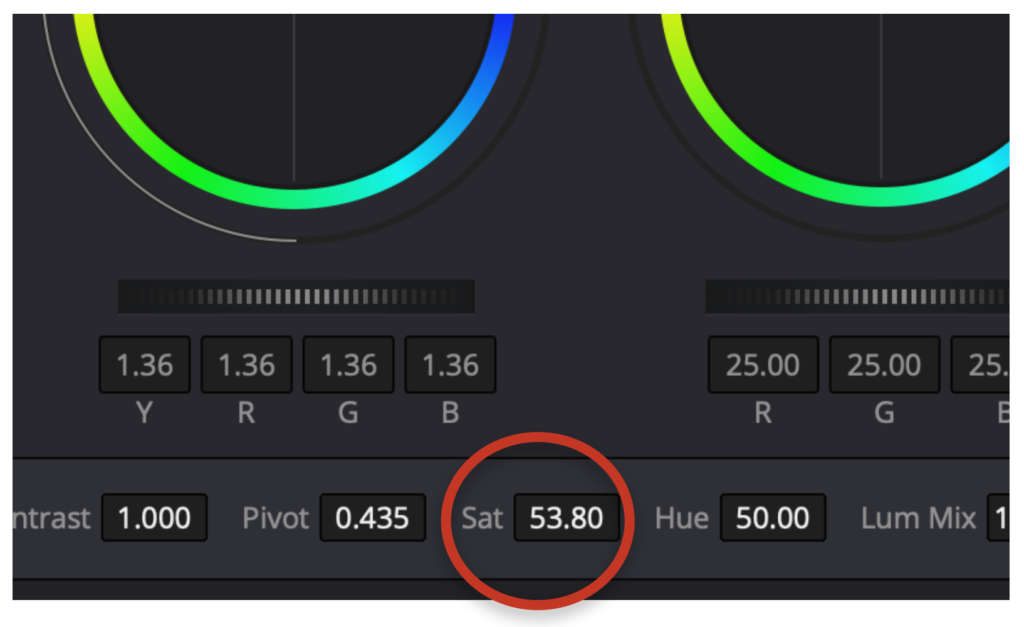
- Give a boost to the Saturation (Sat) up to at least 53-54.

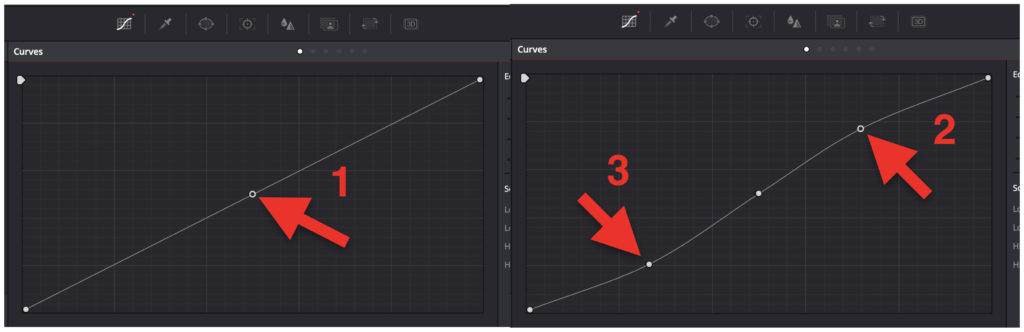
- Go to the Curves tab and create an S-curve. Hold shift to make the first control point near the center. Create another control point to the right of the center point and drag it gently to the left. Create a third control point on the left of the center point and drag it gently to the right.

You can toggle between your original picture and the color corrected version by typing cmd + d at any time.
Table of Contents
