Using an iPad with Apple Sidecar
About Sidecar
Sidecar is Apple’s method for connecting an iPad to a Macintosh so you can use the iPad as a secondary display. When used with an Apple Pencil, the iPad also works as a pressure-sensitive drawing surface for the computer. For our Computing Kits, we’ve gone with this solution because of several reasons:
- Portability – Sidecar works without needing to plug either device into a power adapter (as long as the laptop is charged); the iPad weighs 40-60% less than a similarly sized portable pen display; and Sidecar only requires a single cable to work, with no adapters (it will also work wirelessly).
- The accuracy and precision of the Apple Pencil, which is especially critical when working on a portable display.
- The added functionality of the iPad as a standalone device – as a digital sketchbook; for internet access; or as a standalone Zoom client with a built-in camera and microphone.
- No third-party drivers are required – since both devices are from the same manufacturer, potential troubleshooting is greatly simplified.
Getting started
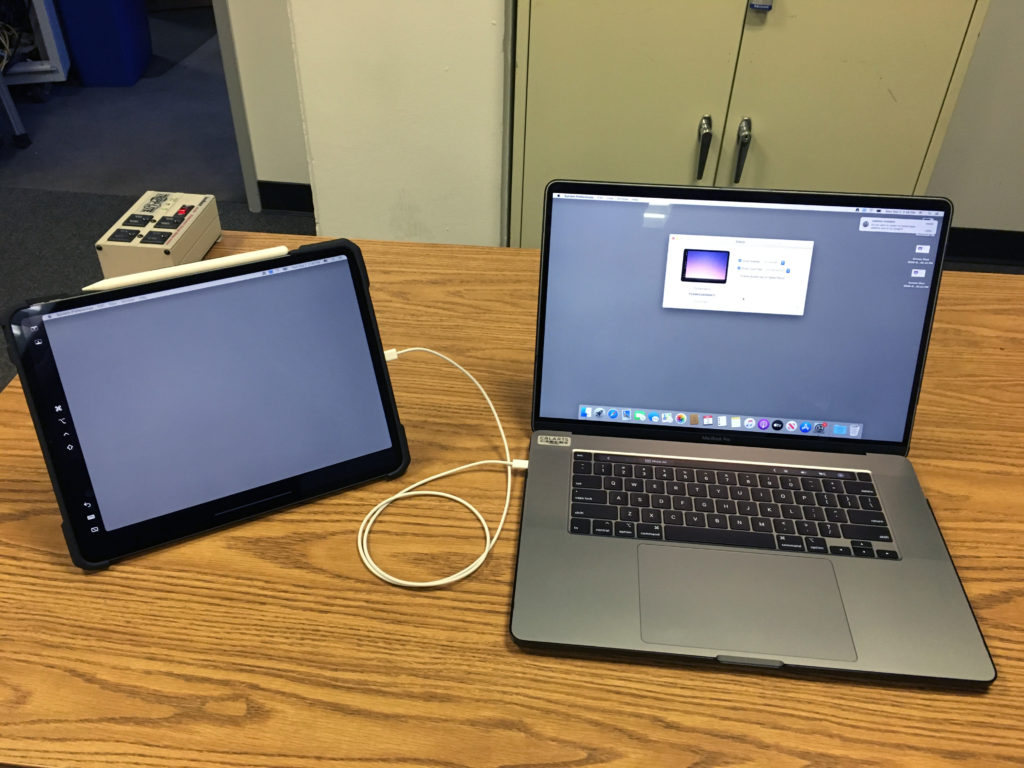
First, you will need to set up your MacBook Pro, and be logged into it with your Apple ID:
Then, you will need to set up up your iPad Pro, and be logged into it with the same Apple ID.
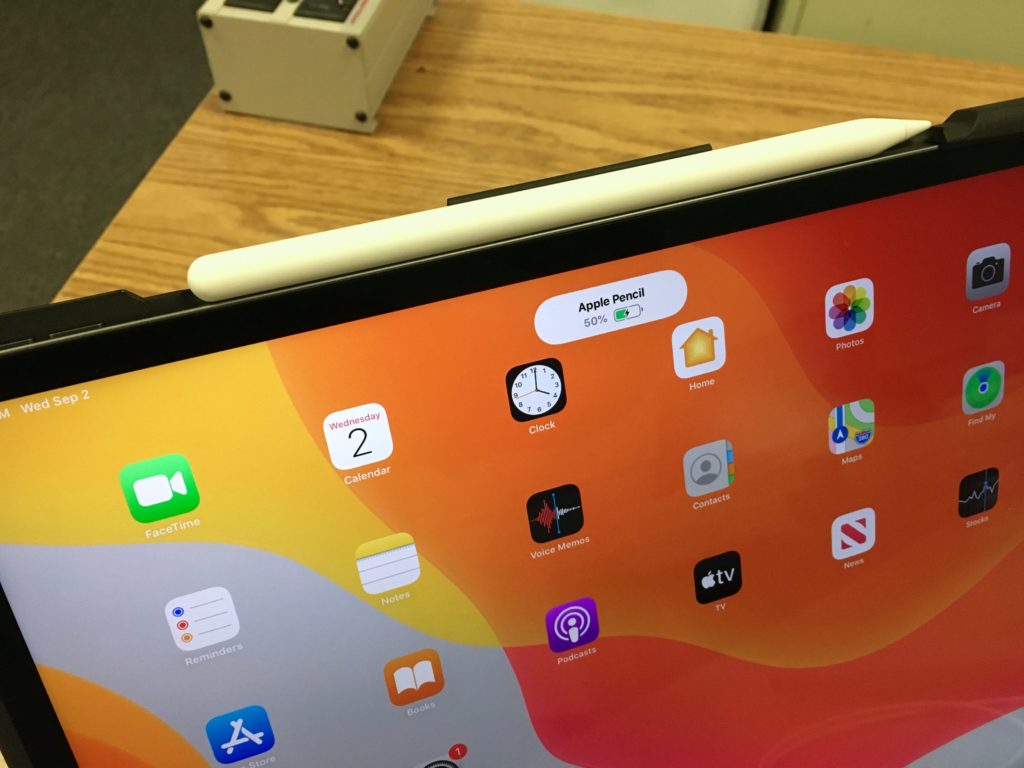
To pair your Apple Pencil with the iPad, set the flat side of the Apple Pencil against the side of the iPad. The Pencil will magnetically attach, and connect to the iPad. It will wirelessly charge while attached.
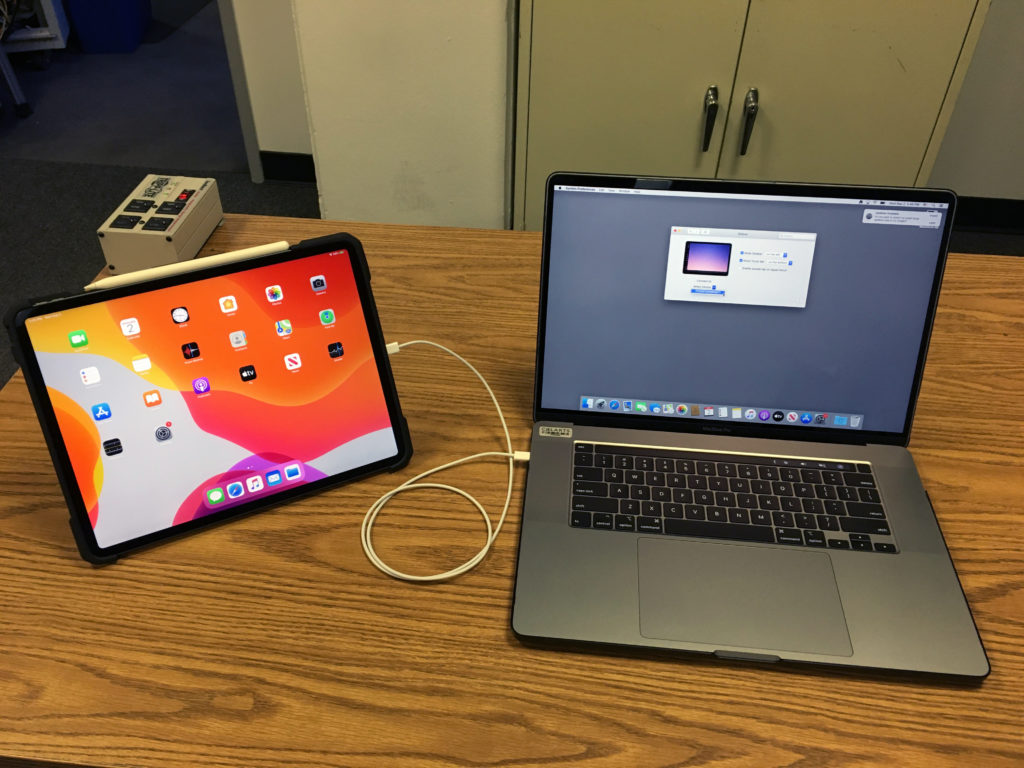
Connect the iPad Pro to the MacBook Pro, using the USB-C cable that came with the iPad Pro (you can also connect wirelessly if both devices are on the same WiFi network, and within range of each other).
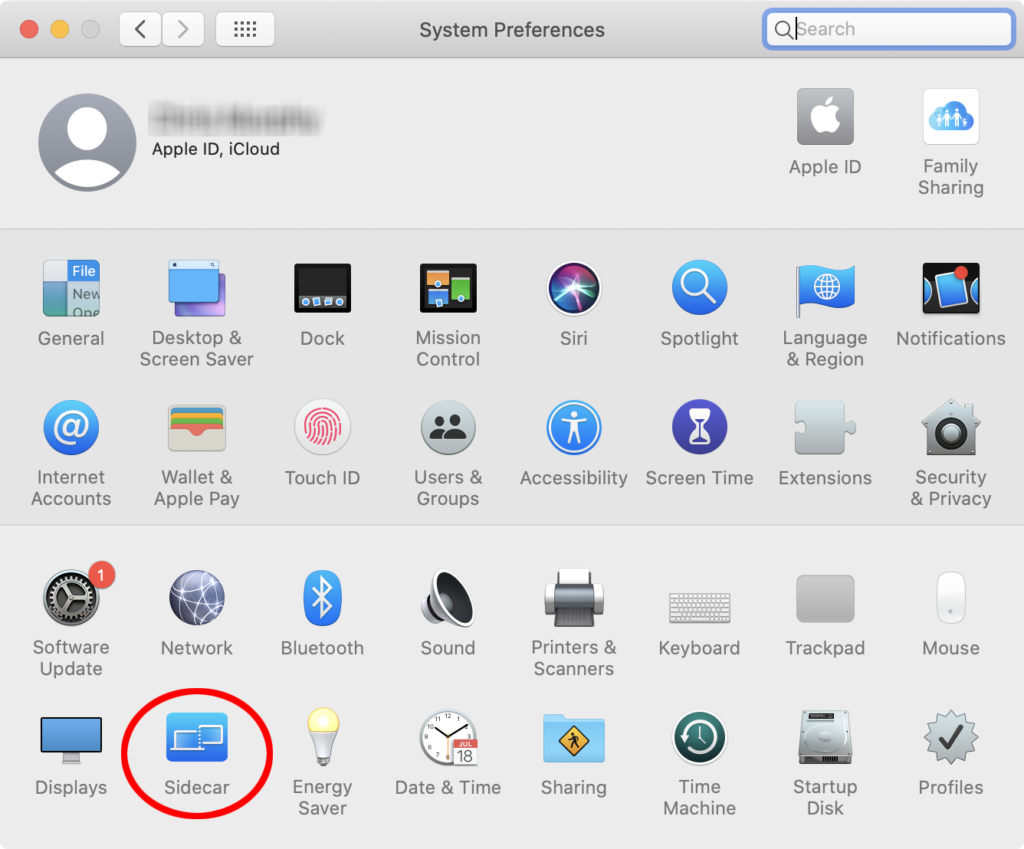
On the MacBook Pro, select System Preferences from the Apple menu, and click on the Sidecar icon.
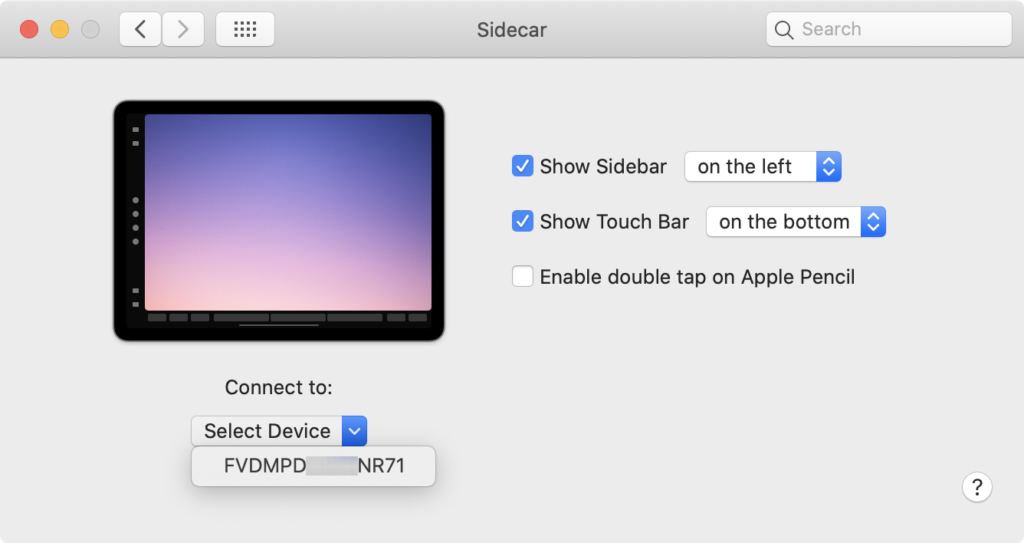
From the Select Device menu, choose your iPad Pro. If the iPad Pro was provided by CalArts, its name will be its serial number, beginning with FV. You can enable/disable other Sidecar options here as well.
The iPad Pro will now act as a secondary display for your MacBook Pro.
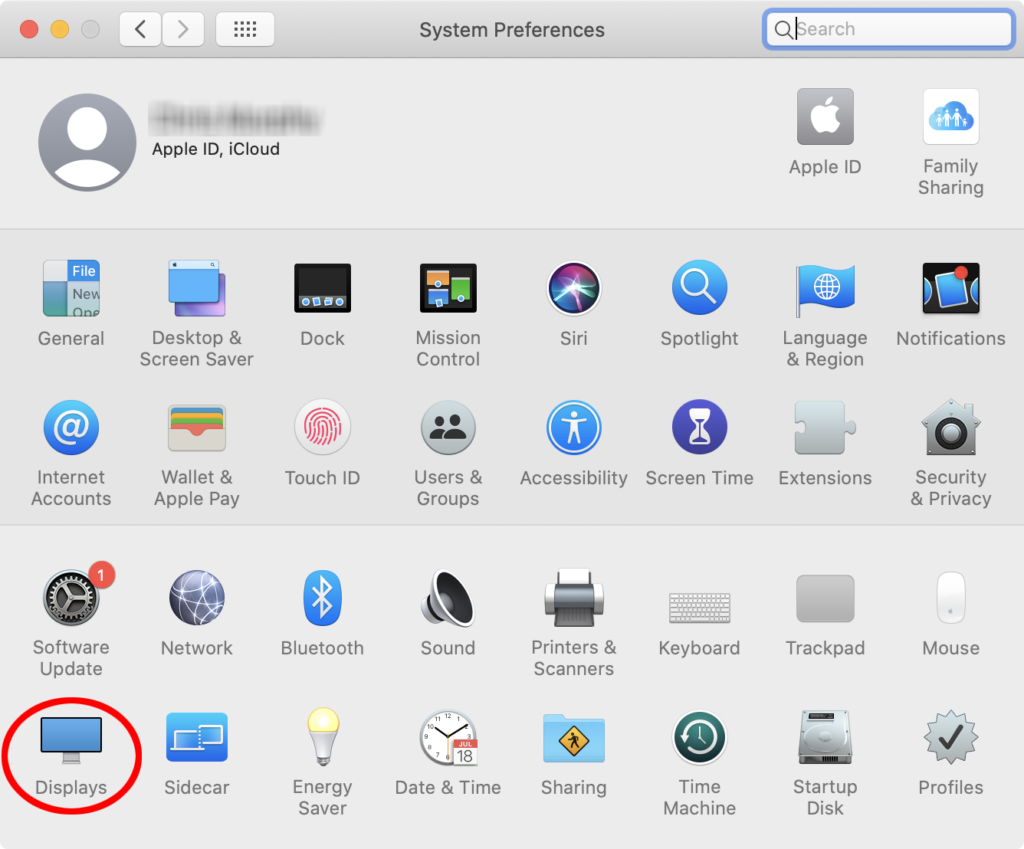
Go to System Preferences and select Displays.
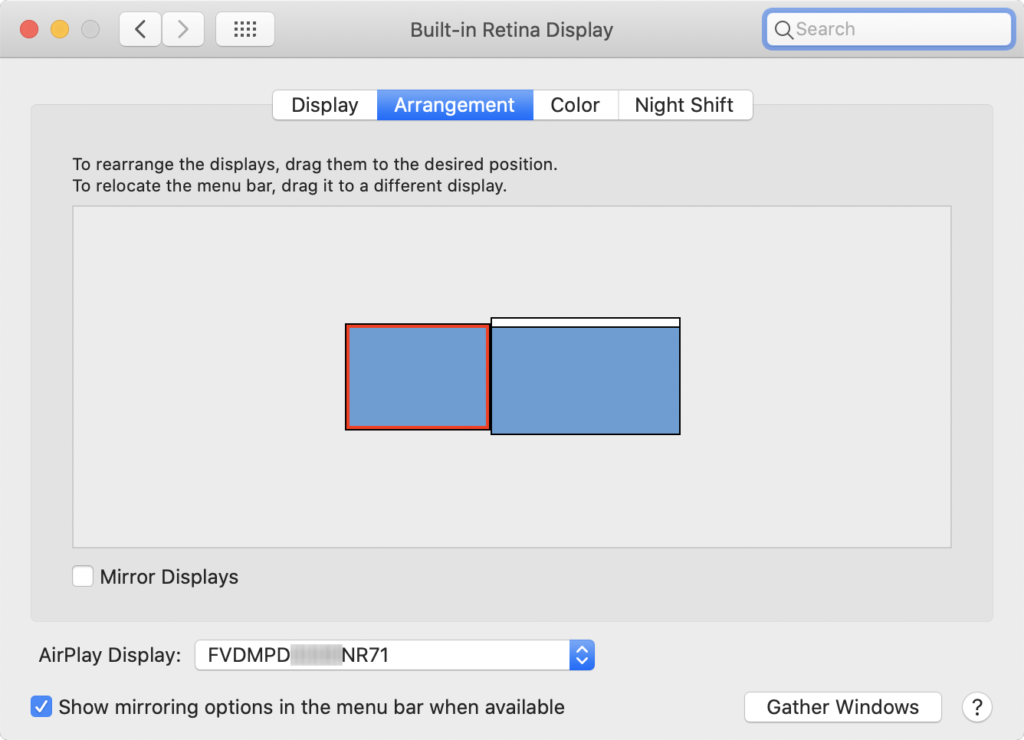
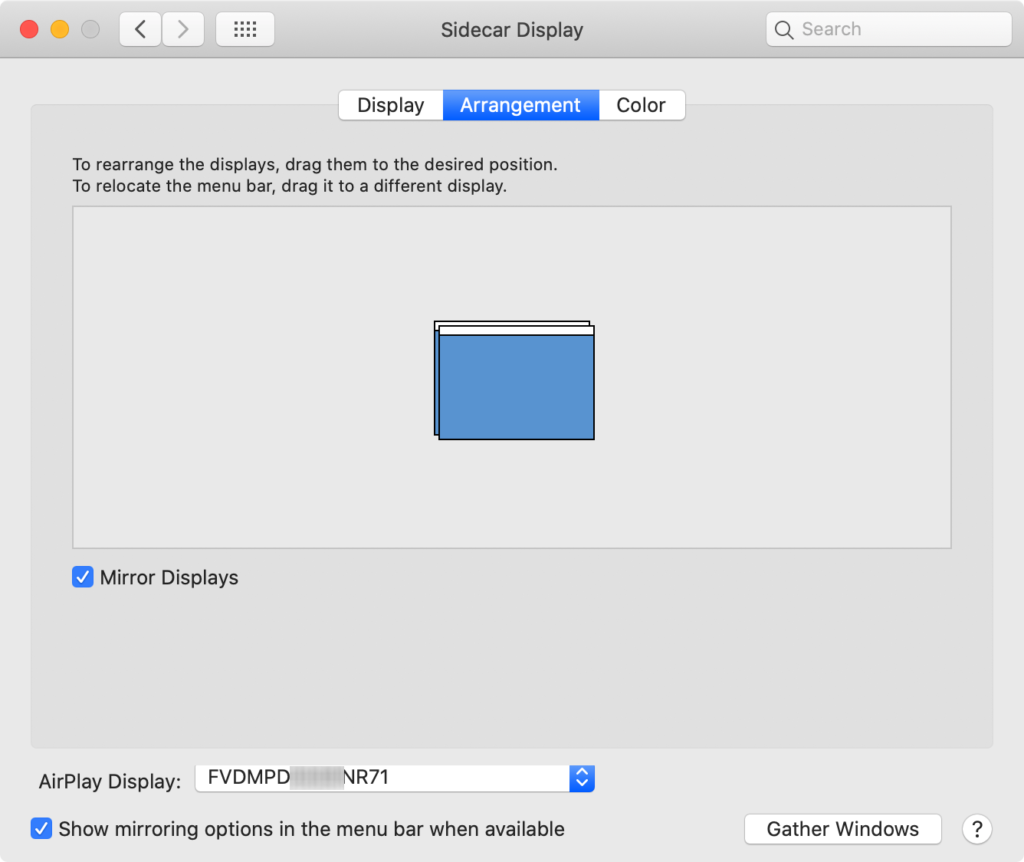
Click on the Arrangement tab. Drag the icon for the iPad Pro display (the smaller of the two) to any side of the MacBook Pro display, depending on how you want to physically set up the two devices. This allows you to drag windows, documents, etc., off the edge of one displays, and onto the other. (The display you’re currently moving will show a red border around it.)
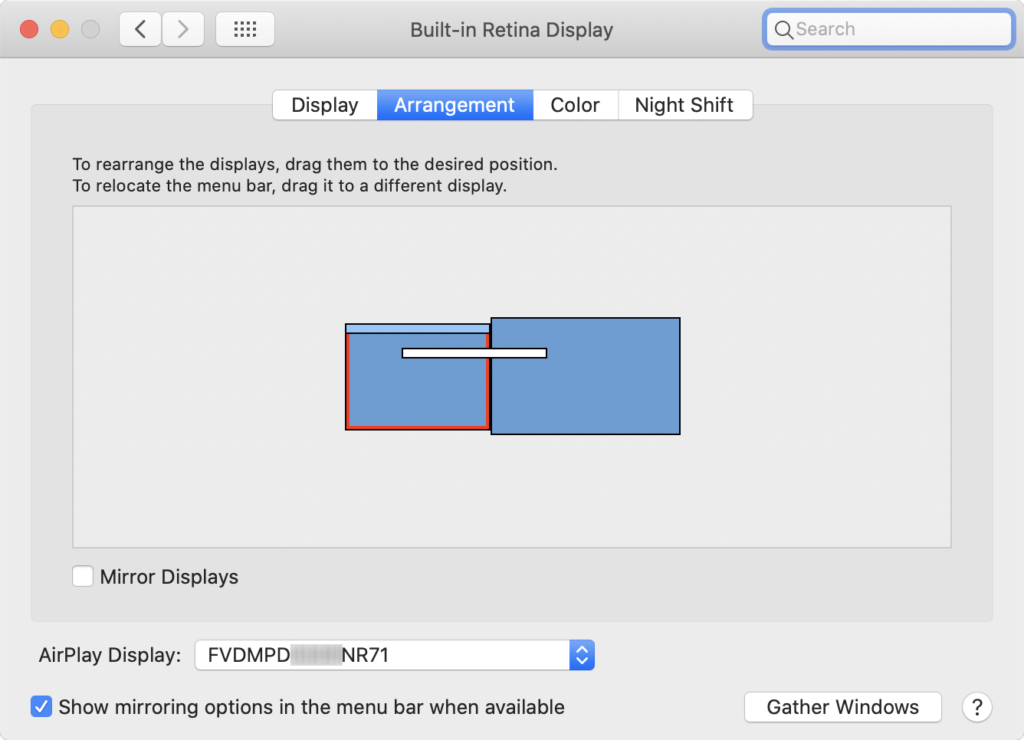
To make the iPad Pro the primary display (where applications will open by default) drag the menu bar from the MacBook Pro screen to the iPad Pro.
Two make both displays show the same image, check the Mirror Displays button. Uncheck the box separate both displays.
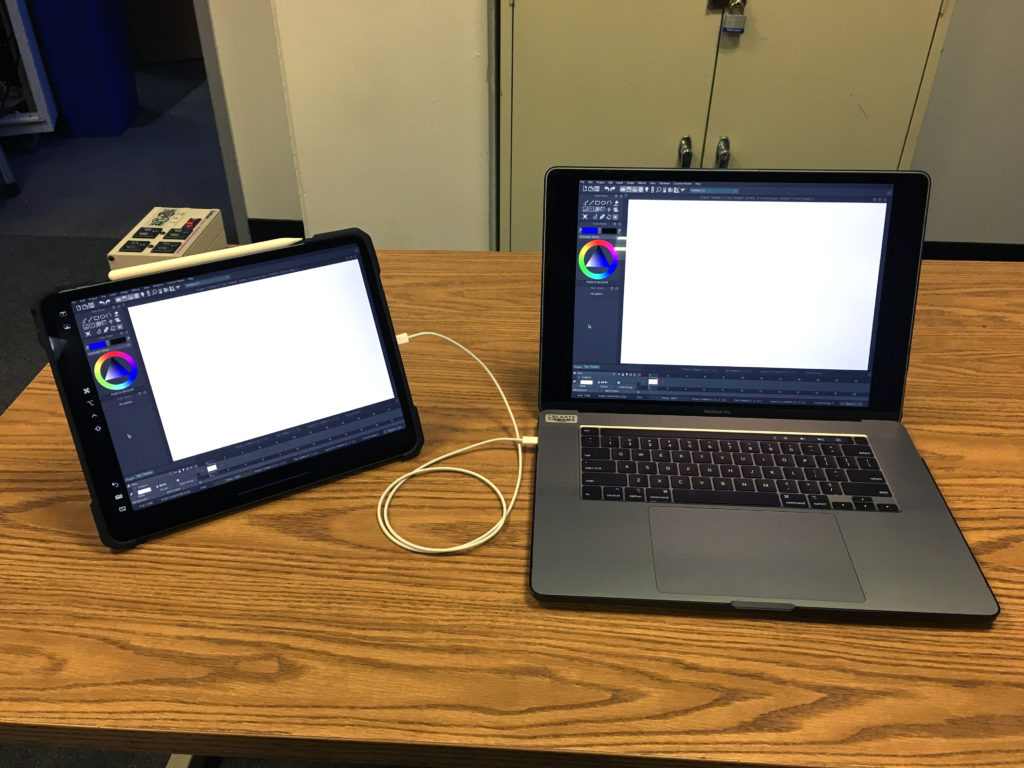
Mirroring works well with applications where you can’t tear off individual windows, or split them across multiple monitors.
Tutorial Video
Character Animation Faculty Chris Wood has put together a great introductory tutorial on using Sidecar:
More details about using Sidecar can be found on Apple’s website.
