
Scanning Film Using the Cintel Scanner
The Cintel film scanner, located in E39, can scan negative, positive, interpositive, or internegative 16mm and 35mm film. The Cintel film scanner scans film to Cintel RAW files (.cri) that need to be transcoded to deliver to the client.
This tech doc will go over the film inspection, threading, scanning, and digital output of the Cintel film scanner using Davinci Resolve.
Film and Cintel Inspection
- Film must be clean before loading into the Cintel. It is recommended that clients have their film prepped for telecine when processing at a lab. Inspect the film on the rewind table and clean if necessary. Check that there is at least 10 feet of leader on the head and tail of the film.
Negative film works best on the Cintel scanner. They are typically cleaner than workprints and the perforations are easier for Davinci Resolve to use for image stabilization. 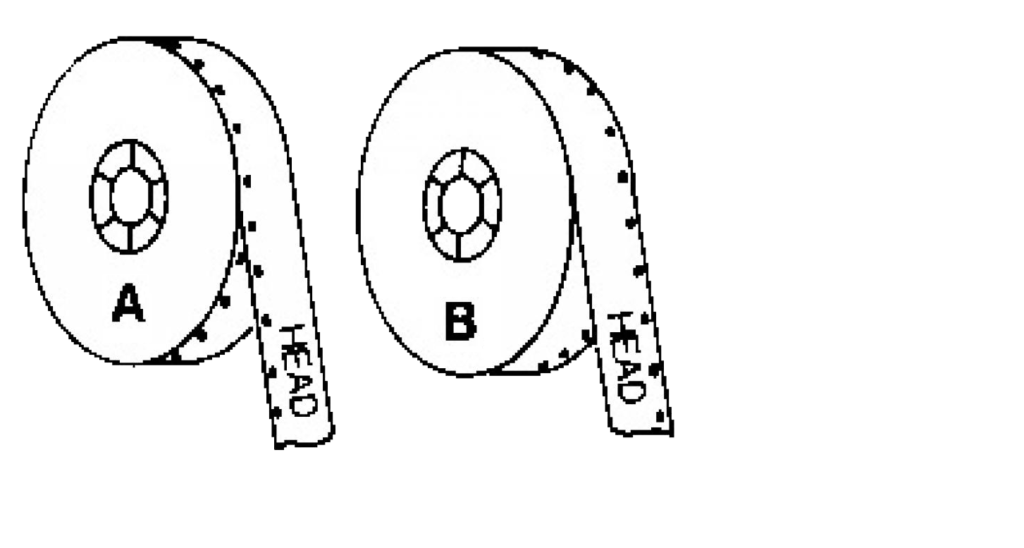
- Determine what wind the film is. This will help determine how to load the film and will be used for supply and take up settings in Davinci Resolve.
To tell if a reel is A or B wind, hold the roll of film heads out with the leader facing you. If the perforations are on the left, it is A wind. If the perforations are on the right, it is B wind.
- Open the doors to the Cintel. Use the compressed air, working from top to bottom, about 6” to a foot away from the sensor and rollers, and dust off the rollers and gate.
- Inspect the metal rollers and clean if necessary. Inspect the orange sticky rollers, if dirty, replace with clean ones. Check that there is a 75mm diameter core on the take up spool.
The machine is preprogrammed to use 75mm (3”) cores on both the supply and take up sides of the Cintel.
- Check the sprocket wheels and clean if necessary. If you are unclear on how to clean them, contact Paul Kyle.
Powering Up and Davinci Resolve Set Up
- Power on the Cintel by turning the power switch located on the wall. Power on the iMac and enter the FV Credentials to log in to the computer.
- In the Finder, create a folder on FVCentral > Operations > Film Scans, using the CalArts naming convention and affixing your initials at the end “LastF(of the client)_FilmTitle_YYYYMMDD_FL(Scanning Tech Initials).” Inside this folder, create 2 more folders. One with the same name and affix _Media to the end of it. This is where you will set the capture media to be stored. The second folder with the same name but affixed with _Renders. This will be the save location for the exports.

- Launch Davinci Resolve and create a new project in the cinteldb database by clicking New Project. Name it using the same name as the folder you just created. Click Create.

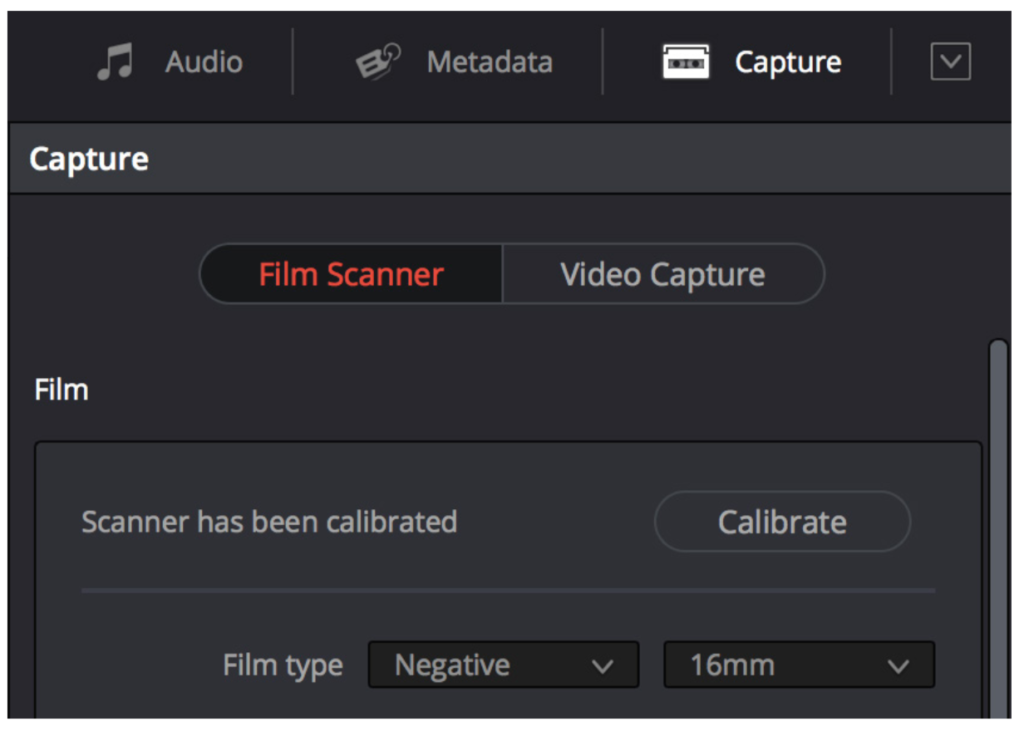
- In Davinci Resolve, go to the Media Workspace and click on the Capture button. Make sure there isn’t any film in the Cintel. In the Film Scanner panel of the capture window, under Film Type, select whether the film is a negative, postitive, interpostive, or internegative and select the film gauge; 16mm or 35mm (2, 3, or 4-perf).
- Inspect the Cintel gate in Davinci and clean if necessary. Close the Cintel doors and turn off any overhead lights. Once it is clean and the lights are off, click Calibrate.

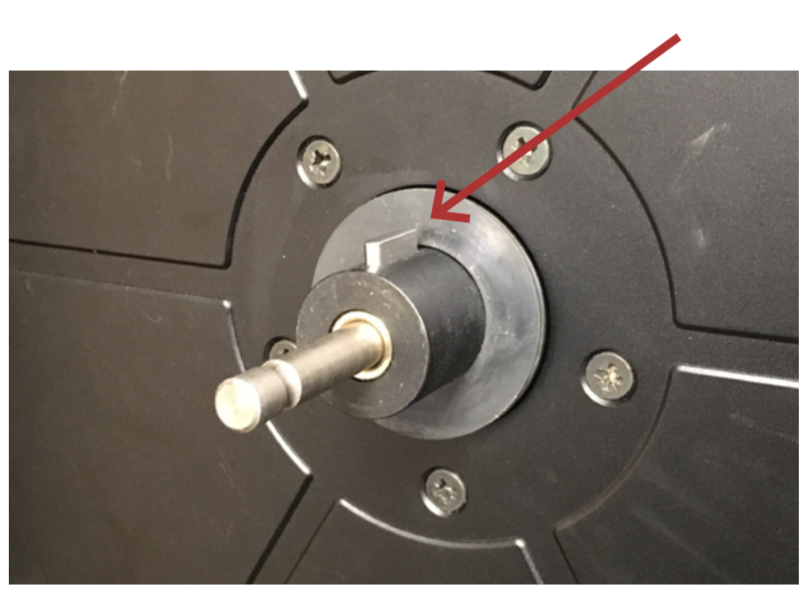
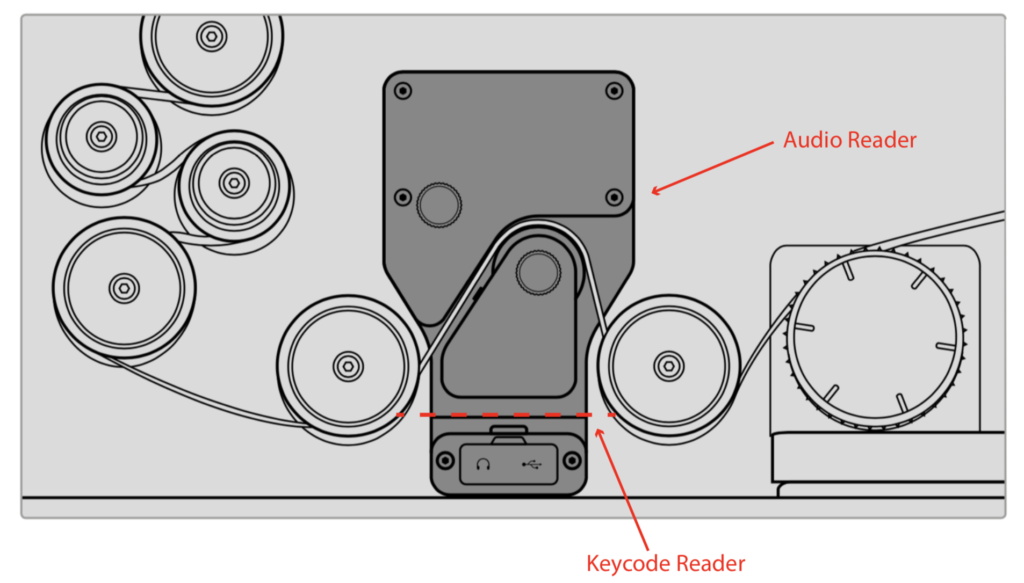
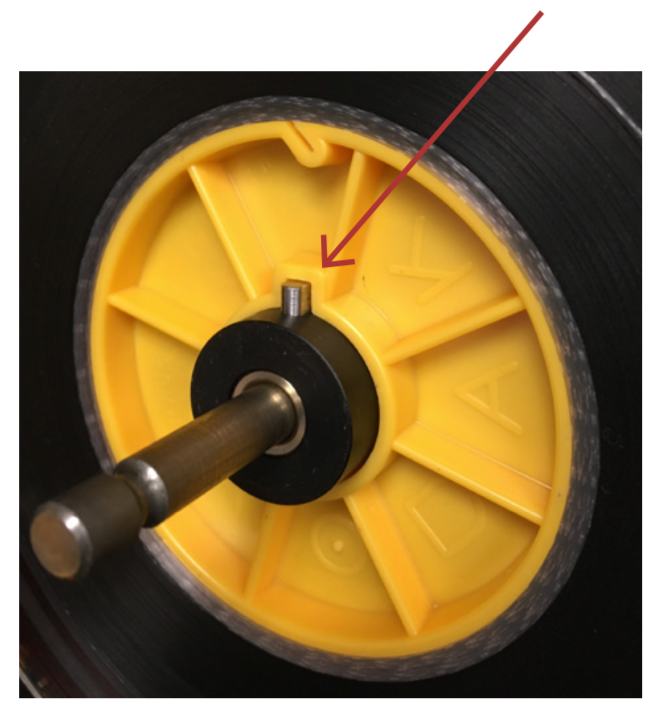
- Load and thread the film in the Cintel. Follow the diagram below. Be careful removing the spool lock and spacer on the supply side, there is a silver metal key tab that is prone to falling out. Make sure the spool lock clicks, is completely engaged when you put it back on and the orange tab button is popped out.
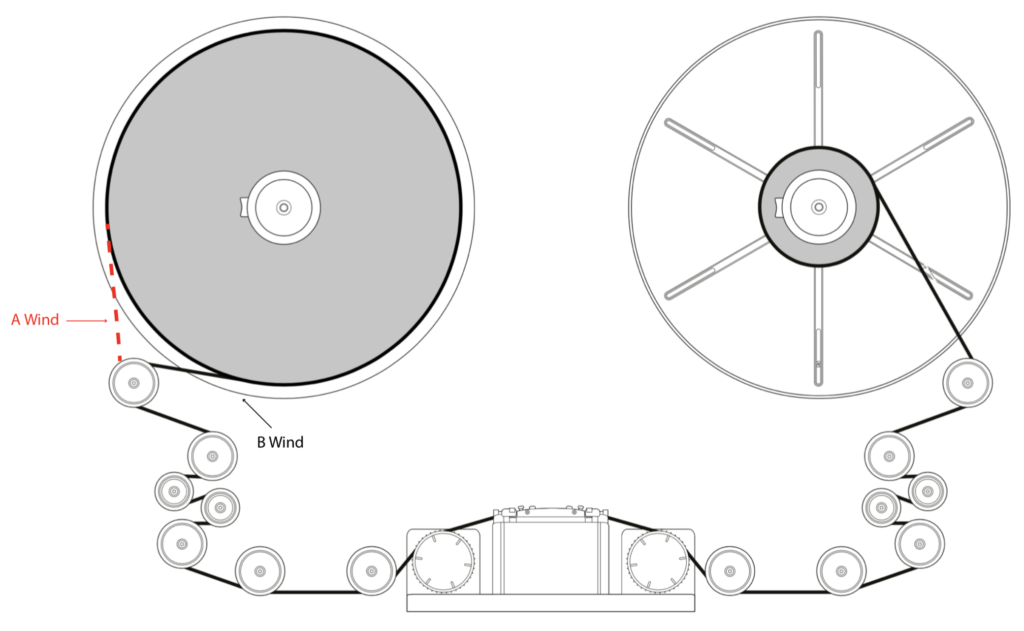
Make sure the film is emulsion side up.
For 16mm use the black spacers between the film and the spool lock. For 35mm you do not need the black spacers.
Do not use any paper tape to attach film to the take up core in the Cintel.
- If there is optical or mag sound on the film, thread the film through the sound head. If there is keycode, thread it normally underneath the sound head. Make sure that the perforations are lining up to the sprocket wheel on either side of the gate. If it is double perf make sure the KeyKode is on the correct side. For 16mm, it will be away from you and for 35mm it will be towards you. Wind the film a few times over the take up core.
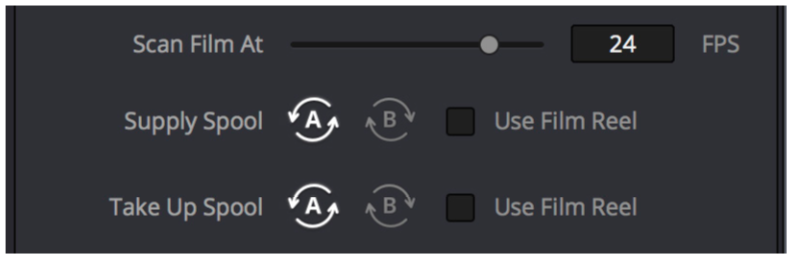
- In Davinci Resolve, Set Scan Film at to 24 FPS. Set the supply spool and take up spools to the correct wind. Uncheck Use Film Reel. When you’re done, push Load on the machine and the tension will adjust accordingly.
The Load button is also used to release tension before unloading the film and to wake up the Cintel if it has fallen asleep.
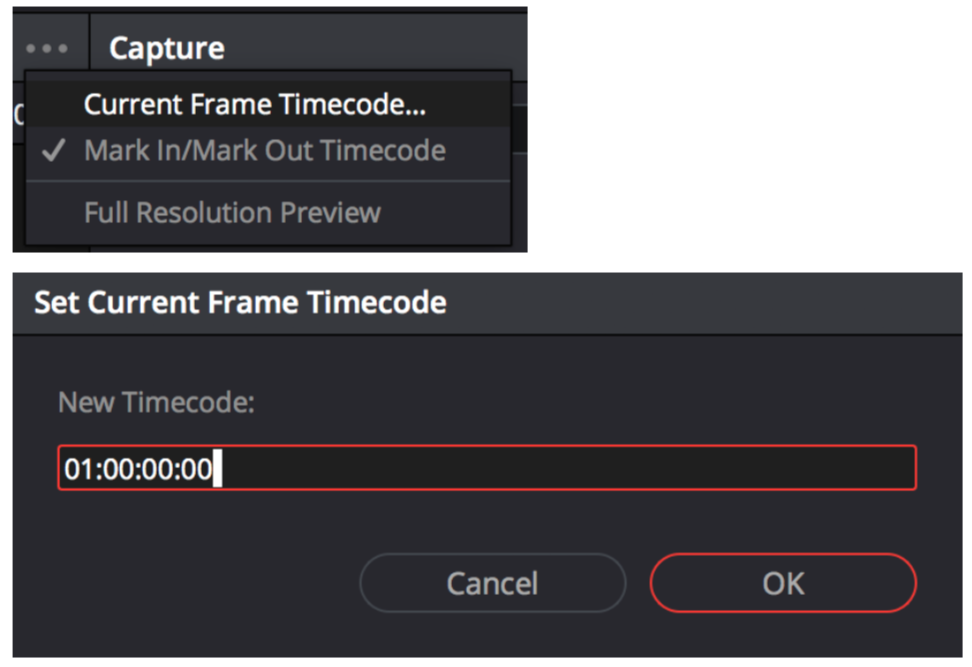
- The Current Frame Timecode needs to be set. This will be the reference timecode for the entire roll. Go to the first frame that will be scanned (this can be the hole punch or a lab sticker) and click on the Options setting menu in top right corner of the viewer and select Current Frame Timecode…. Enter 01:00:00:00 and click Ok. Save the project.
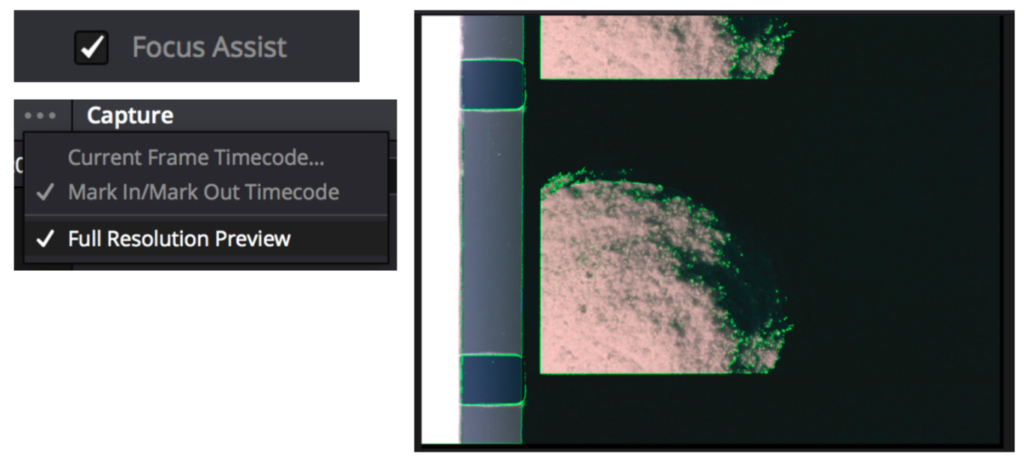
- Click Play or Fast Forward and find a focus point. Check Focus Assist and click on the Options setting menu in top right corner of the viewer and select Full Resolution Preview. This will display a green edge around the sharpest points of the image. Adjust using the focus dial on the center column of the Cintel scanner. Turn off Full Resolution Preview when done focusing.
- Close the Cintel doors to keep any dust and light pollution out.
- Click Play to check how stable the image is. To use image stabilization, the slider has to be engaged (red). This will bring up a vertical red stripe with a thin black line in the viewer window. Use the Horizontal Position slider to line up the thin black line with the inside edge of the perforations. If necessary, adjust frame nudge for 16mm or perf nudge for 35mm. Use the scroll wheel on the mouse to zoom in and out. Check Enable X and Enable Y.
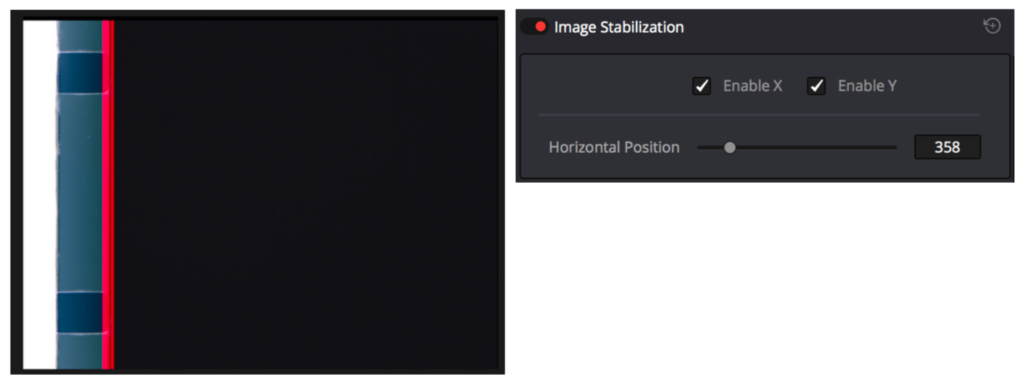
If the image stabilization is having trouble stabilizing, uncheck Enable X. If it still having trouble stabilizing, uncheck Enable Y.
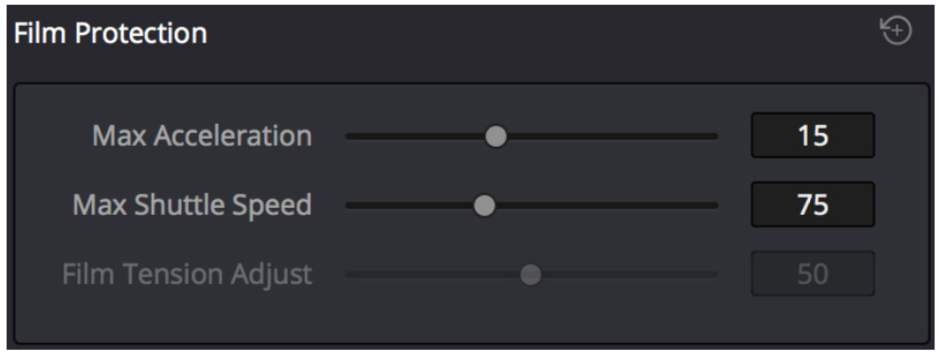
- Leave the Film Protection section at the default settings.
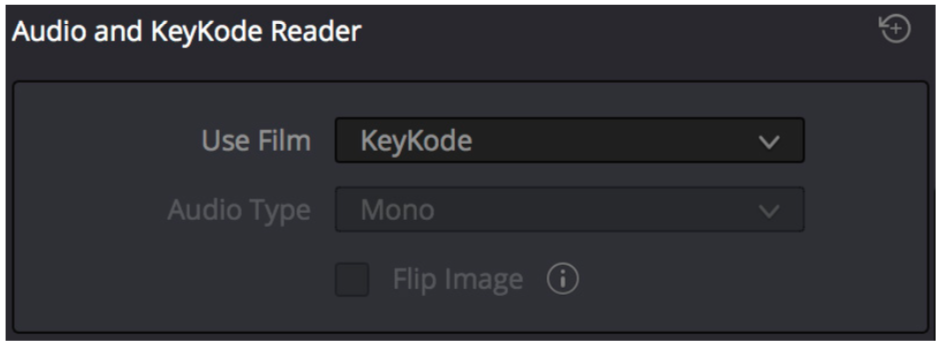
- If you are reading KeyKode, in the Audio and KeyKode Reader section, under Use Film, select KeyKode.
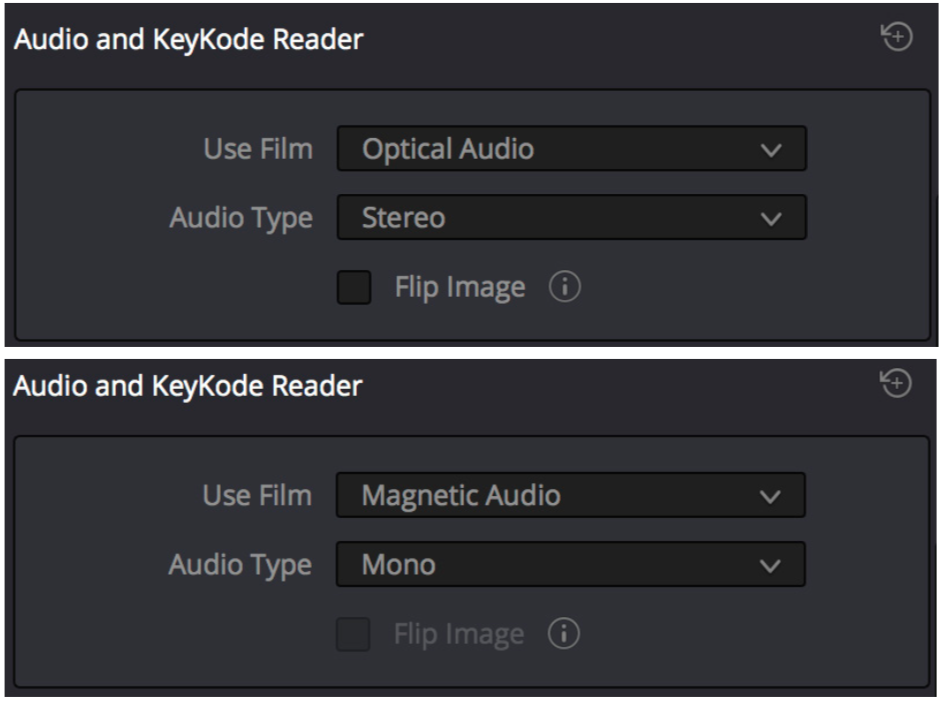
- If you are reading audio, in the Audio and KeyKode Reader section, under Use Film, select if it is Optical or Mag and under Audio Type, select if it is Mono or Stereo. Stereo is only an option with optical sound.
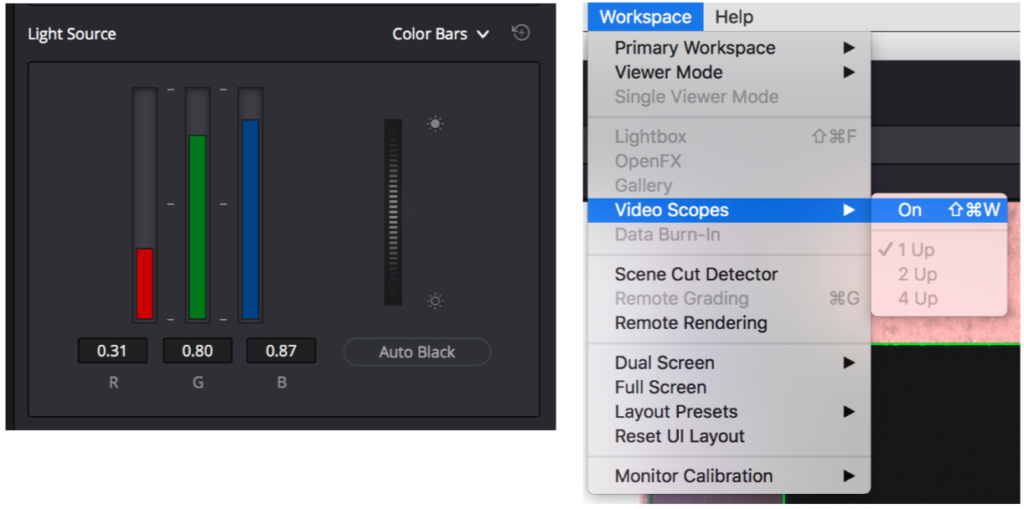
- In the Light Source section, use the master wheel to change the intensity of the light and the color wheel for RGB controls. If you want to use the color bars, go to the mode pop up to the right of the Light Source title bar. This may have to be adjusted per shot in the film. You can bring up the scopes by going to Workspace > Video Scopes > On to help with color timing. It may be beneficial to start by clicking Auto Black.
Color Timing, Logging and Capturing
- In the Capture Info section, click Browse and navigate to the media folder you created in FVCentral > Operations > Film Scans.

- Under Capture, select the type of capture you are doing: Image Only, Image and Audio, etc. Under Codec, make sure it says Cintel Raw, and FPS is 24.
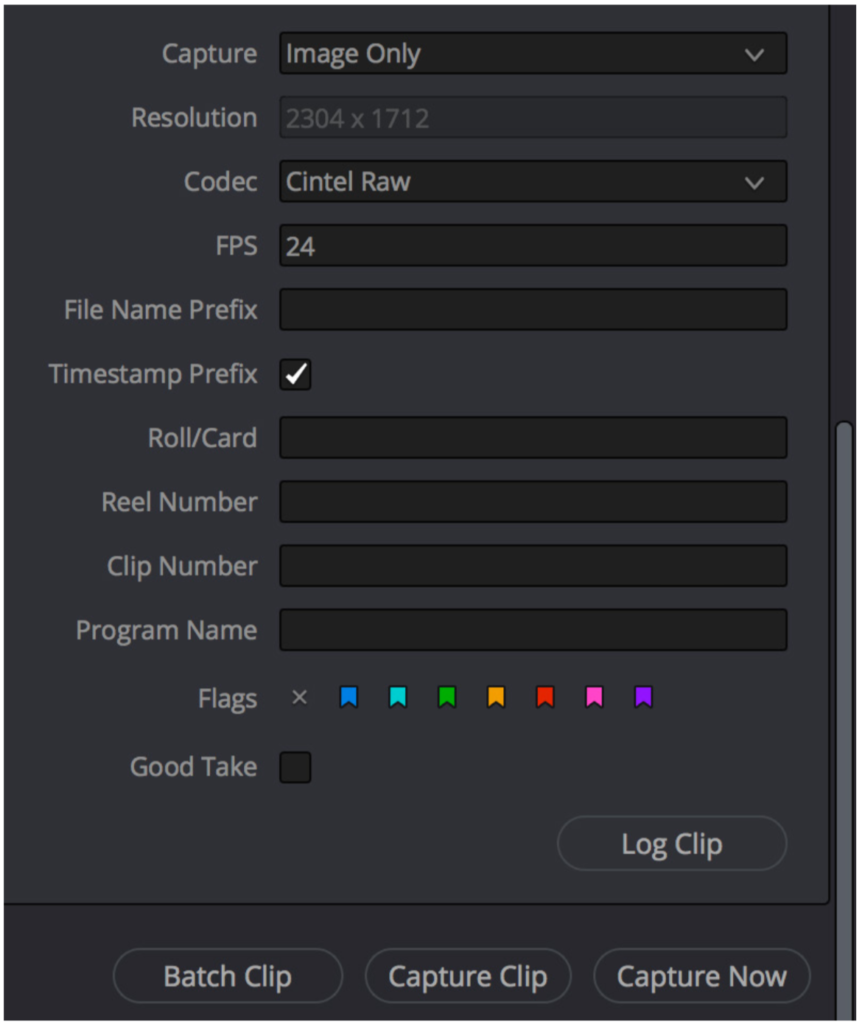
- Mark In and Out for the first shot. Set the Light Source setting that best fits the shot and click Log Clip. It will add the clip to the Master Browser.

Logging clips will not save the Light Source setting with it. For films with multiple Light Source settings, take a screenshot of the Light Source settings for each clip by pushing Command + Shift + 4 on the keyboard for reference later.
- Repeat for any additional shots.
- When you’re done logging all of the clips, select the first one, set the Light Source settings based on the screenshot taken earlier and click Batch Clips. If multiple clips have the same Light Source settings, select all of those logged clips and batch at the same time. If each clip has a different Light Source setting, only batch one clip at at a time. Repeat for any necessary clips.
Editing and Rendering
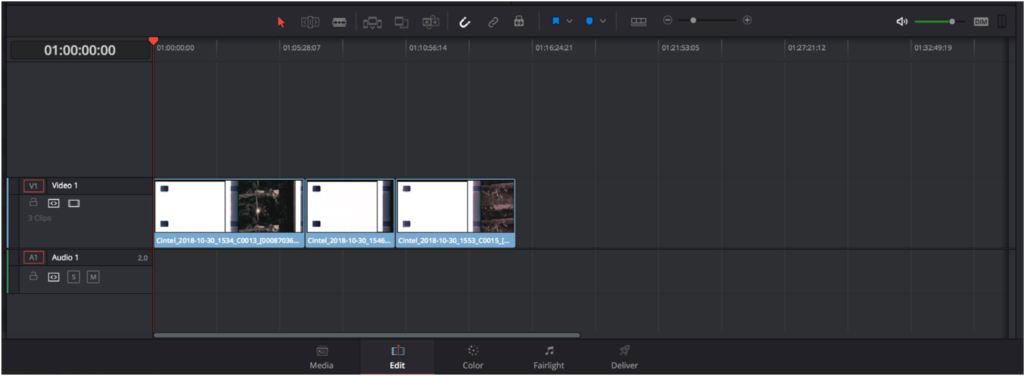
- Go to the Edit Workspace and drag the clips into a timeline.
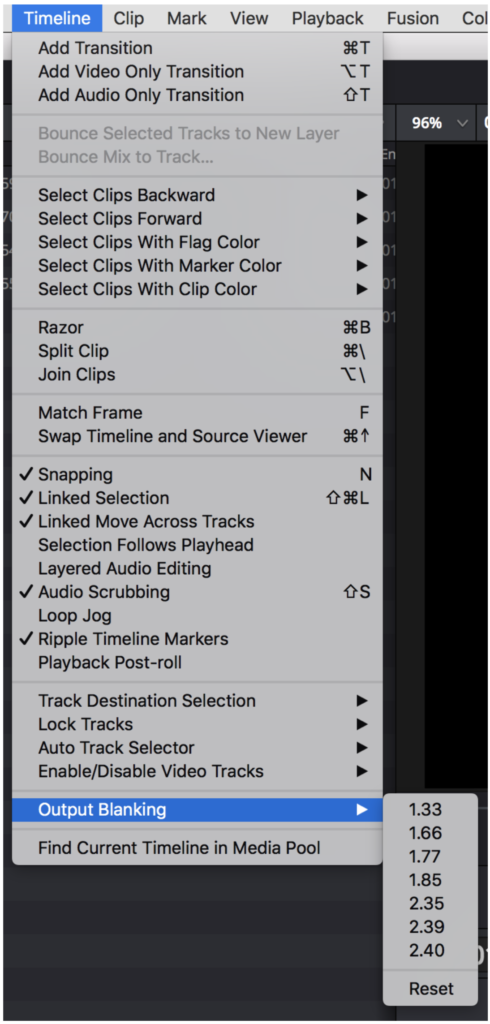
- Go to Timeline > Output Blanking > Aspect Ratio and select the aspect ratio of the film. This will mask the window to the aspect ratio.
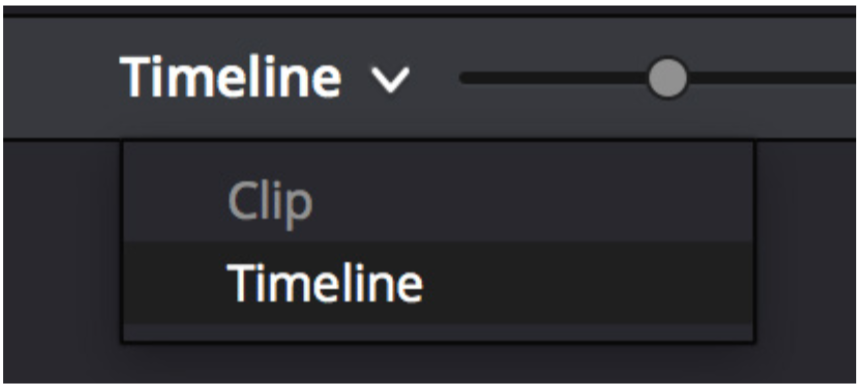
- Go to the Color Workspace and make sure you are in the Timeline mode.
- Go to Nodes > Add serial node and in the Sizing Control panels, use the Zoom, Pan, and Tilt sliders to frame the image within the masking.
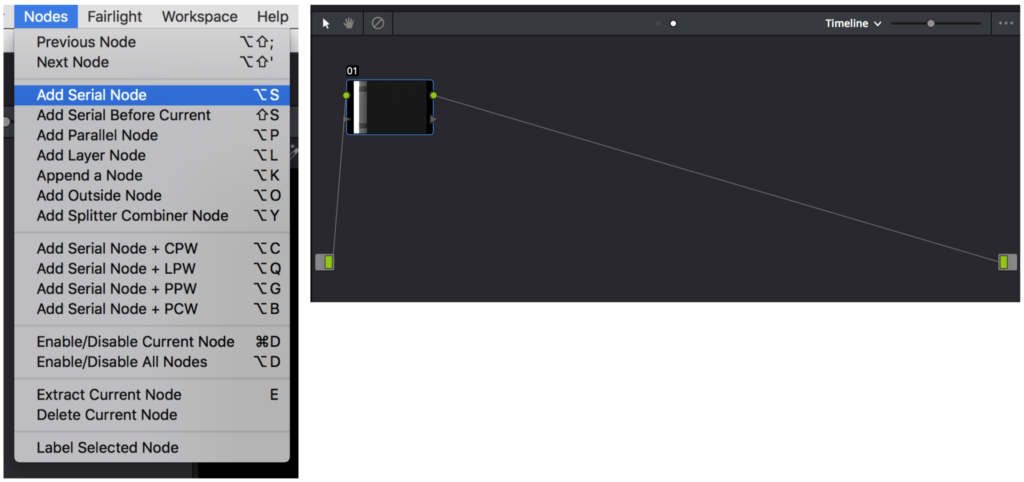
- Add another serial node and right click to go to Apply LUT > 3D LUT > FV Film Scan LUT to apply a custom CalArts LUT created for the Cintel scans.
- Time permitting, do any additional color correcting that may be requested.
- If the client needs KeyKode burned in, go to Workspaces > Data Burn-In and select Keycode and close the Data Burn-in window.
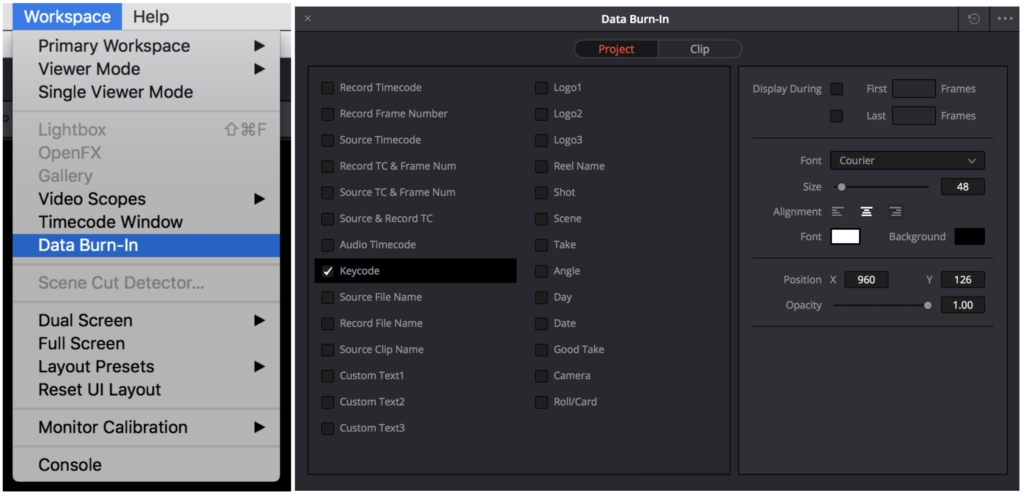
If the client wants a clean copy of the scans in addition to the KeyKode burn in, this can be set in the Delivery Workspace.
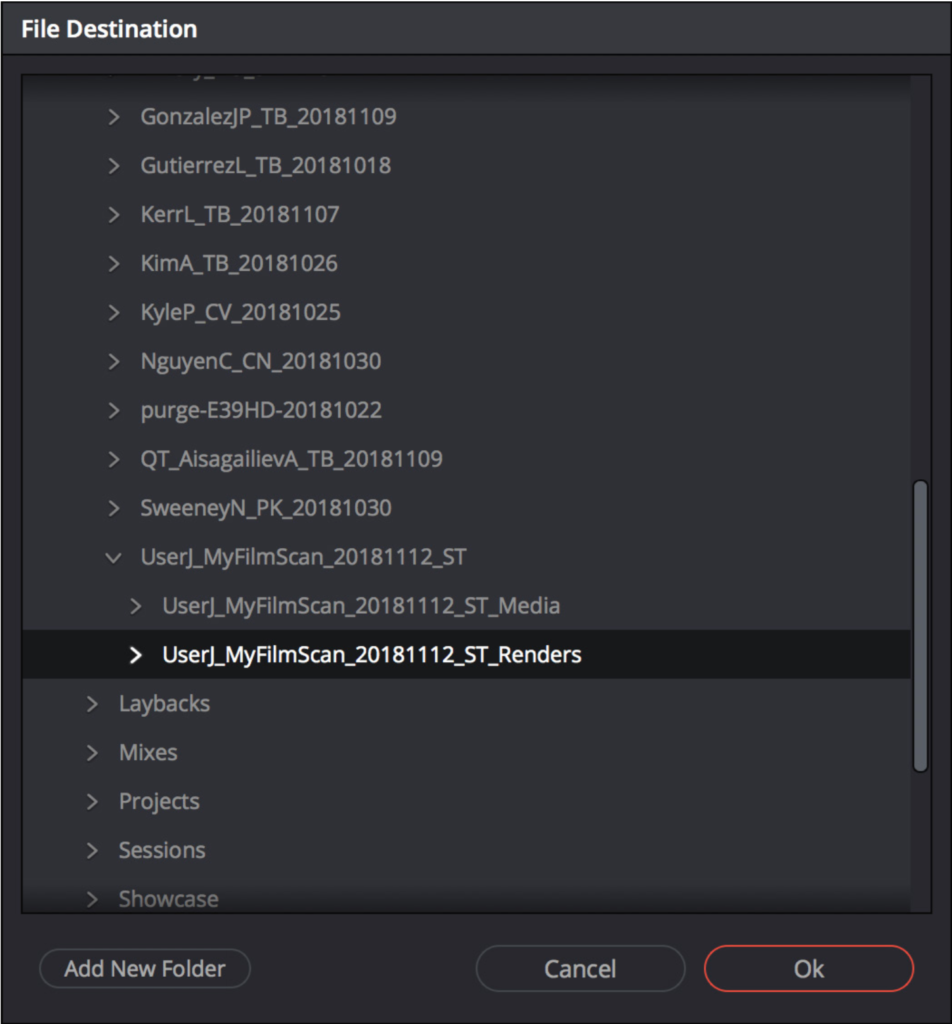
- Go to the Delivery Workspace. In this workspace, you can Mark In and Out points if the client only wants part of the scan exported, or you can select all the clips that were logged and scanned. Once selected, in the Render Settings panel, click Custom. Under Location, click Browse and navigate to the _Renders folder you created on FVCentral > Operations > Film Scans. Click Ok.
- Next to Render, select Individual Clips.

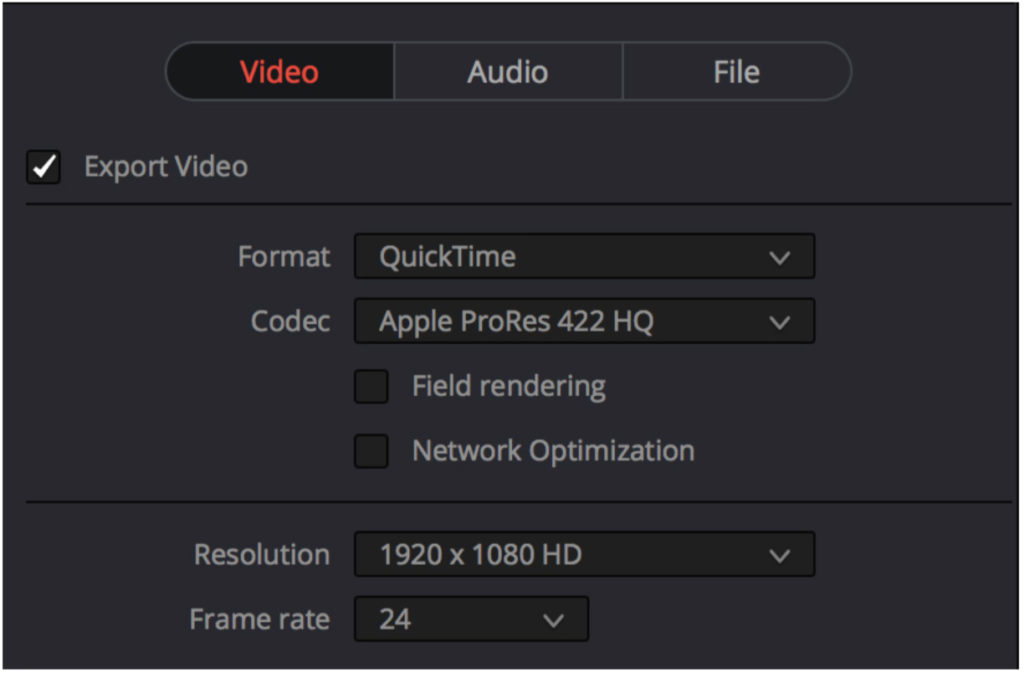
- In the Video Tab of the Render Settings panel, check Export Video, under Format select QuickTime, under codec select Apple ProRes 422 HQ, under resolution select 1920 x 1080 HD, and under frame rate select 24.
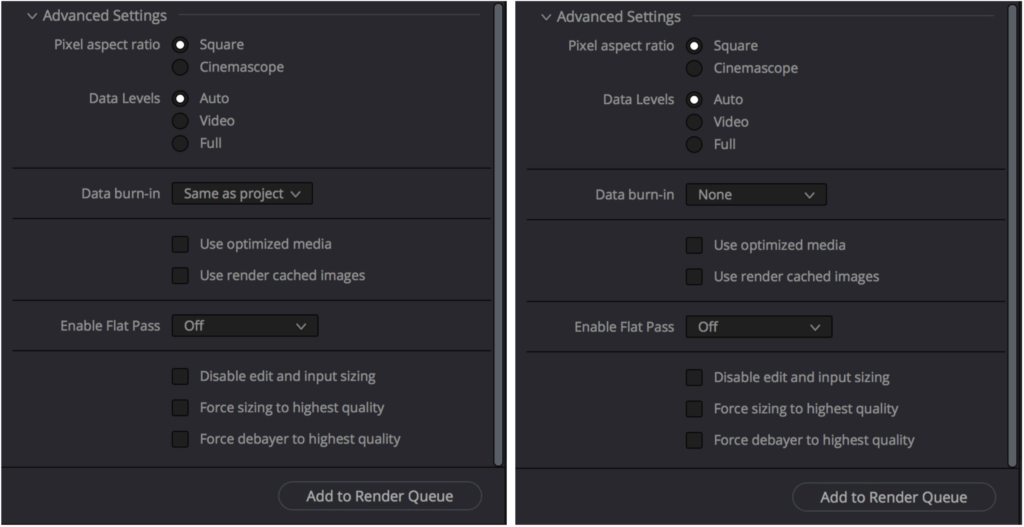
- Under Advanced settings, leave everything under default unless the client needs two outputs: one with KeyKode burn in and one without. In this case, for the first output, under Advanced Settings > Data Burn-In, select Same as project and add it to the Render Queue. For the second output, under Data Burn In, select None and add it to the Render Queue. The burn in will not disappear until the render of the second output has begun.
If you are making multiple versions of the same file (e.g. – Data burn in version and clean version), make sure to add the supplemental information on the file name. Failure to do so will make the second file with the same name overwrite the first file.
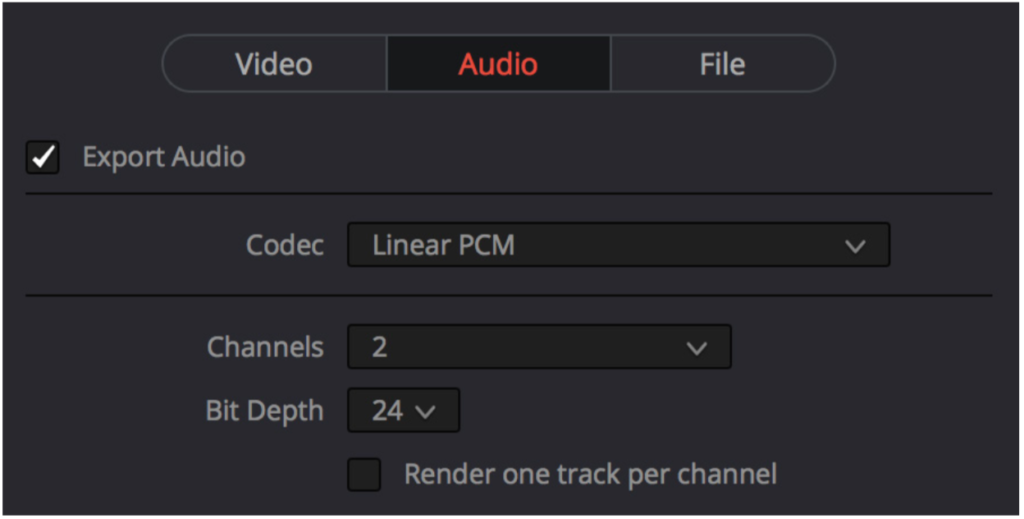
- In the Audio tab, if there isn’t any audio, uncheck Export Audio. For scans with audio, check Enable Audio. Under codec select Linear PCM, Under Channels select 1 for mono, 2 for stereo. Under Bit Depth, select 24.
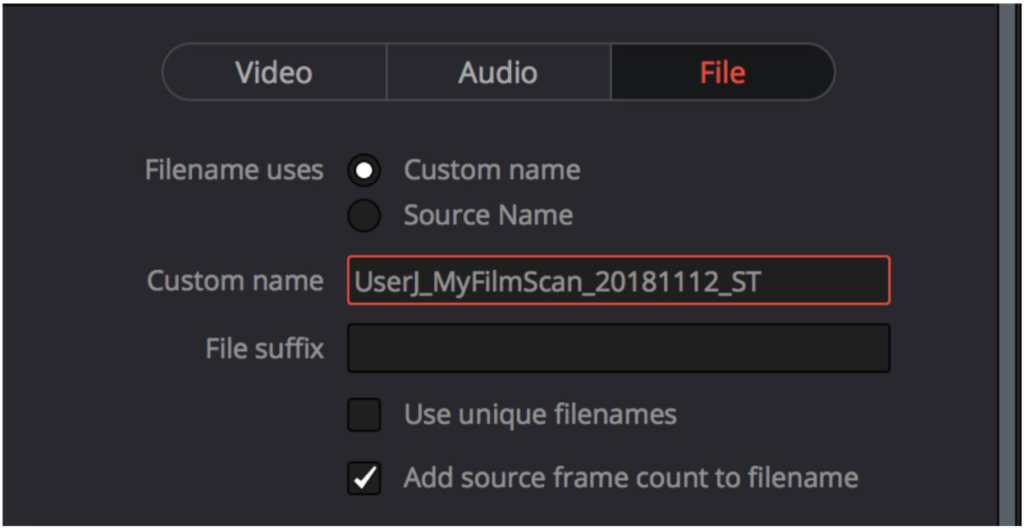
- In the File tab, select Custom Name and in the Custom Name, use the same name as the project and append it any necessary supplemental information, for example if there is Keycode burn in.
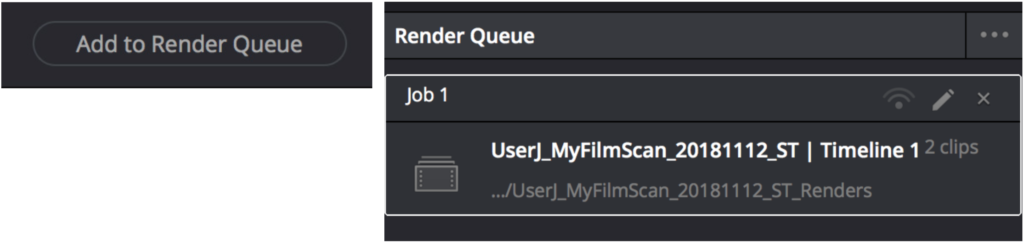
- Click Add to Render Queue.
- Repeat as necessary for any additional timelines.
- In the Render Queue, you will see all of the Jobs you submitted listed. Select all of the jobs and click Start Render.

- When the render is done, check the exports are in the correct location. Save your project and quit Davinci Resolve.
- Rewind the film by pushing Rewind on the Cintel. When the Cintel stops by itself, push Rewind again and be ready to push Stop when there are only a couple winds of film left on the take up spool. Push Load to release the tension and wind the film all the way to the supply spool.
- Remove the lock and spacer on the supply side to unload the film. When unloading the film, make sure the silver metal key tab is pointing straight up before the removing the core. Replace the lock and spacer. Replace and wash the orange sticky rollers and leave them to air dry. Close the Cintel doors and turn off the power.
- On the computer, move the Light Source screenshots into the project’s media folder. Go into FVWorks and enter the time in for the reservation to create a fee. Fill out a charge slip and give it to the client for payment. Log out of the computer.