
A221G Life Drawing & A221O The Fishbowl
Getting Started
Turn on the AV receiver, and any other equipment you need. Lower the screen by using the switch next to the rack.
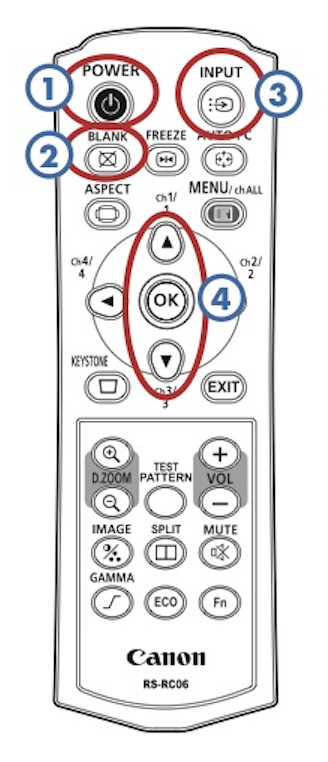
Press Power [1] on the projector remote to turn on the projector. Press it twice to turn it off.
If someone is lecturing and not using the projector for a while, press Blank [2] on the remote to black out the image.
When finished, please turn the video projector off. Also retract the screen to protect it from dirt and damage.
Choosing a Source
To view a source, set the receiver and projector as shown below.
To change the projector input, press the Input [3] button on the remote, and use the up/down arrows [4] to highlight a source. Press Ok to choose. Everything uses HDMI, except laptops using a VGA cable.
Pressing Input twice will also choose the next active source.
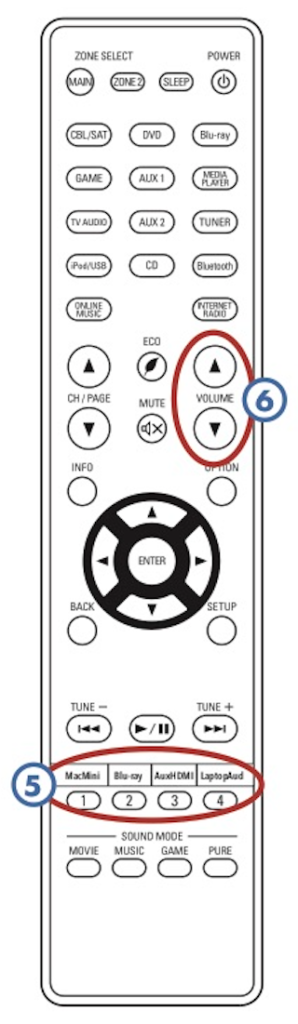
To change the receiver source, turn the Source knob on the receiver, or press one of its Quick Select buttons (also on its remove [5]).
If the projector does not display a source, give it a few seconds – HDMI equipment can take several seconds to connect.
Built-in Devices
| To view: | On receiver select: | Projector input: |
| Mac mini | Mac mini | HDMI |
| Blu-ray, DVD, or CD | Blu-ray/DVD | HDMI |
| Apple TV | Apple TV | HDMI |
External Devices
| To view: | On receiver select: | Projector input: |
| Camera Stand – Projection | Camera | HDMI |
| Camera Stand – TVPaint Capture | Mac mini | HDMI |
| Laptop (VGA cable) | Laptop Audio | Analog PC-2 |
| Laptop (HDMI cable) | Aux. HDMI | HDMI |
| Other HDMI (iPads, etc.) | Aux. HDMI | HDMI |
Mac mini
There is a Mac mini built into the rack that should always be on. If it’s off, press its power button on to turn it on. The wireless mouse and keyboard should automatically connect to the computer. They should always be left on, and can be recharged by plugging them into the cables in the upper rack drawer.
The volume keys on the keyboard do no work with HDMI. You must use the receiver or its remote [6] to control the Mac mini’s volume.
Cintiq

First log in. Then plug one end of the Cintiq’s USB-C able into the connector on the equipment rack next to the screen, and the other end of the cable into any of the three USB-C connectors on the Cintiq [7]. Press and hold the power button [8] on the top of the Cintiq for about three seconds to turn it on. To enable/disable display mirroring, press cmd + F1.
Laptops
For laptops with HDMI connectors, plug an HDMI cable into the Aux HDMI input. For laptops with Mini DisplayPort or Thunderbolt, use a Mini DisplayPort to HDMI adapter.
For other laptops, plug in a VGA cable for video (adapters are provided in the rack’s drawer), and an audio cable if sound is needed. Generally, it works best to turn the laptop’s volume up to about 80%.
There is a network jack located at the front of the rack, if you need access to CalArts’ wired network.
iPads/iPods/iPhones
Use either the Dock or Lightning to HDMI adapter, and plug into Aux HDMI. Copy-protected videos will not play through an HDMI adapter. You can also use AirPlay to wirelessly connect to the Apple TV.
Camera Stand
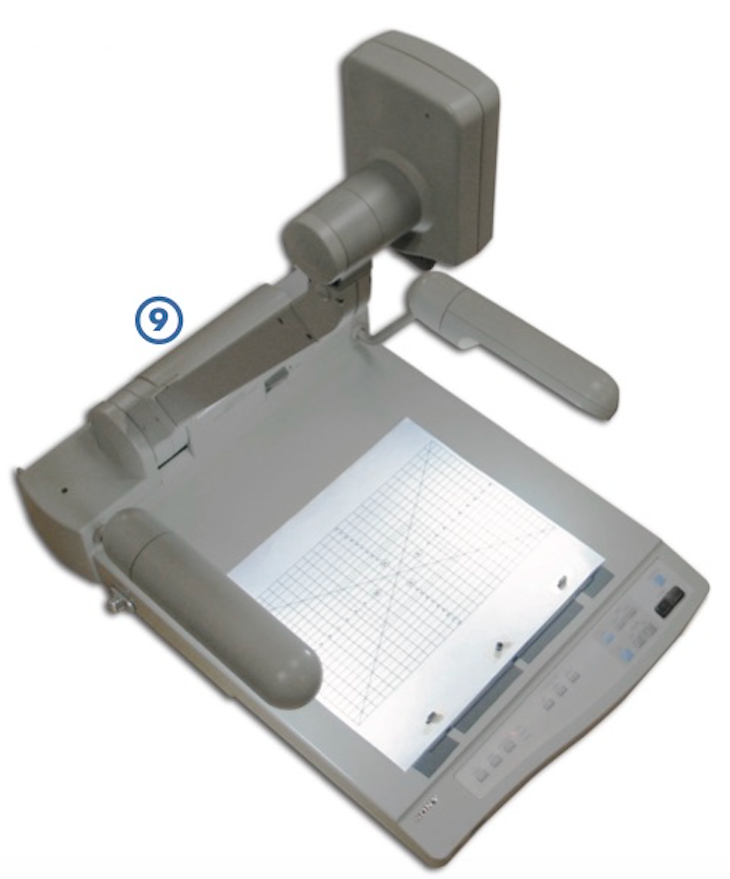
Plug the twist-lock end of the video cable into the back of the camera stand [9], and the other end into the Camera Stand/Video Capture input on the equipment rack. Plug in the camera stand’s power cord, and turn on its power switch.
To project video from the camera stand, select Camera on the receiver.
Video from the camera can also be captured with TVPaint on the teaching computer. Use the same project settings as for the pencil test systems: NTSC > DV 4:3, Frame Rate = 24, Field = Progressive.