
Premiere HD Sequence Settings
Project Settings
To properly set up a Premiere Pro Project for 1080p High Definition, create a New Project.
Enter a Project Name, and select a Project Location to save your file into. (We recommend creating a dedicated folder for your Premiere Project, and keeping all of the media you will be importing into Premiere in that folder.) Click Create.
Select File > Project Settings > Scratch Disk…
Be sure all Scratch Disks are set to Same as Project.
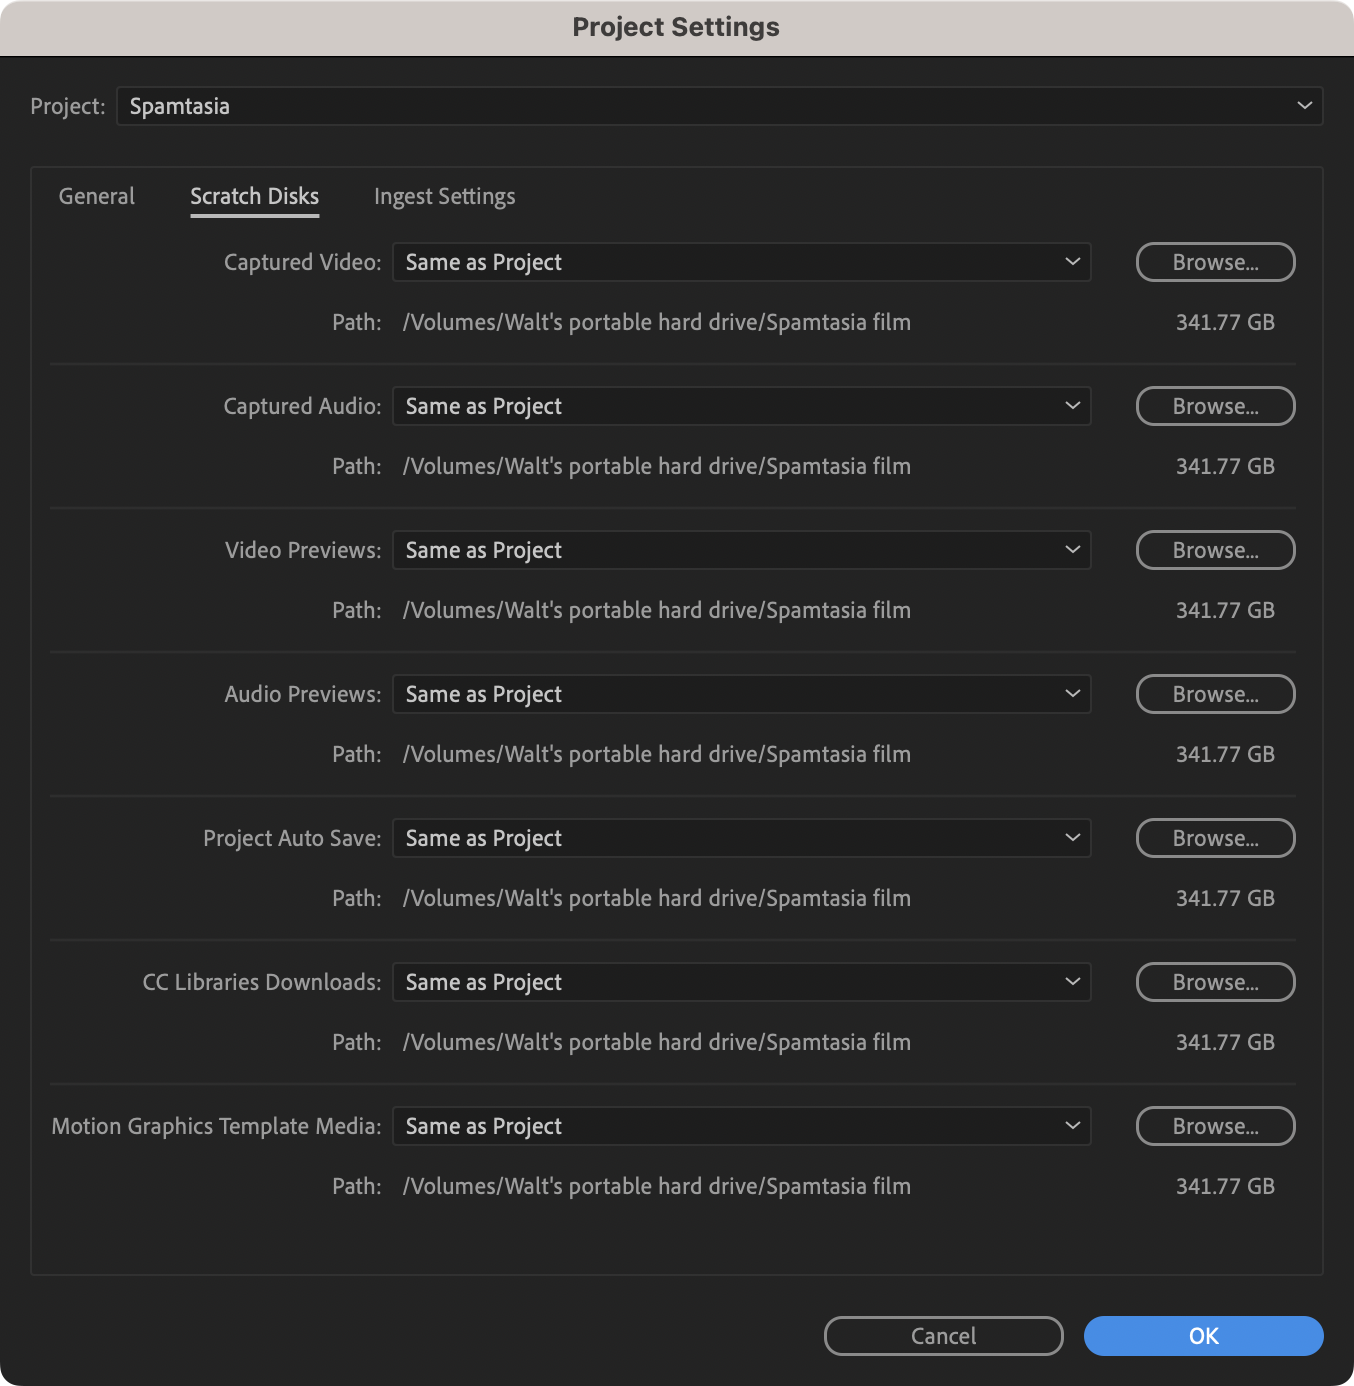
(Note: Computers managed by CalArts have a partition named “Scratch”, but it’s not required to have a Scratch Disk with that actual name. The important thing is to set everything to Same as Project.)
Go to File > New > Sequence…
If you are on a computer managed by CalArts, the New Sequence window will have presets in the folder: CalArts FV ProRes HQ. Select the one named HD 1080p 24 ProRes HQ.
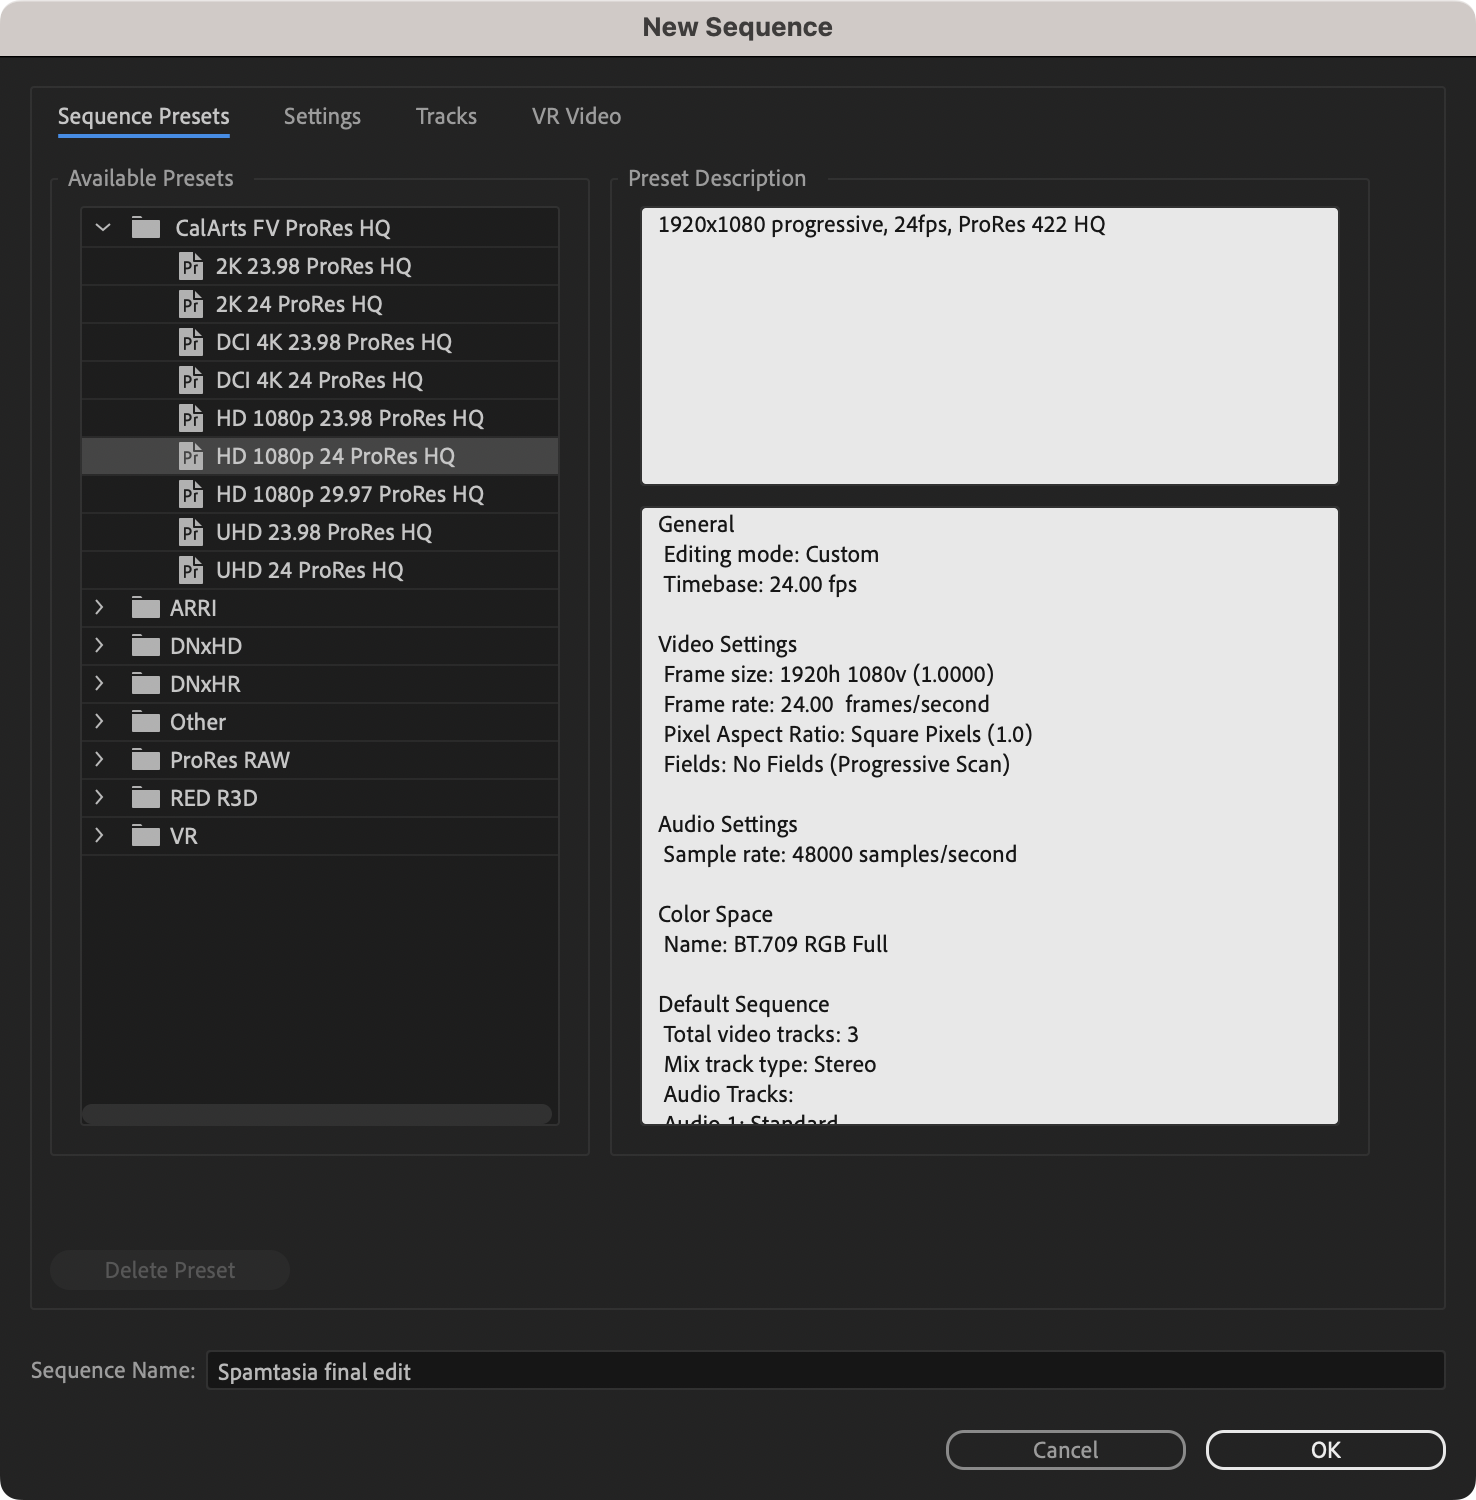
If you do not see those settings, or are on your own personal computer, click on the Settings tab.
For Editing Mode, choose Custom. Then make any necessary changes to match the settings shown below:
- Time Base: 24 frames/second
- Frame Size: 1920 x 1080
- Pixel Aspect Ratio: Square (1.0)
- Fields: No Fields (Progressive Scan)
- Display Format: 24 fps Timecode
- Working Color Space: Rec. 709
- Sample Rate: 48000 Hz
- Preview File Format: QuickTime
- Codec: Apple ProRes 422 HQ
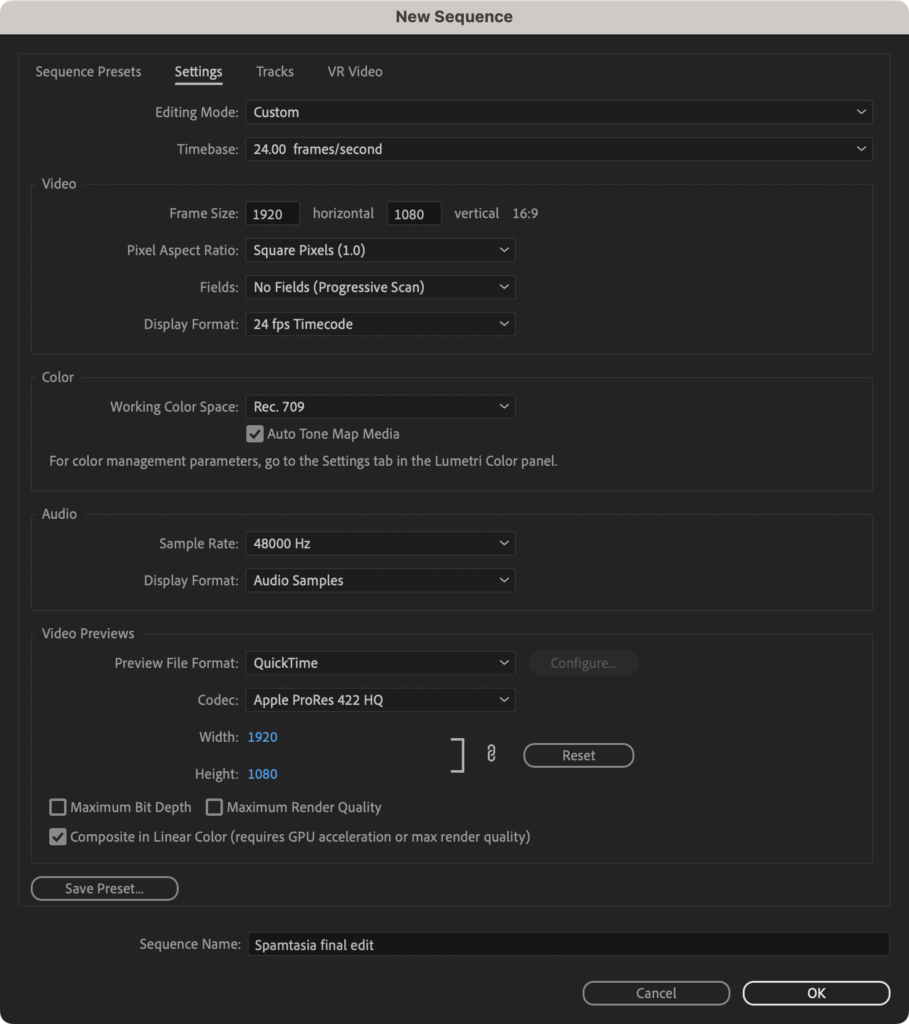
Checking Maximum Bit Depth and Maximum Render Quality will give you better previews, but take longer to render. Unchecking them will not affect your final film’s quality. You can enable those settings when rendering.
Under the Tracks tab, in Audio, set Mix to Stereo.
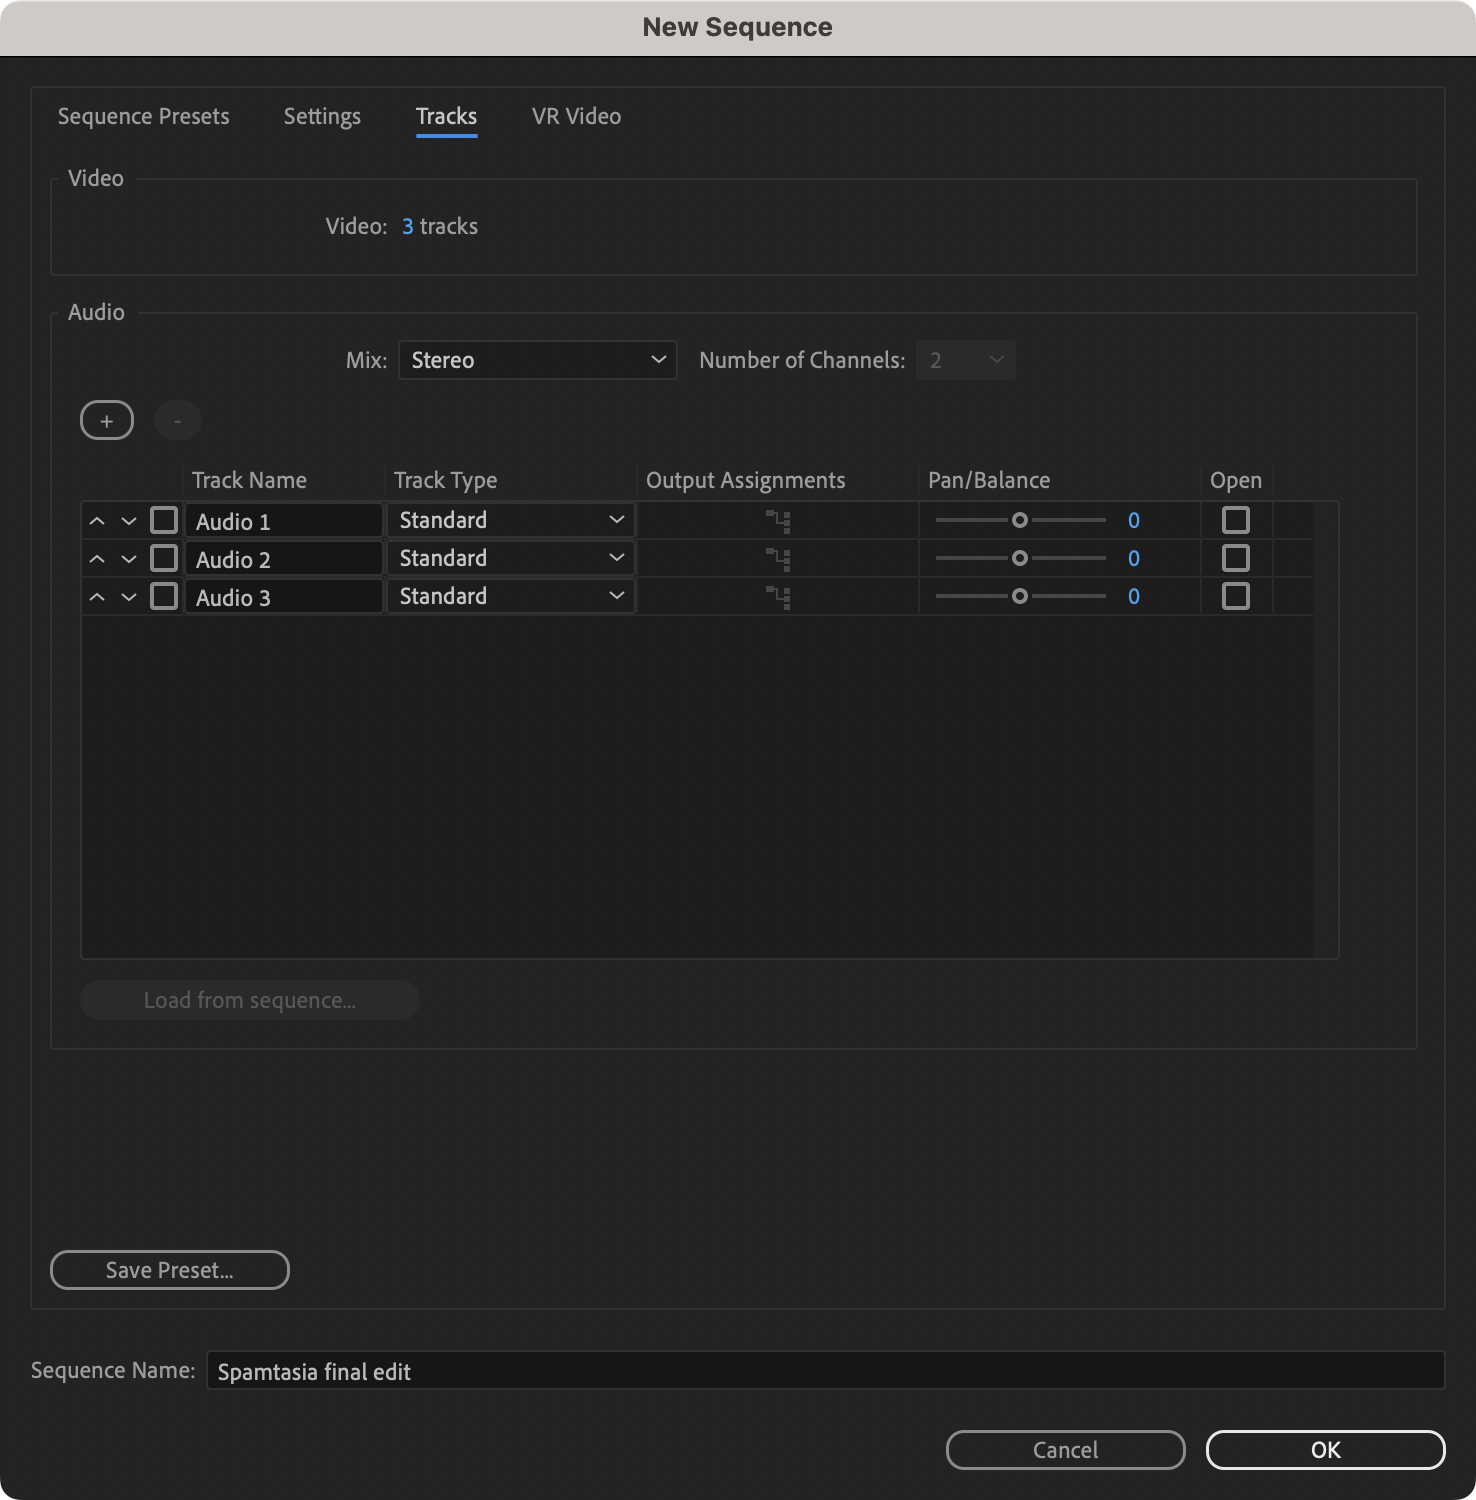
At the bottom of the window, enter a Sequence Name.
When finished, click OK to start your new project.